

Into the Radius VR Artifact Hunting Guide and Tutorial
As you might have seen in our Tips and Tricks article, artifacts are a great way to make money in Into the Radius VR. So let's not waste any time and get right into how you can bag some for yourself so you can start buying all the guns you want.
Prefer watching to reading? Then check out the video version of this article on our Youtube channel.
You Might Also Enjoy:
Where are the Artifacts?
Artifacts spawn inside big fields of anomalies. Any anomaly field that you find an artifact in once will always spawn at least one after each tide, so keeping a mental map of where you have found artifacts before will keep you in the money. If you would prefer there are also community made maps detailing where anomaly fields that spawn artifacts are, then go right here.
If you don't want to spoil anything for yourself just keep your detector on your shoulder and wave it around whenever you see a particularly dense pack of anomalies, chances are an artifact is somewhere inside.
Extracting Artifacts: A Tutorial
Alright so now that your detector is ticking, what to do next? While many anomaly fields are very different, there is a series of steps that will give you surefire success no matter where you are in the radius. There are two sorts of anomaly fields, so let’s start with the first and most common.
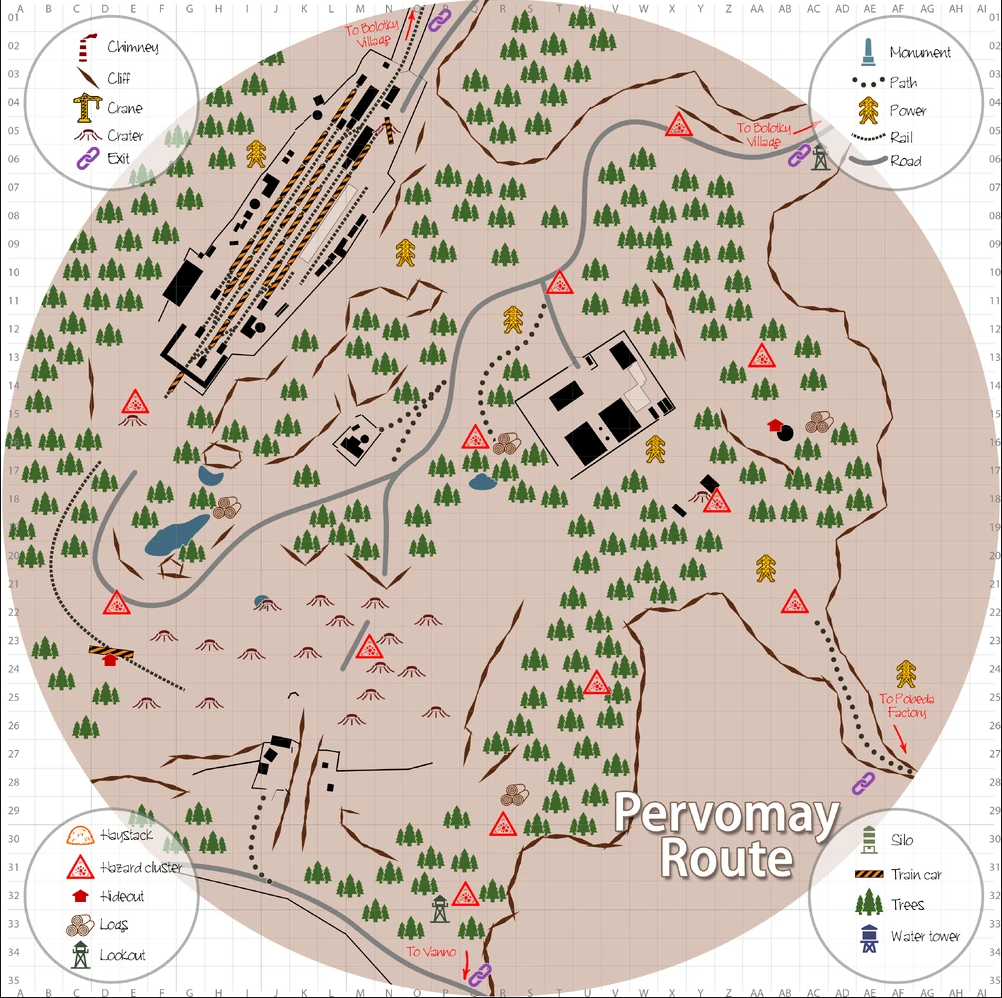
These are dense packs of anomalies found on the ground in a wide open space. In the Pervomany Route you kind find a large field like this just outside the blockhouses which contain the item needed for your first mission. Another example is the hill just past the watchtower beside the road with the entrance to your base. The pile of logs on that hill has a dense pack of anomalies and an artifact spawn inside.

1. First of all you'll want to take a good look around. Enemies might be lurking nearby. You need to decide if they seem to be too far away to bother you or you need to take them down before you go diving for artifacts. Anomalies are deadly to you, but the enemies of Into the Radius aren't injured by them.
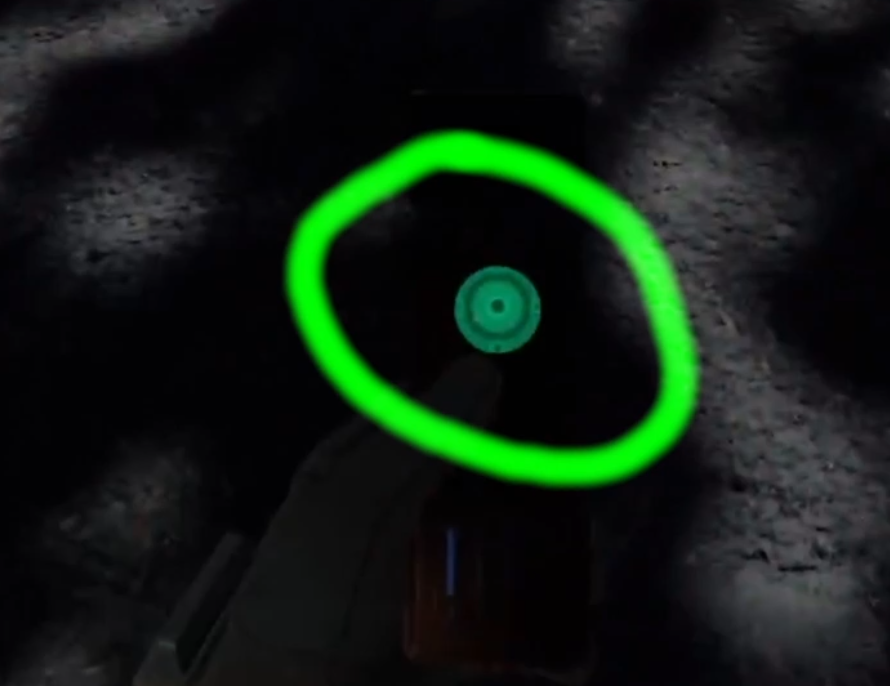
2. Now that you know you won't be bothered, use your detector to find what direction the artifact is in. If the blinking light is green, the detector is pointed towards the artifact it is tracking, if it is blue it isn't. Then put on your gas mask and pull out your probes. If the anomaly field has green tint to it and gas clouds floating around, do not go in without a Gas Mask on, as the gas anomalies will kill you quickly.
3. Throw probes around the edge of the anomaly field. What you're looking for is a gap between anomalies that you can slip into. There is always at least one safe corridor through a field of anomalies that leads to the artifacts inside. Find a corridor and then slip into it. Take your time, and if you don't find it pick around the edges. The corridor can be narrow sometimes, but it'll be there somewhere. If there are reflector anomalies be careful not to get lasered, and if you threw a probe directly ahead into a reflector, strafe out of the way before you get zapped.

4. Calmly, slowly, tightropewalk through the corridor. Use your probes to test the area directly in your path. The faster your detector ticks, the closer you are to the artifact. If the corridor splits, use your detector to determine which direction the artifact is in and go whichever way seems to lead you there.
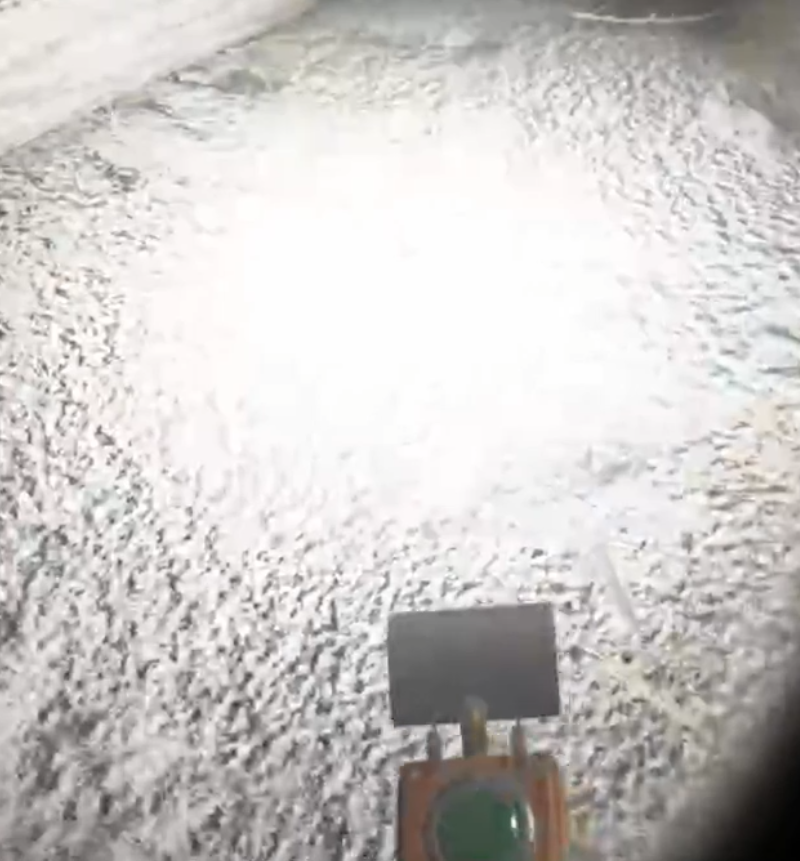
5. Once the ticks are going super fast, point the detector towards the ground and press trigger to reveal the artifact. The Spotlight the detector emits needs to hit the hidden artifact to reveal it, if you don't get it the first time just cover the area nearby in spotlights until you find it. Be careful not to step into any anomalies!
6. Once you've found the artifact use trigger and then the grab button to grab it from a distance. Artifacts can spawn very close to anomalies, so it's always safer to distance grab it.
7. Once you've got the artifact, check your detector to see if there is another. Many fields spawn more than one artifact, so make sure to grab them all before leaving.
8. Once your detector goes quiet, exit the anomaly field slowly and carefully. Retracing your steps and going back out the way you came is always a safe bet, though you might find another corridor out you didn't use before.
9. Profit! Congratulations on your new artifacts. Most just sell for good cash, though some like the Steps and Night Eye artifacts actually have abilities you can use. Whether or not those are useful is up to you, but they're always good money.
Now for the second type of artifact field. These look very intimidating, but as long as you have a gas mask and good balance you won’t have a hard time. These are more obvious, and always have artifacts. Sometimes they’ll be made of earth, or junk, or both. These fields are characterized by being high up off of the ground, and having narrow walkways with few anomalies on them.
The challenge for these fields is not walking between anomalies, but not falling off to your death. A good example can be found in the first zone as well, near the small compound in the northern part of the map. It is a twisting aerial maze of earthen tendrils leading to a couple of floating log houses. All surrounded by gas.

If you’ve pulled off grabbing artifacts out of a normal anomaly field, then these will be a breeze as long as you have a gas mask.
1. Again first clear out any enemies that might be lurking around. You don’t want them to surprise you when you come back down to ground level.
2. Put on your gas mask and find a ramp upwards. Some ramps are covered with anomalies, but others are easy to just walk up after testing with a probe. Some of these sorts of anomaly fields might only have a single entrance.
3. As long as you don't fall off these are a breeze. There will occasionally be an anomaly in on one of the ramps, so keep testing your path forward with your probe. The artifacts in these anomalies always spawn in around the exact same places. For this example the floating wooden houses spawn an artifact each. Just walk up there, take them, and leave, easy.

Well that's all for this artifact hunting guide. Now you can collect all the artifacts that you pass by and emerge unscathed. Above all else just take your time and you’ll be fine. Have fun having fat stacks of cash.
Into the Radius is a fantastic VR game inspired by the book Roadside Picnic which also inspired the S.T.A.L.K.E.R. series of games. It is 29.99$ on Steam and the Oculus Store, and will soon get a port to the Quest 2, so stay tuned for that.
You Might Also Enjoy: