


7 Best VR Survival Games for Meta Quest (And PCVR)
Something about Virtual Reality just makes for great Survival Games, especially on standalone platforms like the Quest 2. Maybe it’s the feeling of actually being inside of the world you’re playing in, or using your actual hands to use the tools you need to keep yourself alive. Whatever it is you’d be crazy not to try VR Survival Games on the Quest 2, it is one of the best genres to experience in Virtual Reality. Here are some of the best VR Survival Games on the Quest 2 to consider getting.
Something about Virtual Reality just makes for great Survival Games, especially on standalone platforms like the Oculus Quest 2. Oh, and if you’re here for PCVR games then you’ll find that most of these are also available on Steam.
Maybe it’s the feeling of actually being inside of the world you’re playing in, or using your actual hands to use the tools you need to keep yourself alive. Whatever it is you’d be crazy not to try VR Survival Games on the Quest 2, it is one of the best genres to experience in Virtual Reality.
The Survival Game genre has seen a massive boost in recent years with many great flatscreen games coming out like Valheim and Sons Of The Forest, and luckily some studios have also been focusing on this genre in Virtual Reality. More and more VR Survival Games have been coming out over the years, and as more are added to the Quest platform we’ll also be adding them to this list here.
So here are the best VR Survival Games on the Oculus Quest 3 and Quest 2.
You May Also Enjoy:
The Walking Dead: Saints and Sinners Chapters 1 and 2 - VR Zombie Survival Games
The Walking Dead: Saints and Sinners Logo
Well known as one of the greatest VR game series out there, The Walking Dead: Saints and Sinners and its newest iteration The Walking Dead: Saints and Sinners - Chapter 2: Retribution are knockout Zombie Survival Games on the Quest 2 based in the universe of The Walking Dead.
If you are even neutral on the concept of a zombie apocalypse you should play these games. Not only are there a ton of zombies (or rather walkers) to dispatch with one of the most straightforward yet elegant melee combat systems in VR survival gaming, but there are also human NPCs to get into firefights with and advance a very compelling story.

In this VR Survival Game there are a ton of zombies and people to fight with a variety of melee weapons and firearms
Most importantly to fans of VR Survival Games, not only will you have to fight to survive, but you will have to scavenge the ruins of New Orleans for materials to craft weapons, medical supplies, and food. Each day you will find less and less as supplies and materials from before the outbreak become scarcer and scarcer.
You’ve probably already heard of The Walking Dead: Saints and Sinners, and that’s for good reason. It is one of the few VR games to combine a dangerous open world with a variety of secrets and systems to draw you into the gameplay, as well as a great story.
So if you’ve ever wanted to see how well you would do surviving in a zombie apocalypse, there’s really no better VR Survival Game I can recommend to you than The Walking Dead: Saints and Sinners and it’s sequel. It’s got fantastic combat, heart pounding moments, and compelling characters.
Cosmodread - VR Sci Fi Horror Survival Game
The Cosmodread Logo
Zombies are scary, sure, but what if they don’t scratch that scare itch for you like they used to?
Well if horror is what you want in your Virtual Reality survival game then Cosmodread is the scariest survival game on the Quest 2. In it you attempt to repair and fly a half destroyed and alien infested ship back to Earth. Along the way you collect crafting recipes to create more weapons and items to help you survive in this VR roguelike horror survival game.

Cosmodread combines resource scarcity and terrifying enemies to make for a fantastic VR Roguelike Survival experience
Cosmodread is not only one of the best survival games on the Quest 2, but one of the best horror games. It’s terrifying looking enemies and creepy sound design will have you sweating to open a door and jumping at dark corners. The creaks of the decaying ship combined with the disgusting fleshy sounds of the alien growth means you never feel truly safe.
You shouldn’t feel safe, either, as the aliens only grow stronger as time goes on, and they can find you anywhere.
Cosmodread uses resource scarcity and an interesting crafting system to make you think on your feet and use every resource available to you to make your way from one end of the ship to the other through all of the dangerous aliens and malfunctioning robots so that you can make it back to earth and survive.
There’s really no other VR Survival Game like it, and when you’re low on ammo and hear the roar of an alien on your trail there’s nothing scarier in Virtual Reality.
Green Hell VR - VR Jungle Survival Game
The Green Hell VR Logo
If you want a survival experience that takes you far away from civilization and deep into the bowls of the Amazon rainforest, then Green Hell VR is the game for you. The jungle is an unforgiving place in this VR Survival Game, and so are its inhabitants.
When you are not hunting for food or figuring out which plants will make you vomit up all your nutrients, you’ll be fighting for your life against predators like pumas and leopards, and the native tribespeople who are very unhappy with your presence.
Green Hell VR combines a fantastic crafting system which involves combining items in your hands with intuitive actions like wrapping vines around a simple stone axe to make it stronger, or running a sharpened stone across a long piece of wood to make a sharp spear.

Even the leeches in the water make surviving in Green Hell VR’s jungles difficult
Gathering resources from the jungle and then building your tools and campsites out of the natural resources of the Amazon makes the most basic necessities of survival feel difficult to achieve and very earned when you do.
For a more rugged and true to life survival experience, there is no better game than Green Hell VR. It’s less combat focused than other survival games here, though there is plenty of combat to be had, and you’ll find that in Green Hell VR you’re far more challenged by more true to life challenges of survival like building your camp, finding the right food to eat, and staying hydrated.
Also just like its flatscreen counterpart Green Hell VR has seen and will continue to see updates like it has with the addition of the free Spirits of Amazonia DLC that was recently added. Now there’s new environments, new objectives, and new ways to survive in this fantastic VR Survival Game. It just keeps getting better.
Into the Radius - Surreal VR Survival Shooter Game
The Into the Radius Logo
What is a list of VR Survival Games for the Quest 2 without Into the Radius? Inspired by Roadside Picnic, the book which also inspired the S.T.A.L.K.E.R. movie and games, Into the Radius combines fantastic gunplay with a surreal and dangerous setting.
In it you are an explorer navigating the Pechorsk Radius, a wide section of land in Russia dominated by a massive black sphere hanging in the sky where the usual laws of reality do not apply.
While completing missions for the mysterious Committee you have to fight off hostile entities, which look a lot like humans (in most cases) but made of a strange black material, while also navigating fields of deadly anomalies that hold valuable and otherworldly artifacts inside.

Into the Radius has very intense and scary fighting
Into the Radius gives you a wide variety of weapons to choose from, which all handle incredibly well in Virtual Reality, and it’s gunplay is definitely a huge draw for this VR Survival Game. What enhances it beyond a normal shooter is not only the need to scavenge and hunt for artifacts to survive, but the mystery of the Pechorsk Zone.
Delving deeper and deeper into the Radius towards greater danger, while discovering bizarre sights and uncovering more about this strange place, is what makes Into the Radius a Virtual Reality Survival Game like no other.
Into the Radius is a classic of the VR Shooter and VR Survival genre, and it’s even got a sequel on the way, Into the Radius 2.
Song in the Smoke - Prehistoric Caveman VR Survival Game
The Song In The Smoke Logo
Want a survival experience that not only takes you far from civilization, but back in time before civilization even existed? Then Song in The Smoke might be what you’re looking for. In this VR Survival Game you are a caveperson discovering the secrets of the land as you craft a number of tools and weapons to hunt and fight prehistoric creatures.
Surviving the vicious predators of a wilderness before time is the hard part, but there is also a lot of fun to be had in the exploration of Song in the Smoke’s untouched wilderness. Not only do you find the sticks and stones needed to create your weapons, but mystical herbs and fruits to craft powerful elixirs.
Song in the Smoke immerses you in its mysticism from the very beginning, and through its many areas you can find secrets that not only reveal more of the forest around you, but your own potential.
Medieval Dynasty VR - A VR Medieval Life Simulator and VR Survival Game

The Medieval Dynasty New Settlement Logo
Medieval Dynasty New Settlement, or rather Medieval Dynasty VR, is a VR remake for the Meta Quest 3 and Meta Quest 2 of the 2021 flatscreen medieval life simulator Medieval Dynasty. Unlike other Virtual Reality survival games on this list, Medieval Dynasty VR focuses more on being a life simulator than a purely survival focused experience.
This means you'll be spending a lot of time talking to the locals, completing tasks for them, and most importantly building a thriving settlement of your own on any of a few available plots of free land. It's very satisfying to go from nothing to putting up your first house to sleep and cook in, to erecting a huge variety of crafting and storage buildings to harvest all kinds of resources and make all kinds of tools.
What is most satisfying about Medieval Dynasty VR is engaging with its huge variety of crafting systems to make all sorts of things from tools to planks to pottery and beyond, and most importantly gathering and constructing buildings. You can even hire workers to work on your land for you and find a wife to marry and have children to continue your dynasty in future generations.

Stirring up some soup in Medieval Dynasty VR
While Medieval Dynasty New Settlement might not have the most satisfying end game at the moment, because those quests and tasks do eventually dry up and become repetitive, it does have a huge map to explore and secret treasures to find as well.
Uncovering the mysteries of Green Valley, the place where you are building your new home, offers some survival challenges of its own, though it is not hard to keep yourself hydrated and fed in this game, and the combat could use some more work.
Still, it is so satisfying to build yourself and your new home up from nothing, and there are many hours of fun to be had going from a nobody to a well respected local landowner in Medieval Dynasty VR.
If you want to know more about this fantastic VR game then check out our review of Medieval Dynasty: New Settlement.
Survivorman VR: The Descent - A VR Survival Game For Teaching You Real Survival Tactics

The Survivorman VR: The Descent Logo
Survivorman VR: The Descent is, of all of the VR Survival Games on this list of Virtual Reality Survival games, the most aimed at realism and teaching you actual survival tactics for the real world.
In this Virtual Reality game, you play as a survivor of a helicopter crash on a cold and desolate mountain. From the start you have very little to work with, and the cold and darkness of the arctic wastes that you have to survive in closing in around you. Luckily survival expert Les Stroud will tell you exactly what you need to do in order to stay alive, stay dry, stay warm, and stay fed.
Survivorman VR: The Descent is more of a survival learning tool than a real game, but is very interesting nonetheless. If you're interested in VR games for the purpose of learning actual things about the real world, then I highly suggest you take a look at this one.
The downside of Survivorman is that it's less a game and more a way to introduce you to these methods of real world survival for this potential real world situation. There is very little replayability, and it functions more as an interactive lecture than a game in the traditional sense of the word. It's also a very short VR survival experience at just a couple of hours.
Still, if you're really interested in survival in the real world instead of just the virtual world, give Survivorman VR: The Descent a look and see if you've got what it takes to listen to Les Stroud's advice and stay alive on the mountain.
You May Also Enjoy:

All Into The Radius VR Endings and How To Reach Them
So you’re wondering what happens at the end of Into the Radius.
Well whether you’ve come here out of curiosity, are wondering what different Into the Radius endings there are, or just completed our walkthrough on the final mission of Into the Radius VR, Ouroboros, we’ve got you covered with this complete list of each Into the Radius VR ending.
This article will, of course, spoil the ending to Into the Radius. If you haven’t experienced it already by completing the game then I highly recommend you do so before ruining the surprise for yourself.
Into the Radius Endings - How To Beat The Game
To beat Into the Radius and reach the ending you’ll need to complete every Top Priority mission of the game.
These missions can be accepted on your mission terminal in your home base of Vanno, and sometimes won’t appear until you’ve completed some repeatable missions first.

Complete all Top Priority missions to beat Into the Radius
These Top Priority missions bring you further and further into the zone to new areas, and become generally harder over time.
So to complete the game you’ll have to unlock each successive map as well, and eventually find yourself in the center of the Pechorsk Radius at Pechorsk Castle.
When you accept the final mission of the game, Ouroboros, the castle gates open and let you in

The entrance to Pechorsk Castle and the final mission of the game
As described in our walkthrough article on this final Into the Radius mission, you then have to fight your way to the central keep of the castle, and pick up the Grail artifact found inside.
That is when the endings commence.
This is your last warning for spoilers, because here is what each of the endings of Into the Radius VR are. The conversation and choice at the ending is a huge source of Into the Radius lore, and experiencing the lead up to it first hand makes those answers even more appealing.
All Into the Radius VR Endings
Once you pick up the Grail you’ll find yourself surrounded by Katya statues.

After picking up the grail you’ll be surrounded by Katya statues
After a few moments you’ll see a loading screen, and find yourself transported to somewhere you’ve never been before.
The ground below you is stranger than it has ever been before, a weird swamp of red shifting water. Above you is a ceiling of eyes looking down, and in each direction are trees and darkness.
In front of you are some floating rocks, and your friend Katya held by a black hand.
Even more strangely there’s another figure, a black statue with a head covered in white spikes.

Katya and a Stranger at the final confrontation
A voice you’ve never heard before, the voice of this new stranger, starts to speak. Out of every bit of Into the Radius lore you’ve found in the game so far, this conversation is the most revealing.
It congratulates you, Explorer #61, on making it to the center of the zone. It says that you acted just according to plan. Katya interjects as well, wondering what this new voice is.
The new voice asks you what it’s like being a hero, and whether or not you evoked the “event” that created the zone.
The voice seems to have multiple people speaking from time to time, sometimes saying words on top of each other to maybe disguise, or maybe reveal the true meaning of what it is saying.

Instead of the usual orb in the center of the radius, now eyes look down on you from above
The ending is certainly very surreal, and also very open to interpretation, but here’s a summary of the conversation between the stranger and Katya, to which you are a silent observer.
The stranger says that you and Katya are not real people, that both of you are just made up composites of a variety of actual people. She is just an image of all of the innocents who suffered at the hands of the radius and served as your bait and motivator to travel to the center of the castle. While you are just a composite of all of the explorers of the radius, and also not a real person.
The stranger says “Iteration successful” and seems to indicate that the center of the zone has been reached before and will be again in the same fashion by you or by possibly other explorers. Though whether this stranger can be trusted at all isn’t clear.
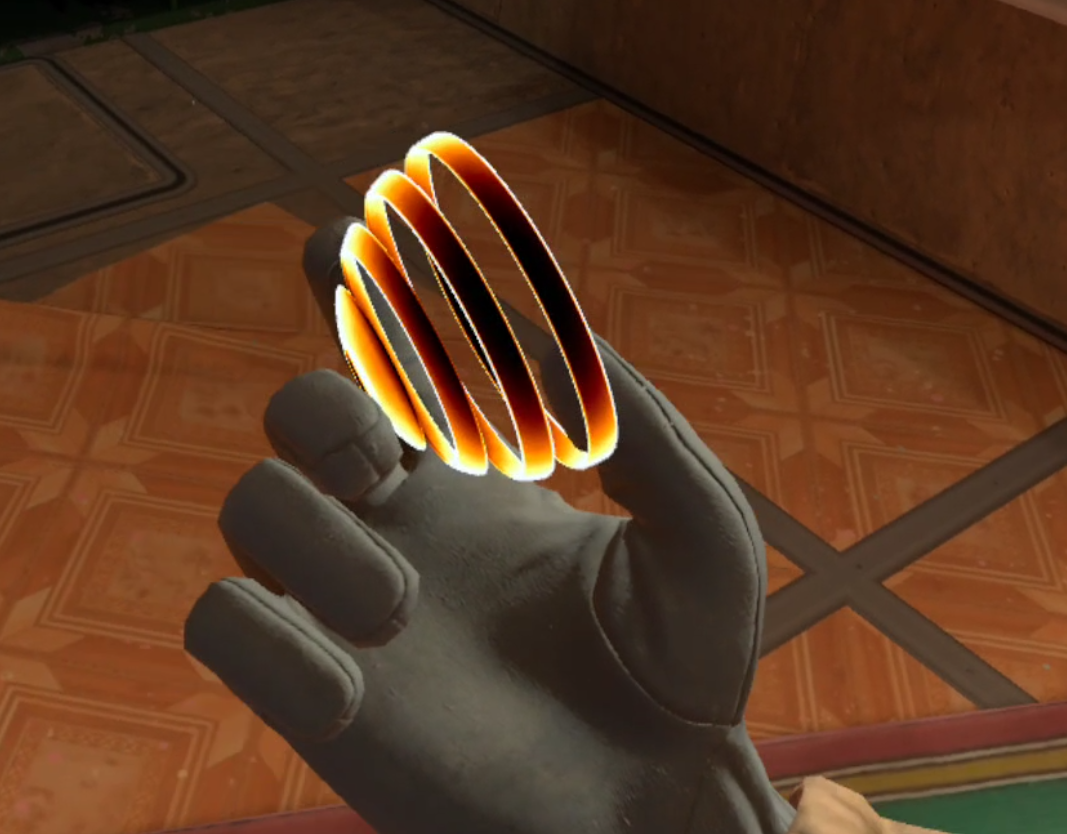
Either way the stranger says they are pleased, and offers you a reward and a choice. It comes in the form of a pistol.
Katya selflessly says that she doesn’t trust the stranger and is willing to be destroyed, especially if neither of you is real in the first place. The stranger says that you can’t harm the radius if you try, and that the “work in progress” there will continue.

The Into the Radius VR Ending gives you one more gun, and a choice
The pistol looks like a Makarov, but it is no normal pistol.
There is no way to avoid this choice. The pistol cannot be dropped or holstered. You cannot move or run away. Trying to shoot the pistol empty or remove all of the bullets from it is impossible, it will never run out of ammunition.
You can try and shoot whatever you like but there are only three choices here. You can shoot Katya and see if the stranger will live up to their promise of giving you a normal life, or you can shoot the stranger and free (or possibly create) Katya.
What you might not realize is an option, and what the stranger doesn’t say, is that you can also shoot yourself.
Into the Radius VR Endings - Shooting Katya

Sacrificing Katya gives you a normal life
If you shoot Katya her white statue will break into pieces and start to drift off.
She will still thank you for freeing her from the radius, and says farewell.

Your normal apartment and normal life
After a brief loading screen you find yourself in an ordinary looking apartment, surrounded by the creature comforts of an ordinary life.
You can walk around your apartment and can hear the sounds of a distant city around you. More importantly you can hear and see a narration with a voice that sounds just like Katya.
It tells you that an ancient consciousness is what is speaking to you, and that that consciousness was awakened sixteen years ago in the Pechorsk radius.
It also says that you were freed from the radius a year ago, and that you now have a human form, an identity, and a place to live and work. You live a normal, mundane life now, and even have a partner who is not Katya.
Despite your freedom and normal life, the voice says that you think about Katya a lot, and that you never do stop thinking about her and the Zone. Your questions still are not fully answered, and the zone is still out there.
Into the Radius VR Endings - Shooting The Stranger

Shooting the stranger frees Katya
If you shoot the stranger they will break into pieces and those pieces will drift off.
Its odd voice will say “All the necessary data has been recorded.” Katya exclaims that something is happening to her and then you’re surrounded by TVs.

These floating TVs and narration are your last connection to Katya
Each shows a young girl in an idyllic field, and all around them are ruined trees and more red swamps.
You can’t move. You can only listen as Katya tells you about her becoming real. She says she was separated from the being she only just knew she was a part of, and that just before she was separated the being told her that an act of self sacrificed was performed for her.
Then Katya tells you that she woke up in a field full of wildflowers, and to a normal life with a little sister and a mother and father.
Katya takes a moment to spread out in the grass, and she thanks you for sacrificing yourself for her.
Into the Radius VR Endings - Shooting Yourself
There is a hidden third option here that the stranger doesn’t offer you.
Maybe it’s the only way to interfere with its data collection, or whatever the purpose of the radius is. Maybe it’s your only way to strike back for being treated like a rat in a maze.
You can use the pistol to shoot yourself.

The final option
While generally not recommended in VR games, it’s very possible that this third option is the only true ay to get one over on the committee, or whatever being is running the radius.
It’s hard to tell though, because once you watch your body hits the floor all you hear is a scream from the stranger. Maybe of pain, maybe of frustration, or maybe of just annoyance.
That’s it.
After the Endings
Once you’ve gotten whatever ending you want, the game is still not effectively over.

Once you choose your ending you’re spit back out at Vanno
There won’t be any more Top Priority missions to do, but you’ll wake up in front of the gates of Vanno much like when you started the game.
Except this time you have all of your equipment that you had when you picked up the Grail, and everything else you had in your home before you left.

Revealing the grail after completing Into the Radius VR
As a final reward you can use your detector, which will start beeping like mad, to reveal the Grail artifact next to your mission terminal.
You might remember that the promised reward for the Ouroboros mission was 10000 dollars. Well the Grail is how this reward is delivered to you.
The Grail is the most valuable artifact in the game
While this artifact has no obvious uses it does sell for 10000 dollars, a lot of money in this game.
You’re not free to explore and mess around in Pechorsk however you like.
If you want to collect all of the weapons in the game, or explore more of the radius, you’re free to do so. The whole zone is still available, and there are still repeatable missions to be done. Congratulations! You beat Into the Radius VR. Those are all of the Into the Radius VR Endings.

Into The Radius Walkthrough And Guide - The Final Mission - Ouroboros
Stuck in Into The Radius? Wondering where to go and how to get there for your next mission?
Well don’t worry we’ve got you covered with this walkthrough and guide for Into the Radius VR.
Here we’ll be talking about the final mission of Into The Radius, Ouroboros, which brings you to Pechorsk Castle to get some answers, and more mysteries, at the center of the Radius. Ouroboros is the final Top Priority mission of this game, and the most illuminating and difficult of all of them.
Stuck in Into The Radius? Wondering where to go and how to get there for your next mission?
Maybe you would just like to see what is in store for you before you get there, or you’d like to know if you’re properly prepared for your next mission in the Pechorsk Zone.
Well don’t worry we’ve got you covered with this walkthrough and guide for Into the Radius VR.
In this Into the Radius walkthrough we’ll detail how to progress through the main story “Top Priority” missions, with a couple of guiding tips thrown in here and there to make your adventure smoother.
The focus of these walkthrough articles will be the story missions, but we’ll throw in some general gameplay tips and other useful loot locations near your objectives.
These articles will also assume you’re playing the game on the Normal difficulty mode with Tutorials turned on, which is highly recommended for your first playthrough. This walkthrough will still be useful if you’re playing on Realistic difficulty, but some details like vendor prices or enemy placement and numbers will be different.
Here is every article in our complete Into the Radius VR Walkthrough:
Into The Radius Walkthrough And Guide - The First Mission - Equipment Retrieval
Into The Radius Walkthrough And Guide - The Second Mission - Total Recall
Into The Radius Walkthrough And Guide - The Third Mission - Fixing A Leak
Into The Radius Walkthrough And Guide - The Fourth Mission - Flash In The Dark
Into The Radius Walkthrough And Guide - The Fifth Mission - A Probing Move
Into The Radius Walkthrough And Guide - The Sixth Mission - The Intrusion
Into The Radius Walkthrough And Guide - The Seventh Mission - A Farewell Feast
Into The Radius Walkthrough And Guide - The Eighth Mission - Kids Playground
Into The Radius Walkthrough And Guide - The Final Mission - Ouroboros
Here we’ll be talking about the final mission of Into The Radius, Ouroboros, which brings you to Pechorsk Castle to get some answers, and more mysteries, at the center of the Radius. Ouroboros is the final Top Priority mission of this game, and the most illuminating and difficult of all of them.
Ouroboros - Loadout
Congratulations, you’ve made it to the final mission of Into the Radius! Get ready for the hardest fighting in the most difficult map of the game. More than ever being properly prepared is important and will help you win.
This mission brings you to Pechorsk Castle, which has a variety of indoor and outdoor areas. As you make your way through the inside and outside of Pechorsk Castle, you’ll be fighting a lot of enemies in both very close quarters, and once or twice from far away. So it’s best to be prepared for a lot of close range, and some long range combat.
There will be a smattering of all of the enemies you have encountered so far like Fragments, Spawn, Seekers, and Sliders. Though most dangerously of all you’ll be coming up against a lot of heavily armed and armored Mimics like Mimic Soldiers, Mimic SWAT, and Mimic Snipers.
The automatic weapons they’ll be using are very effective and if you aren’t careful can take you down in a few short bursts at close range, so it’s best to arm yourself with weapons that are capable of taking down Mimics very quickly.
So more than anything rifles that hit heavily and have a decent rate of fire are recommended like the FN 17 “SCAR” that you can see in this example loadout. They can hit enemies at medium and long ranges with some skill and patience, and also offer more than enough firepower for close ranged fighting.
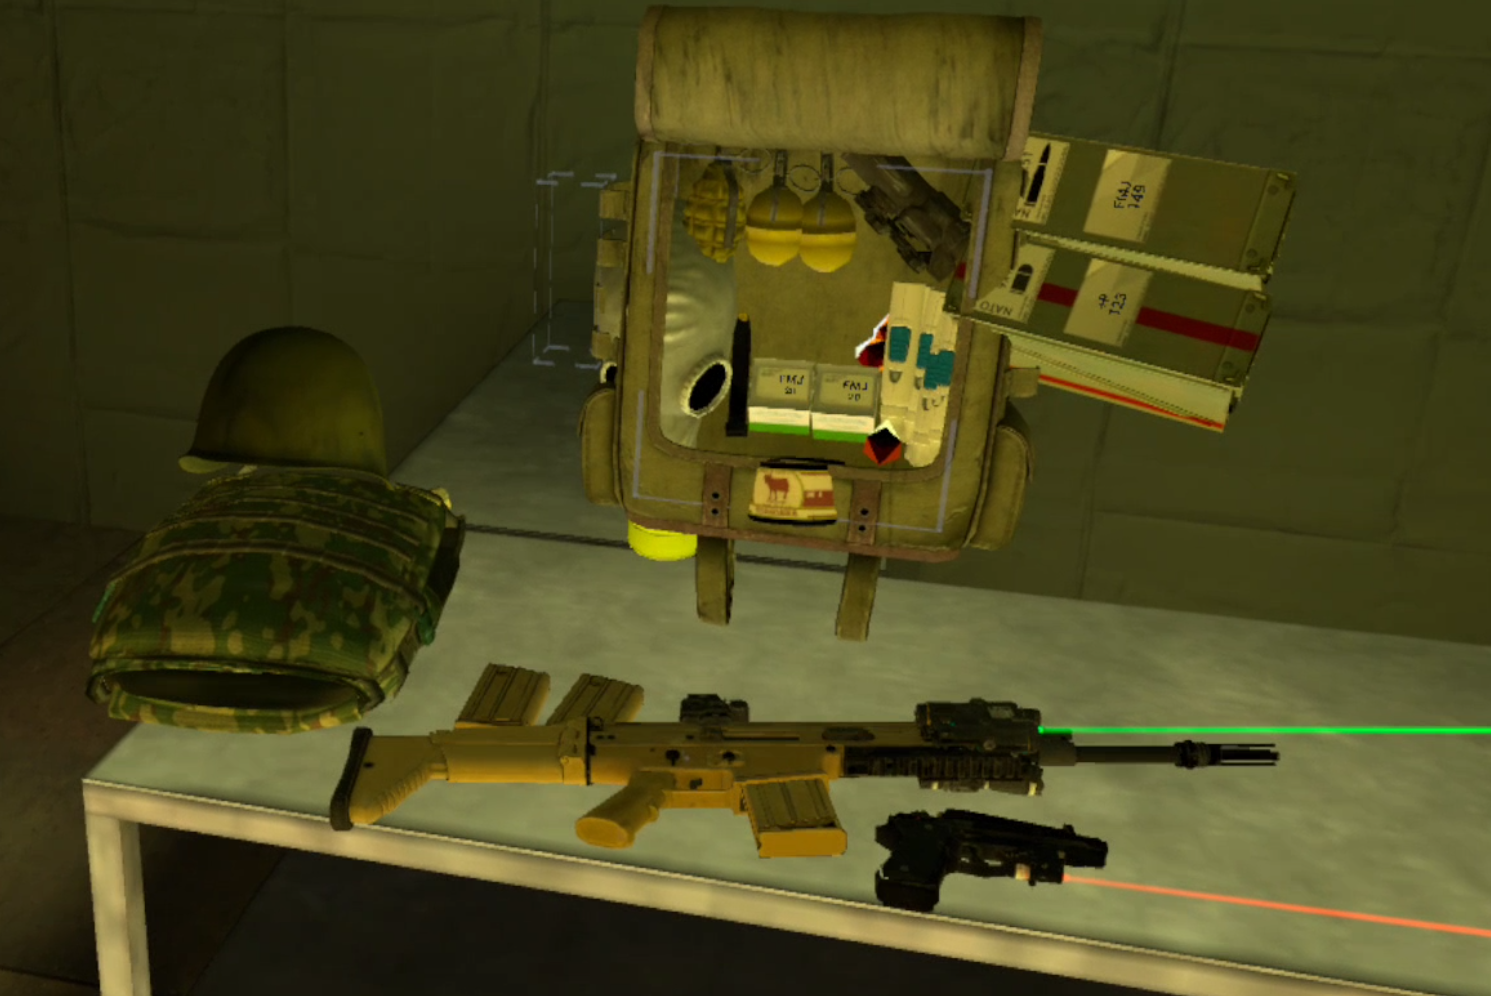
A sample loadout for the last Into the Radius mission
This is the final mission and so there’s no need to spare any expense on your equipment. A good sidearm is also very useful in the close quarters fighting you’ll be doing inside of the castle, preferably with a laser pointer for easy aiming as well.
Having a good pistol to quickly switch to if your main gun runs dry is more helpful in the final mission than anywhere else, and more likely to happen and save your life. While I used the M9 in this sample loadout, which is an all around very reliable and hard hitting pistol, you may want to use the extremely heavy hitting Desert Eagle, or something that can fire automatically like the OC-33.
It’s also not a bad idea to bring two long arms, one for up close and medium ranges, and another for longer ranged shooting. Though you don’t necessarily have to have a sniper rifle with you it can be helpful, and you can always keep a longer ranged optic in your pack to swap on to your rifle, as you can see in the top right hand corner of the backpack in the example loadout.

Upgrading an M9 before heading out on the final mission
You also might want to upgrade what weapons you do bring with you if you can afford it, and adding attachments like optics or lasers if you haven’t already can be extremely helpful.
More than anything else make sure you have a lot of healing items like Healing Injectors and Regen artifacts. Bring more than you think you’ll need. In this mission one wrong step can drain most if not all of your health pool.
Also invest in the best possible ammunition for whatever weapons you are bringing, and bring at least a whole crate of it. As always healing items and ammunition are the number one thing that might force you to quit and turn back. So go ahead and get the best, and have a lot of it.
A little food is a good idea to have, though you’ll find more in various loot areas inside the Castle, and you will definitely want to bring your Gas Mask. While not strictly necessary it will make some of the anomaly fields in the exterior of the castle a lot simpler to navigate and survive.
You’ll also notice that I brought a few grenades. While not necessary they can be useful in flushing out Mimics that are waiting to ambush you in the next room, and so they’re worth having a few of just in case.
You’ll also notice in this loadout that there aren’t any silencers or subsonic ammunition. Unlike in other missions stealth isn’t very useful in Ouroboros, as your enemies will generally be right in your path and impossible to avoid, so don’t bother, this will be a loud mission.
Of course the usual Head Lamp, Detector, Probes, and melee weapon of some sort are necessary as well. Make sure all of your equipment is fully repaired and loaded before you head out. Don’t spare any expense, you’re about to finally enter the center of the radius and master it.
The Last Mission - Entering Pechorsk Castle
As always accept the mission at the terminal before heading out. You’ll see that you’re in for a challenge as the briefing ominously indicates. Don’t worry, you’ll be alright.

The briefing for the last mission of Into the Radius. Combat Training will definitely be required.
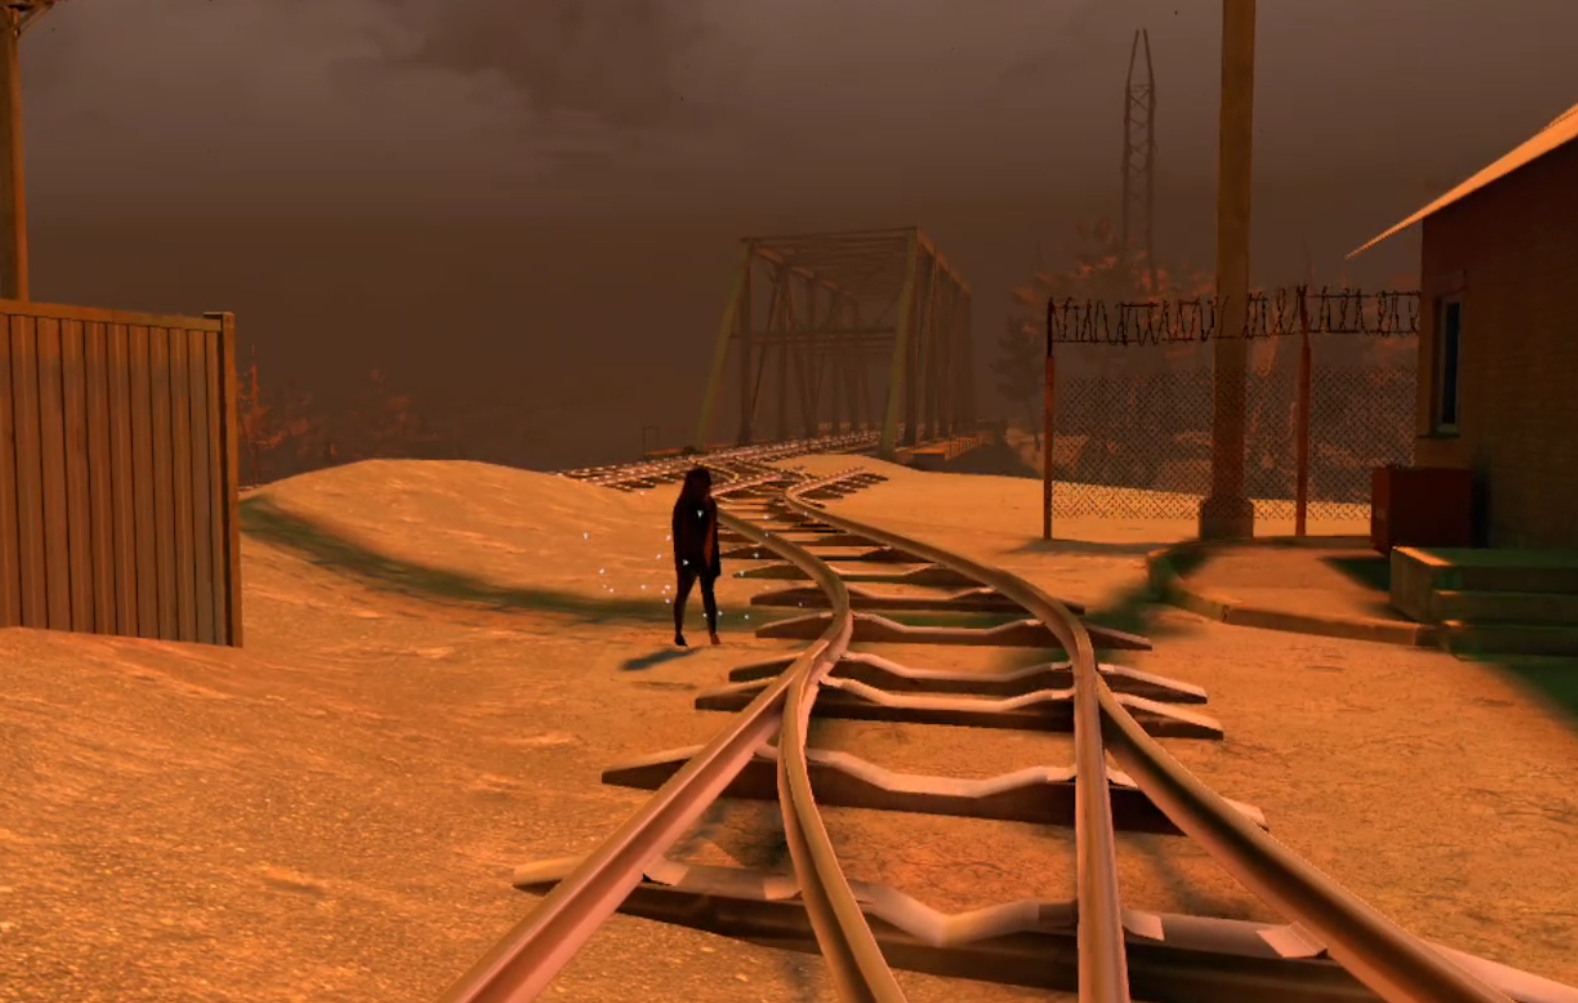
Once you do head out of the gate, double check your gear, and take the left most rope line out, which leads to Kolkhoz Zarya.
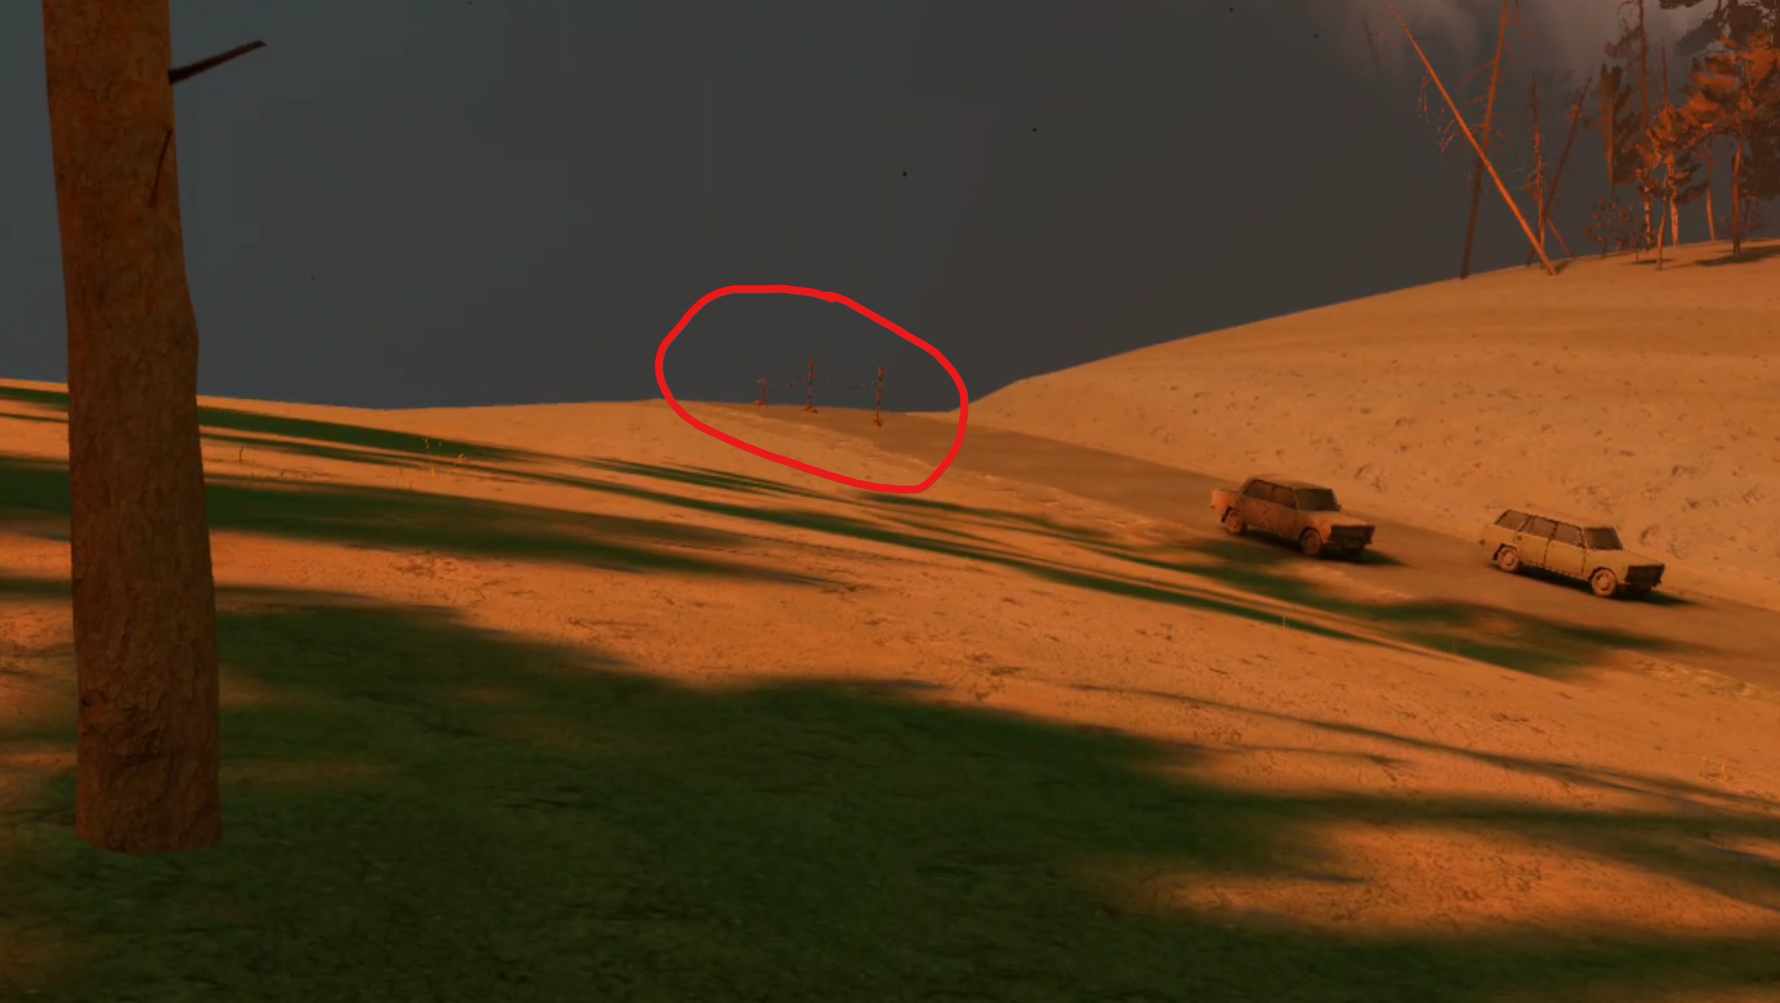
Once you find yourself in Kolkhoz Zarya take a look at your map and get your bearings.

The path from Kolkhoz Zarya to Pechorsk Castle
Luckily you won’t have to go far to get to Pechorsk Castle, though there will be some enemies and anomalies in your way.
You can head straight down the railway in front of you towards the bridge and fight your way through the Mimics that patrol by the bridge before taking a left down the road.

The Mimics guarding the bridge. You can sneak past them by going through the woods.
You can also go left off of the railway down the embankment, swim through the water, and skirt around the anomaly field in the trees to avoid those mimics if you like. Either way you should be very prepared for a fight if there is one, and these few enemies will be the least of your worries.
However you get there, enter the rope line heading to Pechorsk Castle.
The rope line leading to Pechorsk Castle, the final map of the game
Once you’re through to Pechorsk Castle you’ll see a large house ahead of you, and hear a lot of Stomper Anomalies around. Just head towards the house, eliminating the few Fragments and Spawn that might see you on your way towards the castle.
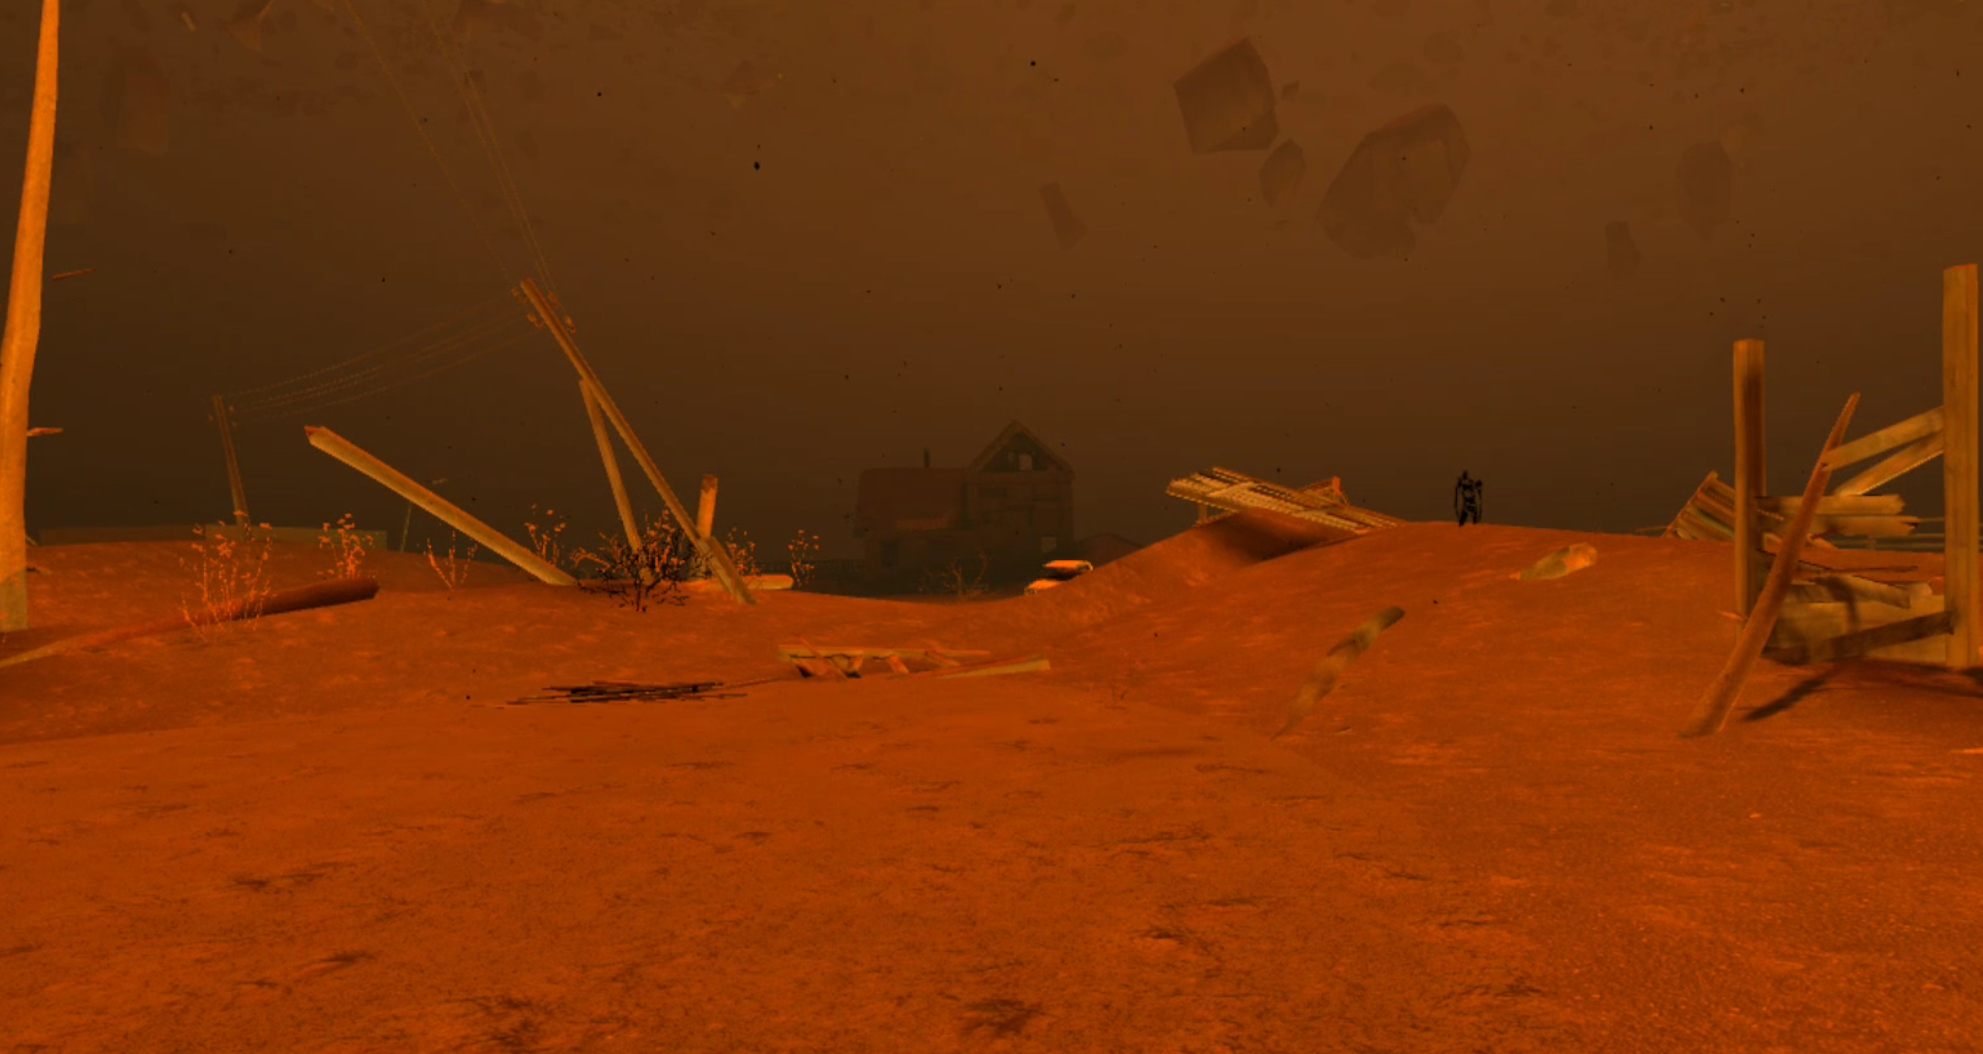
Head towards the house, and you’ll see the bridge heading into the castle right past it
You’ll soon see the castle ahead with a bridge leading to it.
As usual during a Top Priority mission you’ll also see the white form of friend Katya standing near the bridge. Touch her to get some more story details before you head inside.

Katya once again waits for you
Then double check and make sure you’re completely ready. Load your magazines, and make a save if you’re not playing in Ironman mode.
When you look from the end of the bridge towards the castle entrance you’ll see that the gate is open and the way in. The orb that has always stood in the center of the radius is just above you.
It’s time to complete the final mission of the game and discover what is at the center of the zone. Here’s where things get heavy.

Fighting Through The Castle
Take a glance at your map, while it won’t be as useful here as in other missions, this is the approximate route we’ll be taking through the castle.
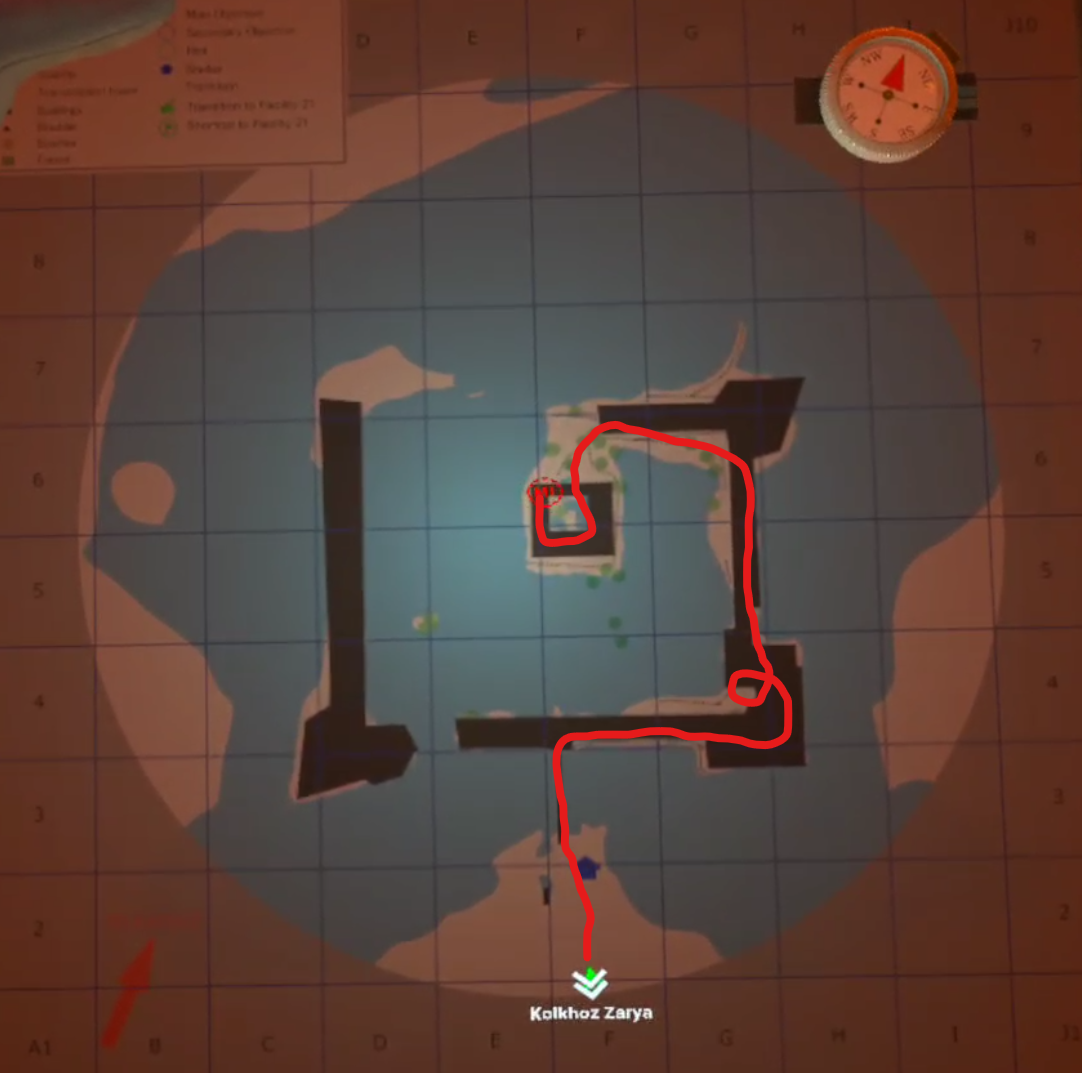
The route through the Castle for the Ouroboros mission
It’s pretty linear, so you’ll have a hard time getting lost even if you tried.
Steel yourself and walk across the bridge. You’ll hear a lot of enemies inside, and a stray Mimic or Spawn might greet you by coming through the gate and attacking, so keep an eye on it and your weapon drawn as you approach.
Though if you decide to go down the dirt path directly to the right of the gate you can follow it past the walls and find a grate with a dead soldier in front of it and a small stash of Saiga 12 magazines and shotgun slugs.
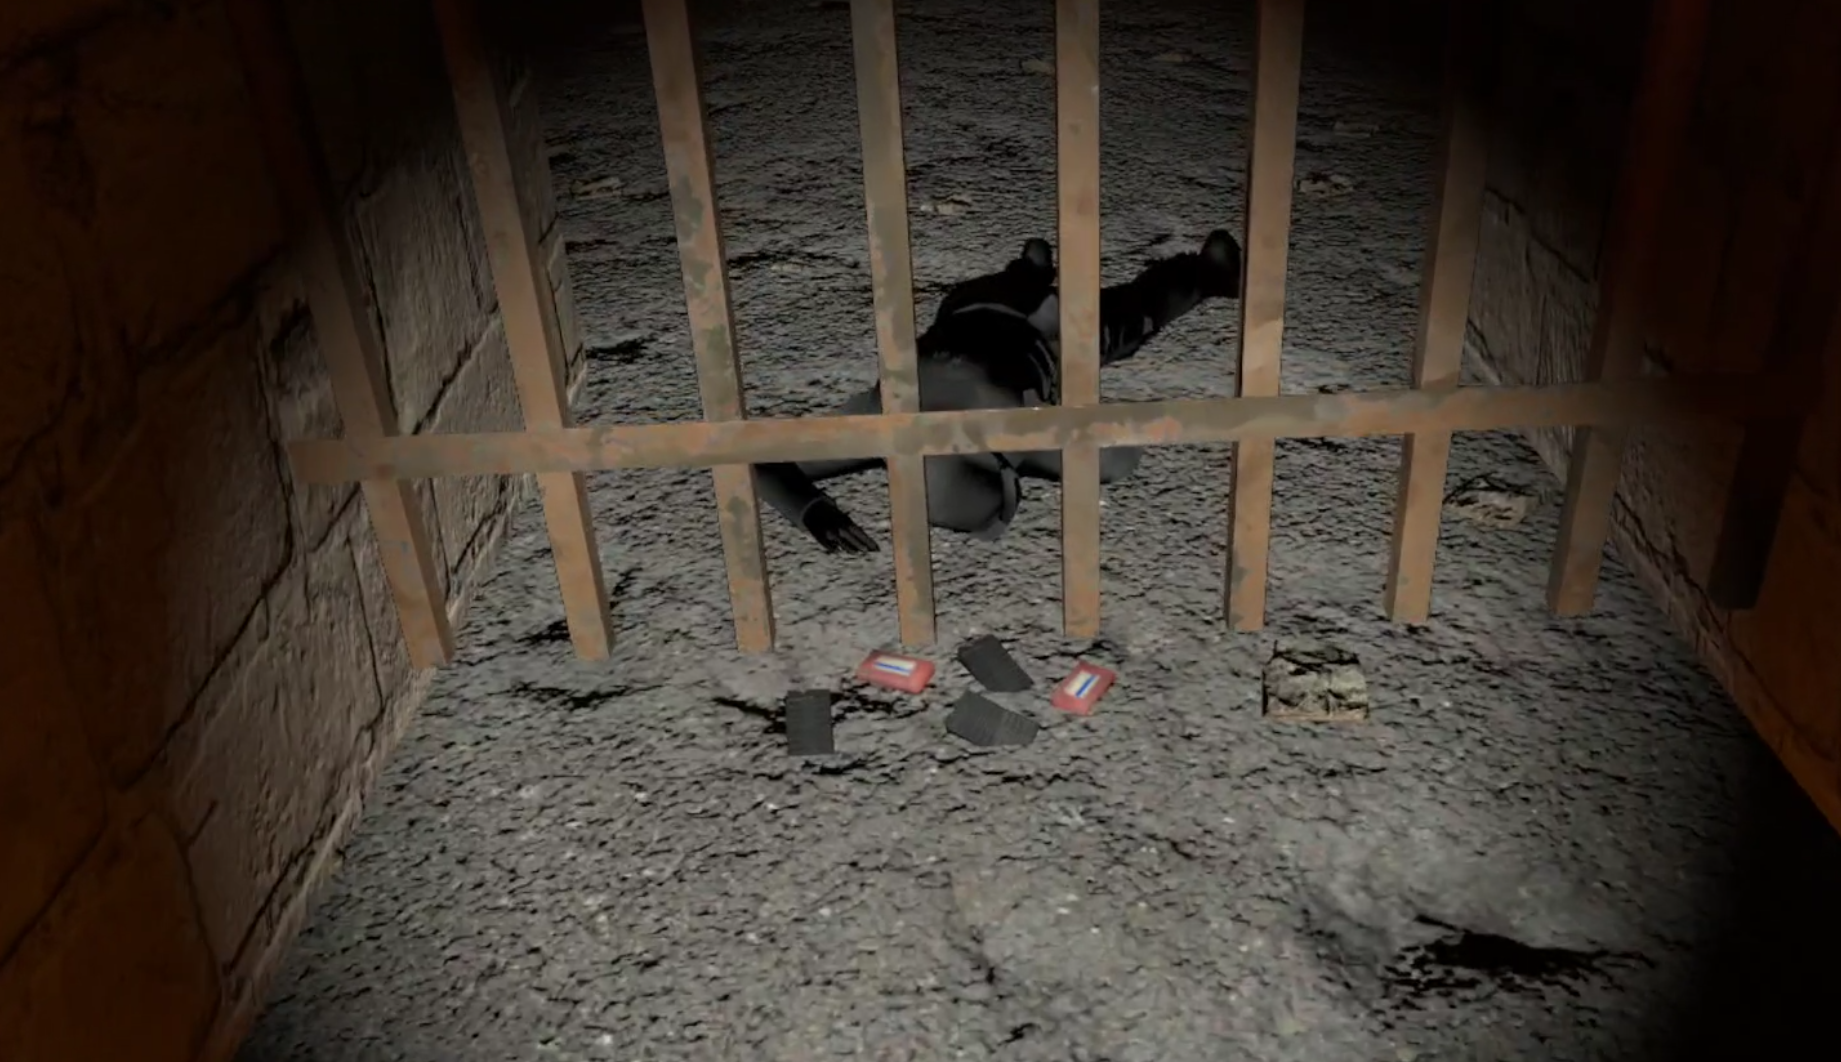
A small stash of Saiga 12 magazines and shotgun slugs
Go out of your way to pick them up or don’t, it’s up to you, and you can always get them later inside the castle. Either way there’s no way through around the side, you have to go through the front gate.
From here on out be ready for enemies around every corner.
Through the gate you’ll see a dark version of Katya, who you can touch for some more story dialog. You’ll be seeing her periodically throughout the Castle, and there will also be other black statues that you can touch for some extra lore.
I won’t be pointing all of them out here, from now on we’ll focus on fighting your way through to the end. There are also numerous crates and small side areas throughout the castle that you’ll find with a ton of loot. Since this is the final mission of the game we won’t be focusing much on looting in this walkthrough guide either, and will be focusing on getting you into the central keep and completing the game.
Directly to the right as you enter the gate is a doorway, and that’s where your enemies will be coming from. Expect Seekers, Fragments, and Spawn to come rushing out.
Gunning down a Seeker as it rushes out of the castle
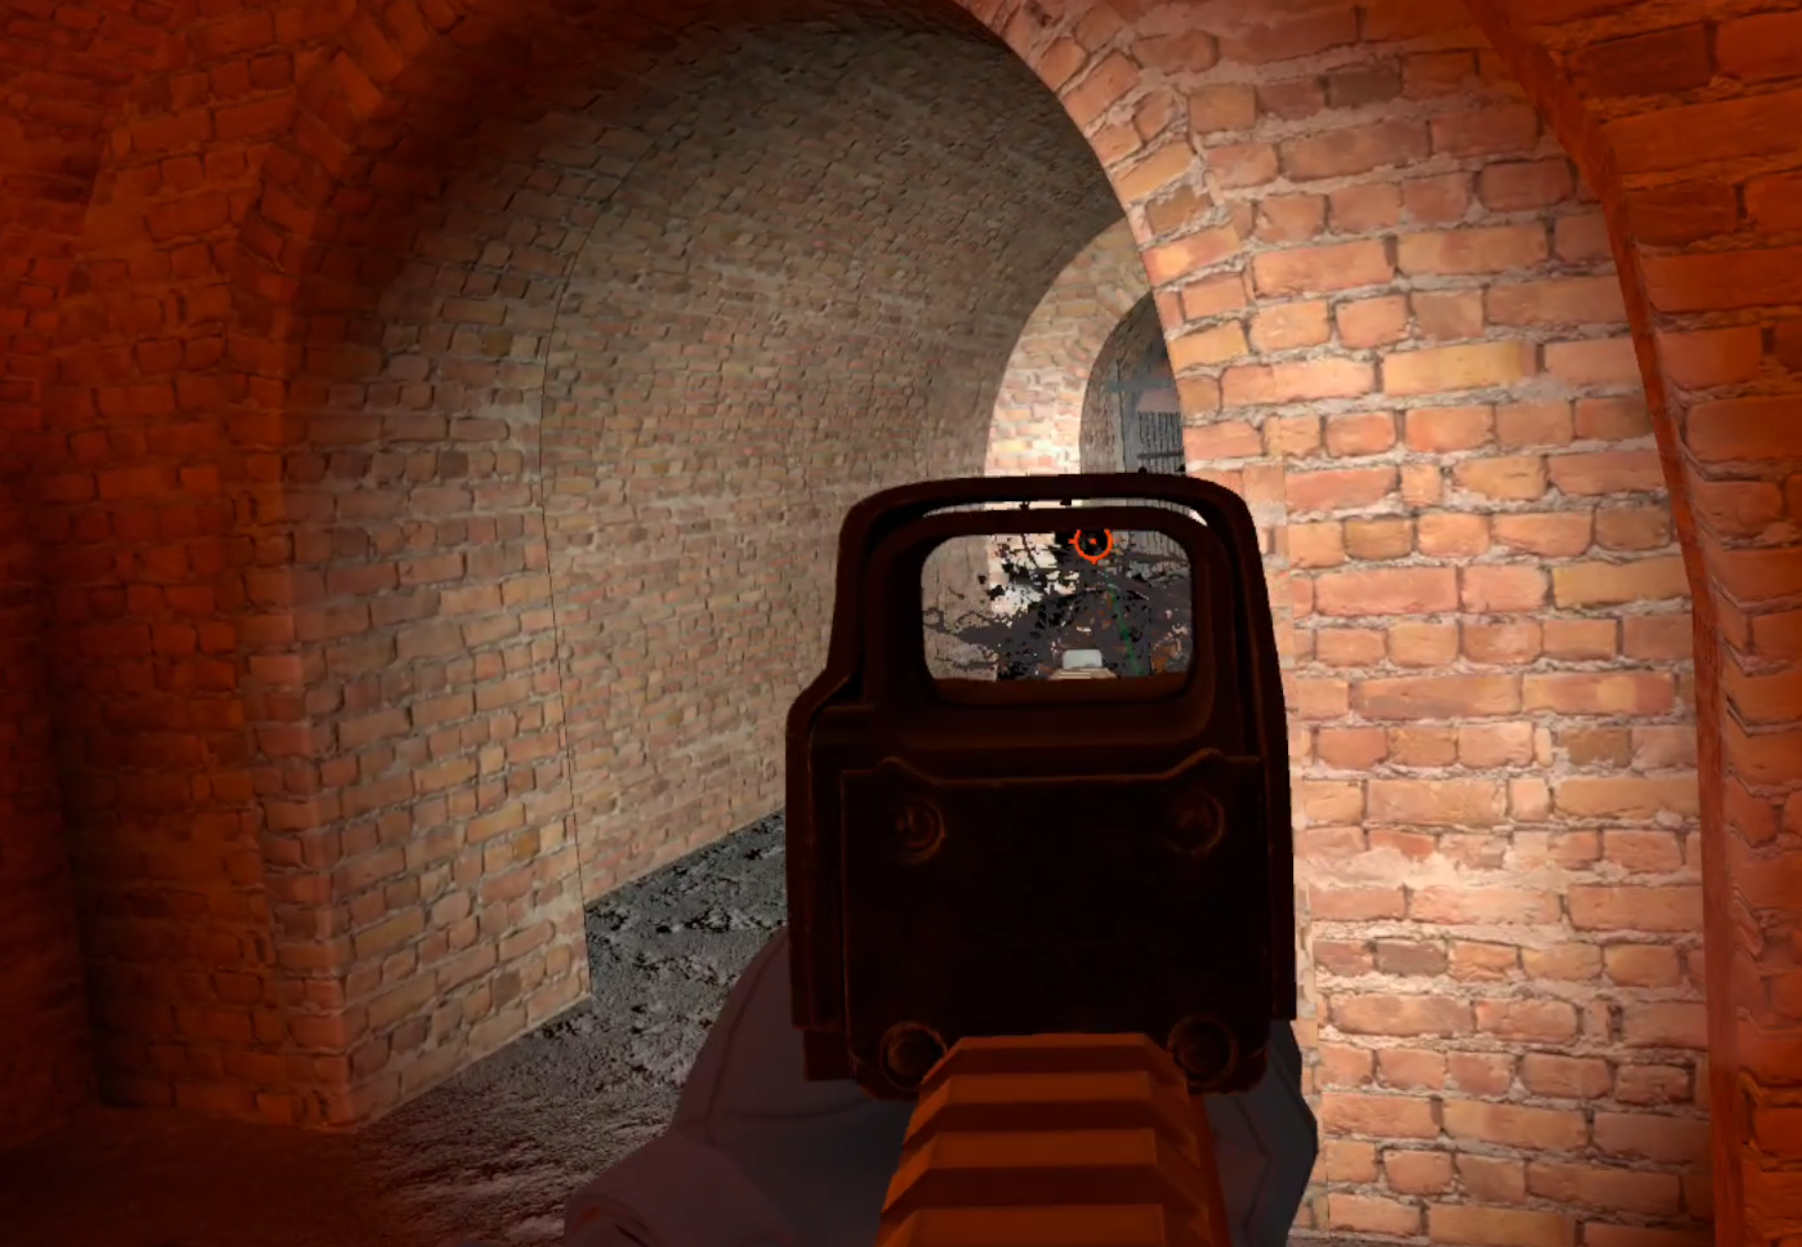
When you see one shoot them down and push forwards to destroy the Rift Anomaly on the other side before it spawns any more enemies.
A Rift Anomaly right inside the castle entrance
It’s a good idea to wait for at least a few seconds after you’ve made a bunch of noise with gunfire to see if any more enemies run around the corner to attack you.
Once the coast is clear head forwards and take a right. Past the room containing the Rift you’ll take a quick left down a very short hallway pictured below into another. Be careful here. It doesn’t look like it but this room expands to your left and right, and there will be a squad of mimics in the next room waiting to ambush you.
If you wait for a moment or two you can hear them talking. If you’re lucky one or two might walk out to meet you, but most likely they’ll wait for you to walk further inside.

Mimic Soldiers wait in ambush around each corner here
You can flush them out by throwing some grenades around each corner, or try blind firing around the corners when you hear them, or quickly peak, take a shot, and fall back. You can also push a little bit into the room and hide behind the pillars inside to block the lines of sight of the other Mimics inside.
This many mimics can take you down very quickly if they fire together, so don’t expose yourself for too long. Once you’ve made some noise and have their attention fall back, heal, and then peeking back in to take one or two down quickly, or try to bait them into coming towards you.
This is definitely the section of the castle where grenades are the most useful, so don’t spare them if you’ve got them. You’ll probably have to take a few shots, but this room is very clearable if you’re careful and quick about it.

The bed inside the castle, just ahead and to the right is a doorway leading forwards
Past this room you can take a left and see a long corridor with a bed in it. This bed is actually useable, though right now isn’t a very good time to use it. As you walk towards it there will undoubtably be more enemies through the doorway on your right, which is also guarded by a patch of Black Grass.
There will also be some arches that you can’t walk through because they have grates on them, don’t be lulled into a false sense of security by these grates. Mimics can still shoot through them, and so can you, so always watch them as you go by.
Once you’ve cleared the first group of Mimics, and whatever Fragments lied beyond them near the bed, your path continues past the Reflector anomaly after the doorway covered in Black Grass.

A Mimic lying in wait past the indoor Reflector Anomaly. Always stay alert while you go forwards
As always constantly be on the lookout for enemies ahead of you, and squeeze past the anomaly on the left to go to the store room beyond it.
This room will have some shelves with various pieces of loot on them, so feel free to grab a snack. This is also not a bad place to reload some magazines and heal.
There is a short period of relative calm here after the huge firefight you just had. Keep going forwards through the corridors. You’ll pass some metal beams and large pieces of concrete, and a room that’s dominated by natural rocks.

A caved in room inside the castle
There may be some sparse enemies here, but most if not all will have been drawn by your huge firefight earlier.
After the caved in hallways you’ll find yourself in a large room, the room on the other side of the grate with the dead soldier near the entrance. If you didn’t grab those Saiga 12 magazines you can grab them here as well.

The other side of the grate with the saiga magazines
Going to the other side of the huge room you’ll see another manifestation of dark Katya facing another doorway.
Head through it, and be wary that more enemies might come at you as you make your way through the next hallways, which are all full of Black Grass.
Use your Head Lamp to deactivate the anomalies and run through them. Though you’ll start to hear the telltale sounds of Lightning anomalies as you head into this room.

Be careful in this room, it is full of lighting anomalies
This room is filled with Bolt Anomalies, though luckily they are all very small and it is complete possible to make your way through without being hit by a single one of them.
Throw a probe very gently, and just a little bit in front of you. If the probe doesn’t trigger the anomaly then follow its path directly, just a little deviation can get you a serious shock and a lot of damage.
First hug the left hand wall and then head between the shelf and the cable reel to the left of it. Then go straight towards the shelf next to the doorway leading out and hug that shelf as you go through the doorway.

The doorway leading out of the Lightning Anomaly room
Take your time and you’ll be alright, you can make it through the Lightning Anomaly Room. Once you’re through there will be another room with some Black Grass in your way.
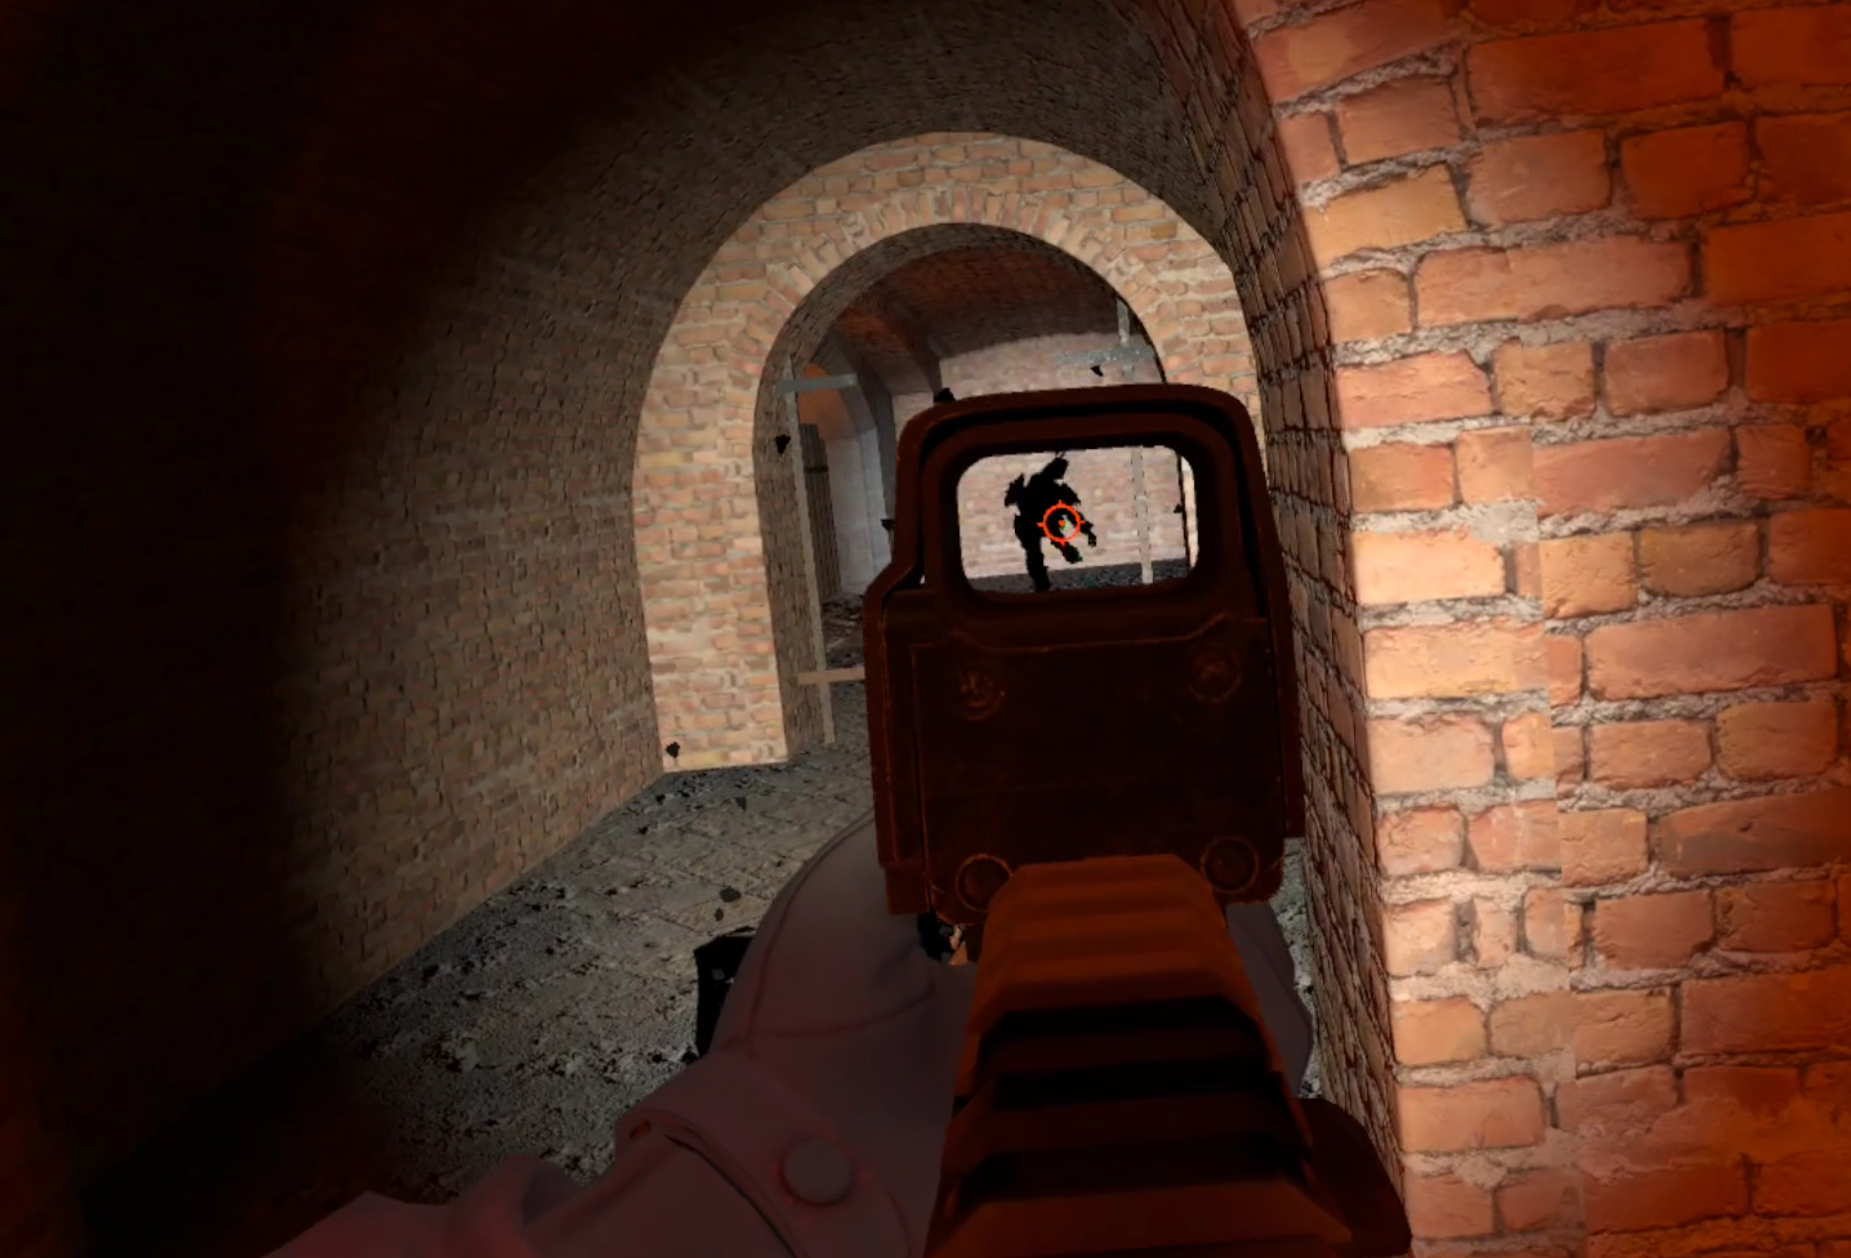
Though once you find yourself at some wooden planks leading across some water be careful, as there’s very likely going to be a Mimic waiting to ambush you on the other side.

Ambushed by a Mimic. Always stay on your toes in the Castle
After dealing with this ambush keep going onwards past a ton more Black Grass.
Making your way past this anomaly should be easy by now, and after shining your way through some more patches of it you will find yourself finally free from the confines of the inside of the castle, with the light of day greeting you.

The ladder up to the walls
Past a blue wall you’ll see a ladder leading upwards to the walls of the castle. Head towards it and climb up.
Once you’re at the top take a left instead of going straight forward from the ladder, so that you’re facing this tower and the huge anomaly field surrounding it.
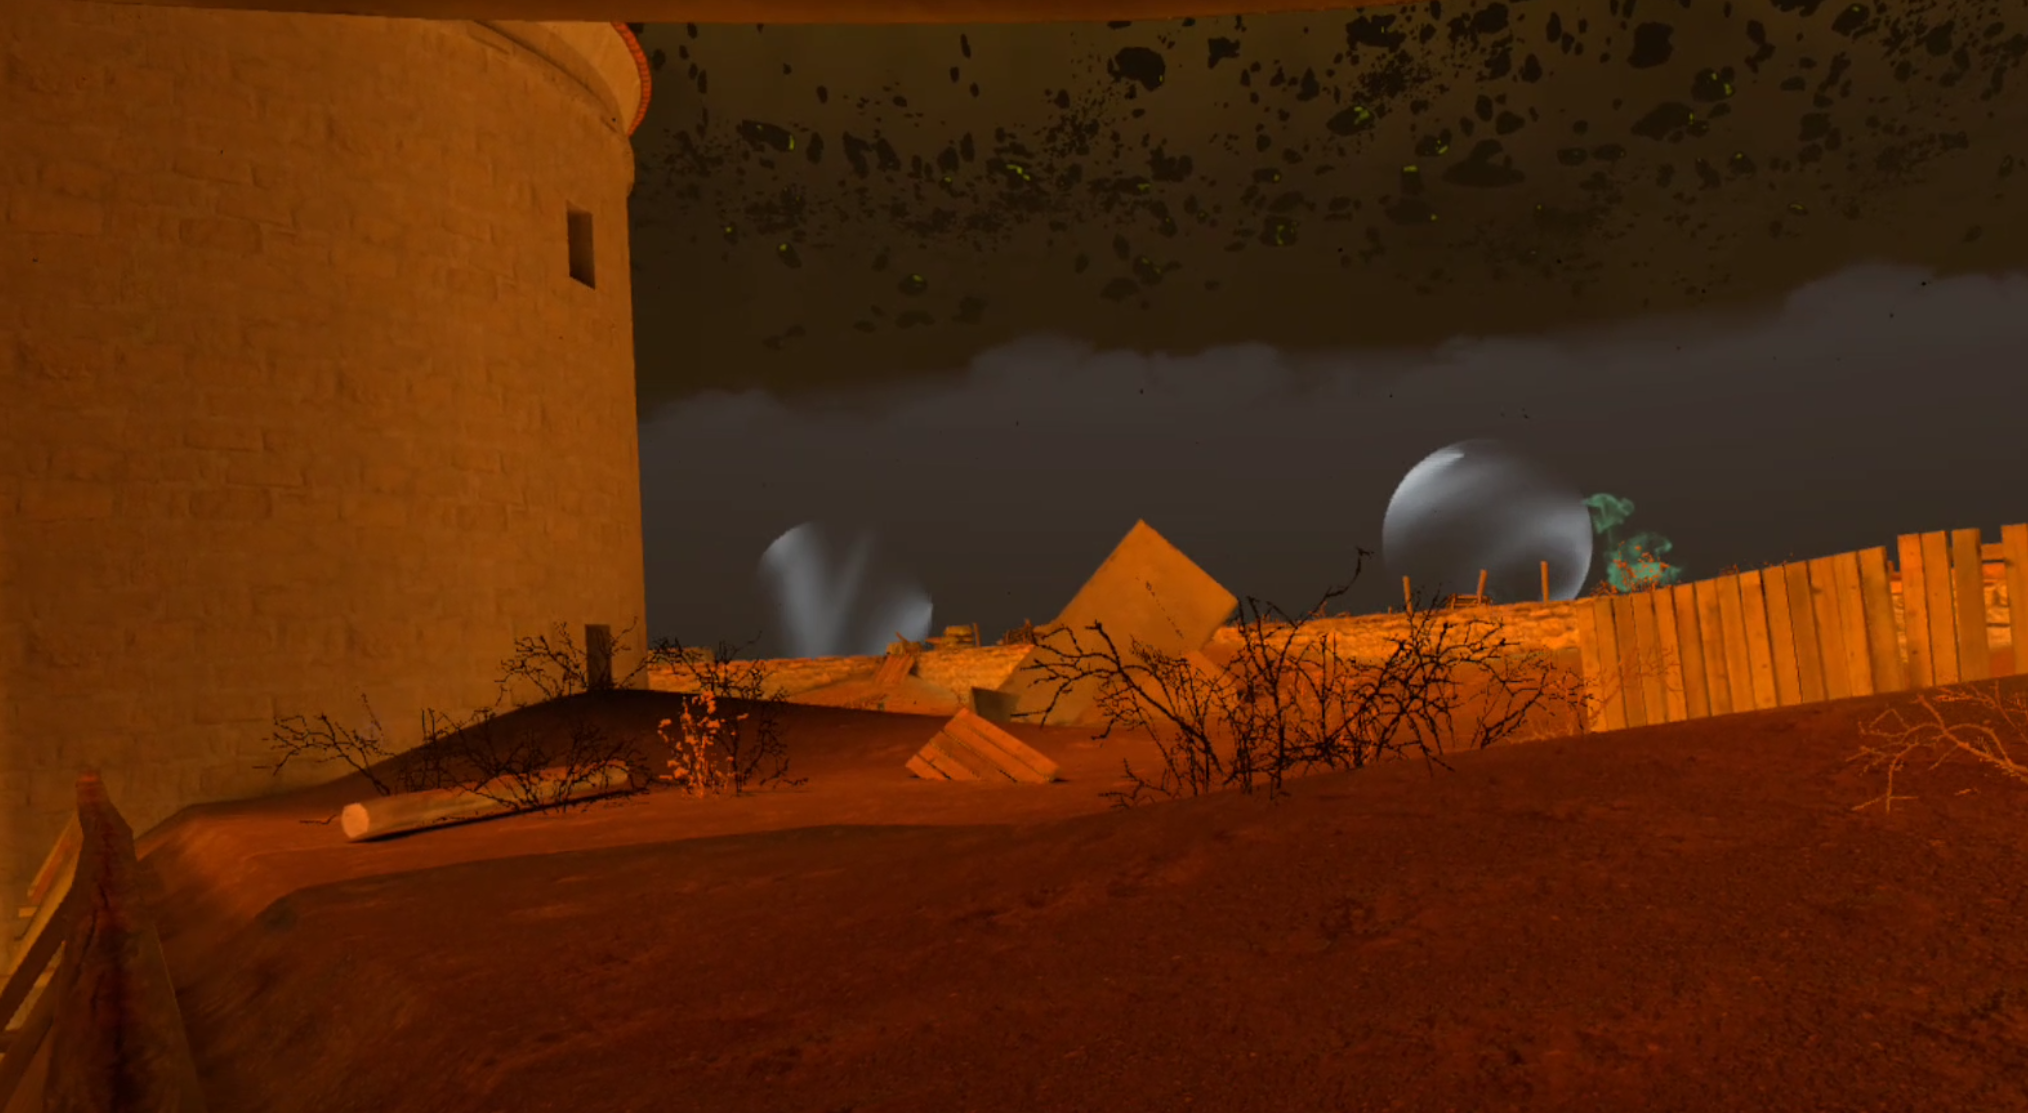
A huge anomaly field you’ll have to find your way through
Now is a good time to take off your helmet and put on your gas mask. You’ll have to head straight through this anomaly field.
It should be pretty easy if you use your probes, you should have a lot of practice by now. At first the anomalies will be mostly Reflector and Distortion Anomalies that you’ve been avoiding ever since the very first map of the game.
Weave your way through the anomalies until you’re on the other side of the tower, and take a little wooden ramp leading up to the top of the wall.

This ramp leads between the anomalies and up to the next level of the wall
You’ll start to see some more gas anomalies once you’re on the upper level, just keep making your way to the north.
You’ll see more gas anomalies once you’re on the other side of the tower, that’s why it’s so important to have brought a gas mask. Once you’ve made your way through the worse of the field you’ll see a long stretch of open wall in front of you.
Now is a good time to get your long ranged weapon ready. If there was ever a time for a little sniping in Into the Radius, it’s coming up now.

A long ranged scope is very useful here
Make sure your magazines are loaded. Once you go further down the wall you’ll see the central keep of Pechorsk Castle on your left.
In front of the gate leading in on the north end of the keep, and ahead of you on the wall, there will be another group of mimics spread out. There will also be at least one sniper among them.
As you make your way up the wall through the gas anomalies it’s important to stick to cover as much as possible. The Sniper Mimic will inevitably see you and open fire, though at such a long range they’ll probably miss at least the first few times.

The keep is on the left, keep going up the wall to your right and stick to cover
Where the two walls meet and become a corner you’ll also see some rocks floating in the air.

The floating rock formation at the corner of the walls
The Sniper will be perched on the wall to the left of these rocks, and other Mimics of various types will be near the sniper, near the rocks, or near the front of the castle to your left.
There are a number of ways to approach this situation. Sniping is the easiest, start by taking out the Mimic Sniper and then pick off the others as they try to sneak closer to you.
You can also get closer to them by moving a little down the wall to your right and advancing forwards towards the rock anomaly. There’s a lot of cover near it that you can work your way through to get closer to the enemy Mimics. Though this comes with the risk of being surprised and gunned down.
Also keep in mind that you’re also very likely to be attacked by Sliders, and possibly Spawn and other melee enemies. If you hear the telltale sound of Sliders teleporting closer to you then immediately break off fighting the Mimics and wait for the Sliders to appear, gun them down immediately. It can be easy to be clawed to death by the sliders while you’re busy with a firefight.
As always take your time when you can, and if you take a hit take cover and heal up.
Once you’ve cleared a path through the Mimics the entrance to the Keep is on the north side of it. Get ready for the final leg of your assault. Load your magazines before heading to the gate.

The entrance to the inner keep of the castle
Ouroboros - Finishing The Mission
Be careful going through the gateway to the inner keep. Immediately inside of it is a large courtyard, and just running out into it is very dangerous.
Instead keep your eyes upward and look to the top of the wall surrounding the inner courtyard. There will be mimics all around it waiting to shoot you.

The courtyard is a death trap if you don’t snipe the Mimics before they all see you
Slowly walk into the gateway, and when you see a Mimic stop and take them down. Rinse and repeat until you slowly reveal the entire wall.
If multiple Mimics see you at once it can be an easy recipe for disaster, but taking them out one by one makes this ambush very easy to fight through.

Carefully clear these walls before walking out into the open
Once the courtyard is clear of Mimics walk up the wooden stairway to the second level, and continue around the wall.
You’ll see a doorway leading to some stairs headed upwards, and another Rift Anomaly inside as well.

Be careful going up these stairways
Go up the stairway and through the small maze of rooms and stairways leading upwards. Be very careful turning each corner.
There can be Spawn, Mimics, and other enemies waiting inside, though hopefully at least some of them have been drawn out by your previous battle through the courtyard.
Be very careful when you see the light of day again. The last stairway leading to the top will have a Mimic waiting to ambush you on it.

This Mimic can take you down by himself if you let him
Once you’ve fought your way through them you’ll find yourself in the room at the very top of the keep, and your Detector beeping like crazy.
Next to you is another black Katya, and a pedestal.
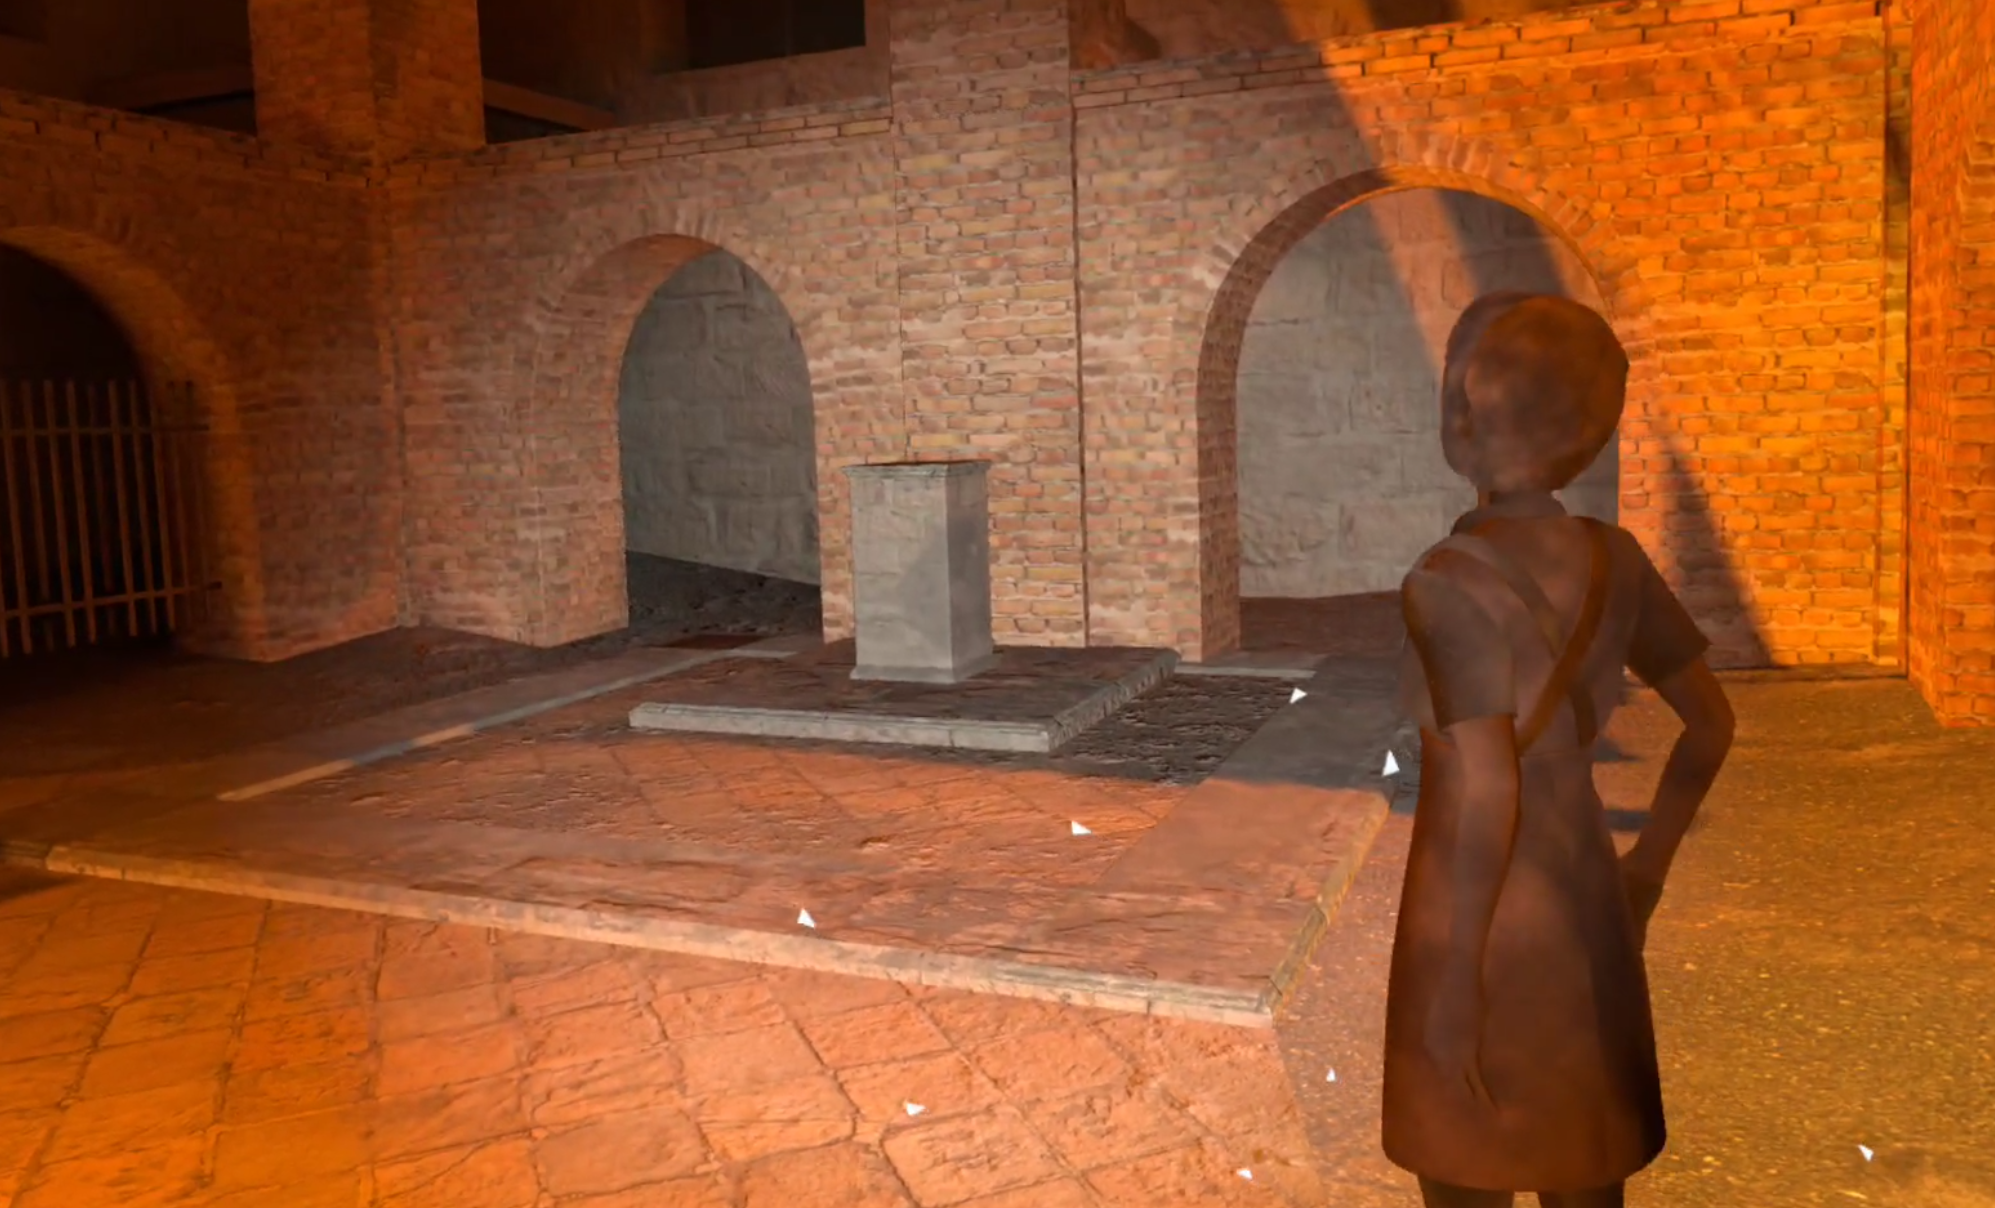
The final room of the game with the final Katya of the game
That pedestal contains the goal of this final mission, and the game. This is the end of Into the Radius. Once you’ve made it here you’ve made it to the end.
Take out your detector and use it to reveal the final artifact, the Grail, on the pedestal.

The Grail artifact revealed
Pick up the grail to reveal the ending to the game, though to avoid spoilers we won’t be talking about that here.
I highly recommend that you play through this level, experience it, and experience the ending of Into the Radius before reading about it here. This game is fantastic, and it deserves to be experienced first hand if you can do so.
For now this is everything you need to know to complete the final mission of Into the Radius Ouroboros. Whether you’ve already completed it or not, or when you do, take a moment before picking up the Grail to be satisfied with your accomplishment.
Getting this far is really hard, and Into the Radius is a very challenging game. So congratulations! Once you pick up the Grail you’ve accomplished a truly difficult victory in the world of VR gaming.
Also take a moment to think about the wonderful people over at CM Games who made this fantastic VR experience. Into the Radius took years of hard work from them to create, and they deserve some gratitude for crafting such a wonderful game.
If you want to see what happens at the end of the game after you’ve completed this last mission, then head over to our endings guide.
Into The Radius Walkthrough And Guide - The Eighth Mission - Kids Playground
Stuck in Into The Radius? Wondering where to go and how to get there for your next mission?
Well don’t worry we’ve got you covered with this walkthrough and guide for Into the Radius VR.
Here we’ll be talking about the eighth Top Priority mission that you get in Into The Radius, A Farewell Feast, which brings you back to Kolkhoz Zarya to explore and fight your way through the train station and summon a ghost train with a one of a kind artifact.
Stuck in Into The Radius? Wondering where to go and how to get there for your next mission?
Maybe you would just like to see what is in store for you before you get there, or you’d like to know if you’re properly prepared for your next mission in the Pechorsk Zone.
Well don’t worry we’ve got you covered with this walkthrough and guide for Into the Radius VR.
In this Into the Radius walkthrough we’ll detail how to progress through the main story “Top Priority” missions, with a couple of guiding tips thrown in here and there to make your adventure smoother.
The focus of these walkthrough articles will be the story missions, but we’ll throw in some general gameplay tips and other useful loot locations near your objectives.
These articles will also assume you’re playing the game on the Normal difficulty mode with Tutorials turned on, which is highly recommended for your first playthrough. This walkthrough will still be useful if you’re playing on Realistic difficulty, but some details like vendor prices or enemy placement and numbers will be different.
Here is every article in our complete Into the Radius VR Walkthrough:
Into The Radius Walkthrough And Guide - The First Mission - Equipment Retrieval
Into The Radius Walkthrough And Guide - The Second Mission - Total Recall
Into The Radius Walkthrough And Guide - The Third Mission - Fixing A Leak
Into The Radius Walkthrough And Guide - The Fourth Mission - Flash In The Dark
Into The Radius Walkthrough And Guide - The Fifth Mission - A Probing Move
Into The Radius Walkthrough And Guide - The Sixth Mission - The Intrusion
Into The Radius Walkthrough And Guide - The Seventh Mission - A Farewell Feast
Into The Radius Walkthrough And Guide - The Eighth Mission - Kids Playground
Into The Radius Walkthrough And Guide - The Final Mission - Ouroboros
Here we’ll be talking about the eighth Top Priority mission that you get in Into The Radius, A Farewell Feast, which brings you back to Kolkhoz Zarya to explore and fight your way through the train station and summon a ghost train with a one of a kind artifact.
Kids Playground - Loadout
The Kids Playground mission involves a lot of medium to close range combat, so you don’t want to bring a weapon that’s meant for long ranges. Most of your fighting will be done in and around the train station, so an assault or battle rifle is ideal.
Since at this point you’ll be Security Level 5, you might as well sprint for the best. That’s why we’re using the FN17, the most powerful and versatile assault rifle in Into the Radius.
It does degrade quickly, but not so quickly that you will need to bring along cleaning supplies for this mission if using this weapon in your loadout.
Of course you don’t have to bring the FN17 (aka SCAR) yourself, and this mission is perfectly manageable with an upgraded SMG or Security Level 3 or 4 rifle. At this point you know what you like best, but make sure you’re ready for very heavy resistance.

A sample loadout for the Kids Playground mission
Other than your primary weapon you may want to upgrade your sidearm as well if you haven’t for a while. In this sample loadout we’re using the Desert Eagle, but other powerful pistols like the OC-33 or M9 are also great end game firearms.
If you can’t afford the upgrades just yet then don’t worry, you can still finish this mission as long as you have plenty of ammunition, healing items, and a full set of armor. While in many missions silencers can be helpful, for the Kids Playground mission they are actually arguably a drawback, and in any case are unnecessary.
Other than that this loadout is fairly standard, though if you have some grenades sitting around now might be a good time to bring some along and use them. They might come in handy when clearing out the train station, but they are not a requirement to complete the mission.
As always once you’re kitted out accept the mission and head off.

The mission description for Kids Playground on the Terminal
Getting to Kolkhoz Zarya
Just like in the last mission you’ll be headed back to Kolkhoz Zarya, and we’ll be taking the same route through Bolotky Village as last time.
So take the rope line leading to Bolotky and then immediately turn north. Your destination is at the northern end of the train tracks.

The route through Bolotky Village
Shoot the few enemies in the woods as you head north, and avoid the Web Anomalies.
As always you’ll probably run into a small cluster of enemies by the oil tanker near the rope line to Kolkhoz Zarya. They should be really easy for you by this point in the game, so don’t worry too much about them.

The route to Kolkhoz Zarya
Once you’re at the rope make sure your health is topped up, you’re well fed, and your magazines are fully loaded. Kolkhoz Zarya is where the fight really begins.
Kids Playground - The Train Station
Very conveniently this path will spit you out right next to the train station in Kolkhoz Zarya.
So you’re already near your objective, but you still have a choice of how to get inside. You could walk along the train tracks along the left side of the building and take the front entrance.
This is riskier than it may seem, as you can attract enemies from the fields further to the west, and even be spotted by the BTR. Not to mention once you get inside you’ll be in the middle of the trainyard and potentially surrounded by enemies on all sides. As you’ll see from this route we won’t be doing that.

The route to the train station in Kolkhoz Zarya
A less exposed approach to the train station, and the one that we will take, is to head around the right hand, eastern side of the building.

Go around the right side of the train station
Once you get on the east side of the wall you’ll see an anomaly field beside the building. Luckily you can get inside without having to walk through any anomlies.
Though there will certainly be enemies roaming around the exterior of the wall, so take them down. Once the outside of the wall is clear of enemies you’ll see a gate leading inside the train station compound.

The gate leading into the compound on the east side
Be careful when going through this gate. Once you go through you’ll possibly be exposed to a Mimic Solider in the rafters inside the train station.
A lot of mimics hide up in the upper catwalks and on top of the train cards inside of the train station. So one or two might be able to see you and fire on you as you go through the gate.

Taking out a Mimic Soldier from the gate
Take that mimic out and any that might walk outside to try and support it. Once the coast is clear get out of the gate and go to the right, where there is a long building.
You could go straight inside the train station if you want, you’ll want to clear it out anyway, but there will be mimics on either side of the opening leading into it on this side.
There are a ton of mimics inside the train station itself, and if you want to even the odds in the fight you have a few options.
Clearing Out The Train Station
There is a puzzle of sorts to spawn the train which carries the artifact, and we’ll get to that soon, but the main obstacle to your success in the Kids Playground mission is definitely the large amount of firearm equipped mimics in and around the train station.
Just running in is risky and will likely end up with you getting mowed down from a hidden mimic up in a rafter or waiting in ambush by one of the entrances.
So let’s play this smart. Once you’re inside the compound go the train yard through another gate, just keep going around the train station the way you’ve already been headed after taking that right from the gate.

The Train Yard
There are some train cars scattered around, and most likely a few enemies around them.
Take those enemies out, so that any that are left will only be inside the train station. Keep in mind that there’s likely also a Rift around, and if that Rift is inside of the train station it will respawn enemies if you take too long.
Either way you have some time, so a good strategy to use to lure some enemies out of the train station is to make some noise outside, which you likely did when clearing the enemies out outside of the train station anyway.
This will cause some of them to come wandering out, which makes them much easier targets.

Try to draw some of the mimics outside if you can
So take out whatever enemies you can lure, and then when you’re ready to go outside take the entrance on the western most side of the train station.
This way in has the fewest enemies watching it, and has plenty of cover.
Always keep an eye on the ceiling as there will be a few mimics that hang out up there and shoot down at you when they can see you.
Your first target should be the Rift if you can hear it. Once you’re inside go from firing position to firing position, wait for the mimics to come to you, and if they don’t go a little deeper.
Make sure you stay healed and methodically clear out the train station. There will likely be enemies hanging out in the corners and platforms, especially near the huge hangar door on the east side of the building.
The easiest way to get taken down is to be ambushed while out in the open, so stay near cover and be ready to react.

A lot of mimics will be on top of train cars or in hiding up high
Grenades aren’t necessary but can be especially helpful in flushing enemy pockets out without having to expose yourself to them, though grenades aren’t extremely effective in Into the Radius, so they’re more useful as a tool to force enemies to change position than to actually destroy them.
Once the train station is clear of enemies worry about completing the mission. Regardless there are some good loot spawns in there, and clearing the place out makes it easy to take everything that you can. Luckily you won’t have to walk back to Vanno.
Kids Playground - Solving the Train Puzzle
The puzzle to spawn the ghost train and the artifact it carries is actually very easy, you might even do it by accident while fighting the mimics in the station.
It starts with a black statue of a child out in the trainyard near the bridge to the north of the train yard.
The first child statue
Touch the statue and you’ll get your first clue: “If the driver’s cab is red, point your flashlight straight ahead!”
This refers to the train right in front of the smaller of the two gates into the train station. You’ll see it’s light glowing red. Shine a Head Lamp or other flashlight at the red light and you’ll hear a click as it disappears.
That’s the first half of the puzzle.

The train with the red light
Once you’ve done that, you’ll notice another child statue inside of the train station in front of one of the gates leading into the train yard itself.
Touch this statue to get the second clue: “If the driver’s cab in green, point your light and you will win!”

The second child statue
This refers to a second train that is right beside this second child statue.
Just as with the first train shine a Head Lamp or other flashlight on to the green light and you’ll hear a click as it disappears.

The green train
Once you do that just walk back out to the train yard, and you’ll see a big black train that looks like a mimic version of a train right in front of the gate that we took to get inside of the train station, or rather the gate with the train that had the red light.
This is the “ghost train” that I mentioned earlier.

The train that appears when you solve the puzzle
When you get close you’ll also notice your detector beeping.
Climb up one of the ladders on to the train car and use your detector to uncover the artifact that is the goal of your mission.

Uncovering the artifact on the train. Turn it in to complete the mission
Now all you have to do is leave. You can go back the way you came, or you can stay on the train.
It will shortly begin moving down the tracks, towards the little green flag on the edge of your map that marks a path back to Vanno.
If you haven’t already taken this path back and unlocked it then I highly recommend you stay on the train. Though if you haven’t already cleared the bridge that it will go across of enemies then they will fire at you as you pass by.

Escaping on the train
Luckily the train makes for an excellent piece of cover, so the fight shouldn’t be so hard, and you can just wait until the enemies are next to the train before lighting them up.
Of course if you prefer you can also just make your way across the bridge normally. If your playstyle is more methodical then being forced to constantly move towards enemies might not be ideal.
Once you’re back in Vanno turn in the artifact and you’ve completed the mission.
Whether you take the train or not, make sure to come back and open up that route back to Vanno, as we’ll be using it in the next, and final mission of Into the Radius, which I’ll cover in our final Into the Radius VR walkthrough article.

Into The Radius Walkthrough And Guide - The Seventh Mission - A Farewell Feast
Stuck in Into The Radius? Wondering where to go and how to get there for your next mission?
Well don’t worry we’ve got you covered with this walkthrough and guide for Into the Radius VR.
Here we’ll be talking about the seventh Top Priority mission that you get in Into The Radius, A Farewell Feast, which is the first mission to bring you to Kolkhoz Zarya where you deliver some food to a house to retrieve a rare artifact.
Stuck in Into The Radius? Wondering where to go and how to get there for your next mission?
Maybe you would just like to see what is in store for you before you get there, or you’d like to know if you’re properly prepared for your next mission in the Pechorsk Zone.
Well don’t worry we’ve got you covered with this walkthrough and guide for Into the Radius VR.
In this Into the Radius walkthrough we’ll detail how to progress through the main story “Top Priority” missions, with a couple of guiding tips thrown in here and there to make your adventure smoother.
The focus of these walkthrough articles will be the story missions, but we’ll throw in some general gameplay tips and other useful loot locations near your objectives.
These articles will also assume you’re playing the game on the Normal difficulty mode with Tutorials turned on, which is highly recommended for your first playthrough. This walkthrough will still be useful if you’re playing on Realistic difficulty, but some details like vendor prices or enemy placement and numbers will be different.
Here is every article in our complete Into the Radius VR Walkthrough:
Into The Radius Walkthrough And Guide - The First Mission - Equipment Retrieval
Into The Radius Walkthrough And Guide - The Second Mission - Total Recall
Into The Radius Walkthrough And Guide - The Third Mission - Fixing A Leak
Into The Radius Walkthrough And Guide - The Fourth Mission - Flash In The Dark
Into The Radius Walkthrough And Guide - The Fifth Mission - A Probing Move
Into The Radius Walkthrough And Guide - The Sixth Mission - The Intrusion
Into The Radius Walkthrough And Guide - The Seventh Mission - A Farewell Feast
Into The Radius Walkthrough And Guide - The Eighth Mission - Kids Playground
Into The Radius Walkthrough And Guide - The Final Mission - Ouroboros
Here we’ll be talking about the seventh Top Priority mission that you get in Into The Radius, A Farewell Feast, which is the first mission to bring you to Kolkhoz Zarya where you deliver some food to a house and retrieve a rare artifact.
A Farewell Feast - Loadout
Since the previous mission, The Intrusion, you now have access to Security Level 4, and after completing A Farewell Feast you’ll also have access to Security Level 5.
Of course you’ll have to have completed several repeatable missions in between The Intrusion and A Farewell Feast, so you will be forced to make some additional money in the interim, but you don’t strictly need to have invested that money into any new Security Level 4 weapons to effectively tackle A Farewell Feast.
As you’ll see in this example loadout, Security Level 3 weapons will serve you just fine, and even they aren’t strictly necessary, though at a minimum a solid assault rifle like a NATO or AK series rifle is highly recommended.
As always what works best is up to you in terms of weaponry, but as always you should have a rifle and a sidearm at a minimum. YOu should also keep in mind that Kolkhoz Zarya is a little different from other maps.
Here you will be confronted with far more firearm wielding enemies than before, and far more wide open spaces.
Now more than ever having a weapon that is effective at long ranges is extremely helpful, though you’ll still want to be effective at close ranges for when you reach your objective or an enemy gets close to you quickly, like the Sliders that appear in Kolkhoz Zarya.
So with that in mind here’s our sample loadout for A Farewell Feast.

A sample loadout for A Farewell Feast
You’ll notice that unlike in previous missions we’ve got two rifles here, the AUG for medium to close range engagements and the Mosin Nagant for sniping at long ranges.
Bringing two weapons isn’t strictly necessary, and while it’s useful to have a sniper rifle and an assault rifle at the same time both will add a lot of weight to your loadout and make retrieving any rifles that you find in the radius more difficult.
Taking a long range scope for an assault rifle is also viable, if not as effective. Bringing just a long range rifle is also not a bad idea if you don’t mind relying on your handgun for close up fighting.
Staying quiet is also more useful than ever in Kolkhoz Zarya because of the unkillable BTR that roams around the map. So silencing your weapons, despite not being pictured above, is more recommended than ever before.
You may even want to invest in subsonic ammunition that is less effective, but extremely quiet.
The usual spare can of food and collection of healing items are also must haves, as well as spare ammunition, though you’ll notice we won’t need as much as in the previous Top Priority mission. While there will be some heavy fighting it won’t last for as long as in the more combat focused missions in Into the Radius. Still, bringing too much ammo is always better than bringing too little.
The most important thing to note here is that you won’t be needing a gas mask to complete this mission, and the large amount of food items in the bag.
That’s because you’ll need these food items to complete the mission, and you’d be hard pressed to find all of them out in the field, it’s easier to bring them along.
Here’s the complete list of what you’ll need, as seen on a note next to the objective.

The list of items you’ll need to complete A Farewell Feast
I highly recommend you bring all of these food items with you, while you can find some in the objective house and elsewhere in the village surrounding it, it’s better to be sure that you have everything you need the first time than be forced to make multiple trips.
If you’re short of any of these items then you can buy them in the “Food” category of the shop for food or “Combat Equipment” category for the Boom Grenades.
“Boom Grenades” just means explosive grenades, two of the RGD or F1 explosive grenades will do.
Oh, and make sure you’re bringing the right cans of food. The pineapple cans look a lot like the big beef cans, but have different text on the label. Large Beef cans are the beef cans that have a cow on the front and are as big as pineapple cans. The small cans with the orange label will not do, make sure they’re the large red cans with the cow on the label.
With all your gear collected accept the mission at the terminal and set off.

The mission briefing
A Farewell Feast - Getting to Kolkhoz Zarya
Luckily the most efficient path to Kolkhoz Zarya is one we’ve already passed by many times in previous Into the Radius walkthroughs, and so you should be familiar with it by now.
Take the rope line leading out to Bolotky Village, and immediately head north through the village to the path leading to Kolkhoz Zarya at the end of the train tracks.

The route to Kolkhoz Zarya
There will be a few enemies as always, especially at the tanker next to the rope line, but they should be child’s play for you at this point in the game.
Just avoid the Web Anomalies in the woods as always, and try not to leave any enemies next to the rope line that might surprise you on your return trip.

The rope line leading to Kolkhoz Zarya
Before you head into Kolkhoz Zarya make sure you’re healthy, fed, and your magazines are topped up.
Kolkhoz Zarya - Getting To The Farewell Feast
Once you arrive in Kolkhoz Zarya you’ll be greeted by the imposing sight of the train station right in front of you.

The train station
Luckily we won’t be headed into there yet, that’s for a later mission. For now we will be avoiding combat as much as possible.
Take a look at your map, here’s the route we’ll be taking today.

The route to the house containing the objective for the A Farewell Feast mission
As you can see the objective is in the village that dominates the south eastern part of Kolkhoz Zarya, and luckily we can avoid the wide open spaces in the center of the map to get there by immediately turning south and skirting along the edge.
As you make your way through the trees you’ll find yourself passing a huge anomaly field and abandoned power substation. You’ll see some enemies in the distance.
Luckily being very far away from enemies means they are unable to notice you, so just keep going as long as they don’t get close enough to spot you.

Walk over this hill and avoid enemies
Once you’re past the power substation you’ll see the trees on the other side of the hill.
Past those trees is a small road, and on your right you’ll see some ruined houses.

Past these trees is the road leading to the village
On the left, where the road reading past the houses reaches the edge of the map, is a broken rope line that leads to Pobeda Factory. When you get down there you might as well take it to unlock the route and have it show up on your map.
Regardless of whether you do or don’t, you will definitely run into some enemies as you go down the hill and into the trees.
Since this is Kolkhoz Zarya anything is possible here. There may be Sliders, the usual Seekers, Fragments, and Spawn, and likely at least one enemy equipped with a gun like Mimic Hunters or Mimic Soldiers.
Clear your way through them and follow the road towards the village. Here is an especially good opportunity to have a long ranged weapon, as there will be a Mimic Sniper on top of the roof of one of the houses next to the river.

The edge of the village with the Mimic Sniper circled
It’s better to take them out at range, as crossing the bridge to get closer means allowing the sniper to take many shots at you while you have no cover to hide behind and heal.
So this bridge and the open ground on either side of it are really dangerous, especially because of the BTR, which roams around Kolkhoz Zarya.
If there’s a lot of noise, or you’re just unlucky enough for it to be nearby, the BTR can park itself nearby and hit you hard as you try to cross this bridge. So if you hear engine noise just hang tight in a building and wait for it to go away.
However you get to the village, it’s recommended that you take cover in a building right as you get there, but be careful, because just like the village in Bolotky, this one is choked full of enemies.

The fight in the village is tough, but short
You’ll hear them walking around, or coming towards you. Just like in Bolotky Village the best course of action is to find a defensible position and let them come to you.
If they don’t come to you then make some noise, perhaps with an unsuppressed weapon, and they’ll come right for you.
So get yourself a little breathing room, and while there are a fair amount of enemies in the village it’s nothing you can’t handle, though those enemies will be tougher varieties than you might be used to fighting in such large numbers. Make sure you don’t run out of ammunition in your magazines.
As you can see on your map you’ve made it to the objective. Go to the house marked on it, which is the one closest to the bridge that the sniper was standing on, and you’ll see a bunch of black statues gathered outside.
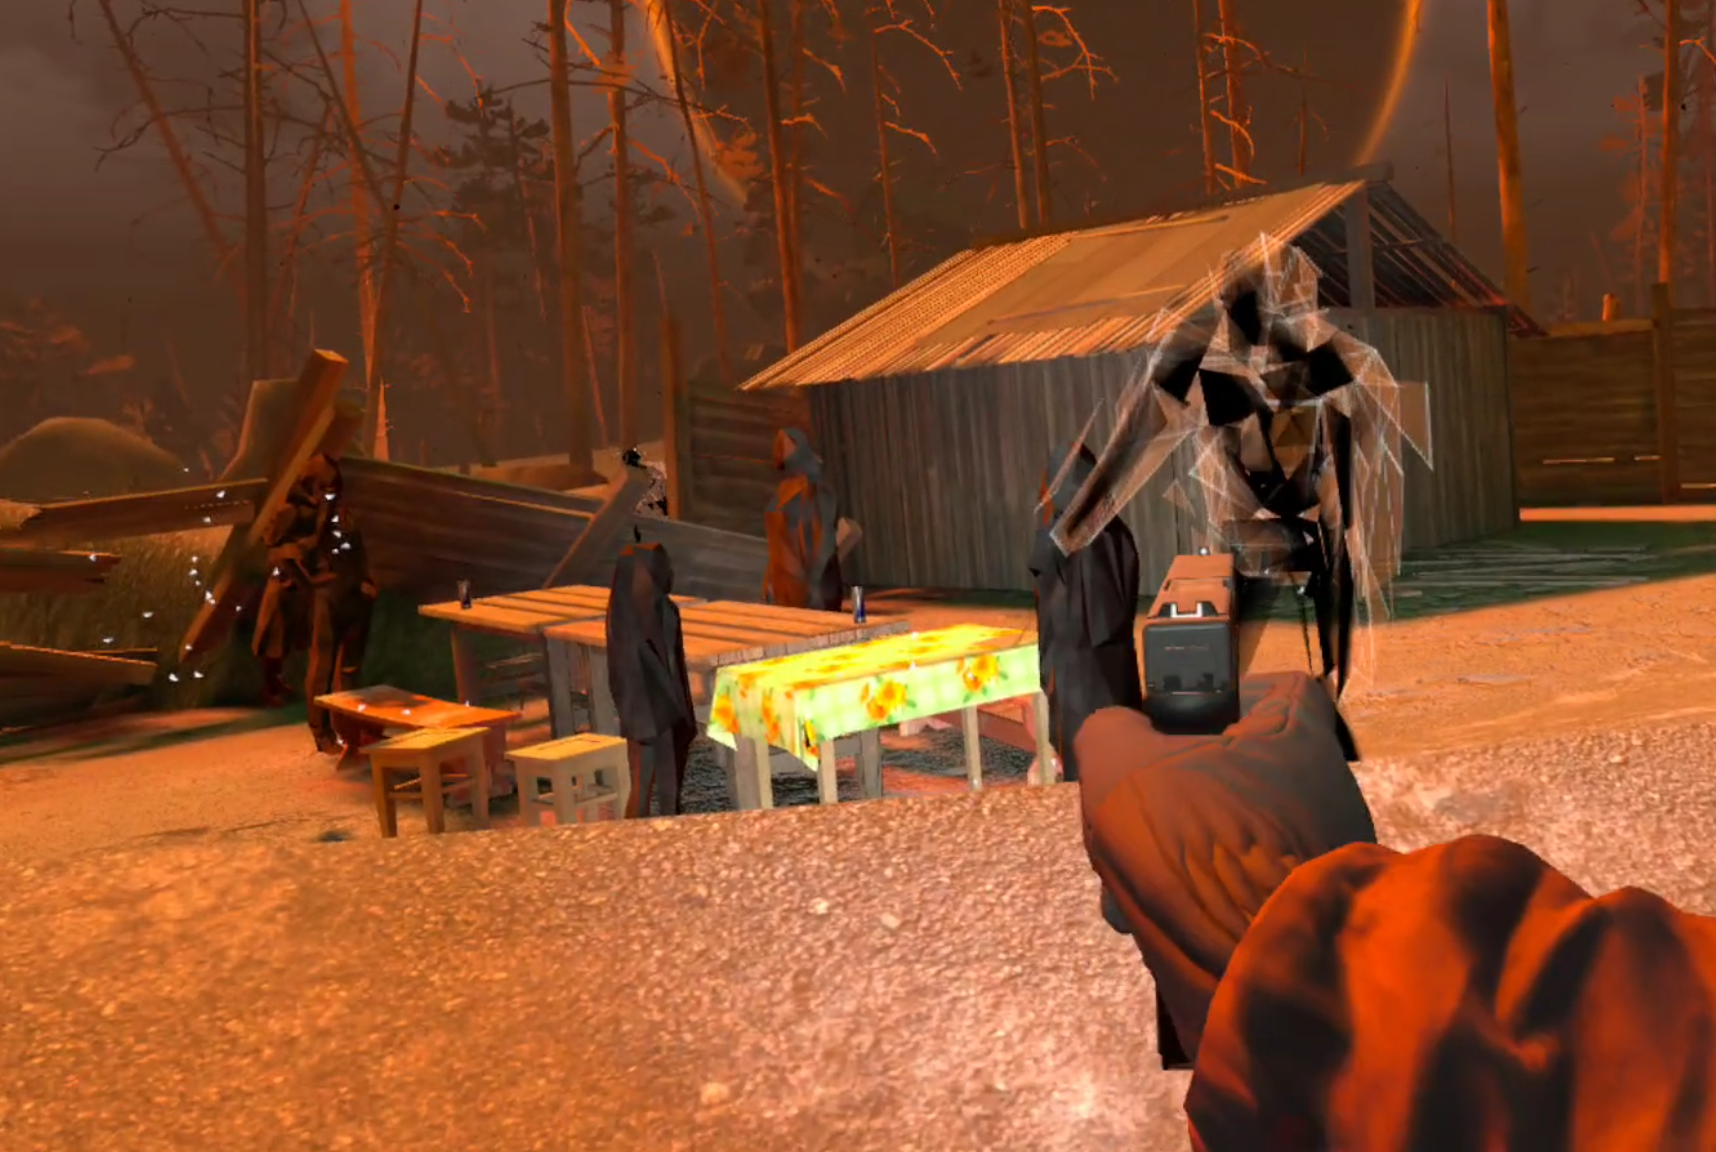
There are a lot of black statues around the house with the objective
There’s a few scattered around that you can touch for dialog, but to complete A Farewell Feast you need to head inside the house itself.
Completing A Farewell Feast
Once you’re in the house there’s not much left to do before you’ve completed this Into the Radius mission.
Take a look in the corner next to the windows, you’ll see a table with a red tablecloth.

The table with the red tablecloth
Now take all of the items off of the list and put them on top of that table.
Once all of the items are on the table they will disappear before a loud noise and an explosion. Then your detector will start beeping.
Use the light on your detector to reveal an artifact now hovering above the table, just like revealing any other artifact as you’ve done many times by now.
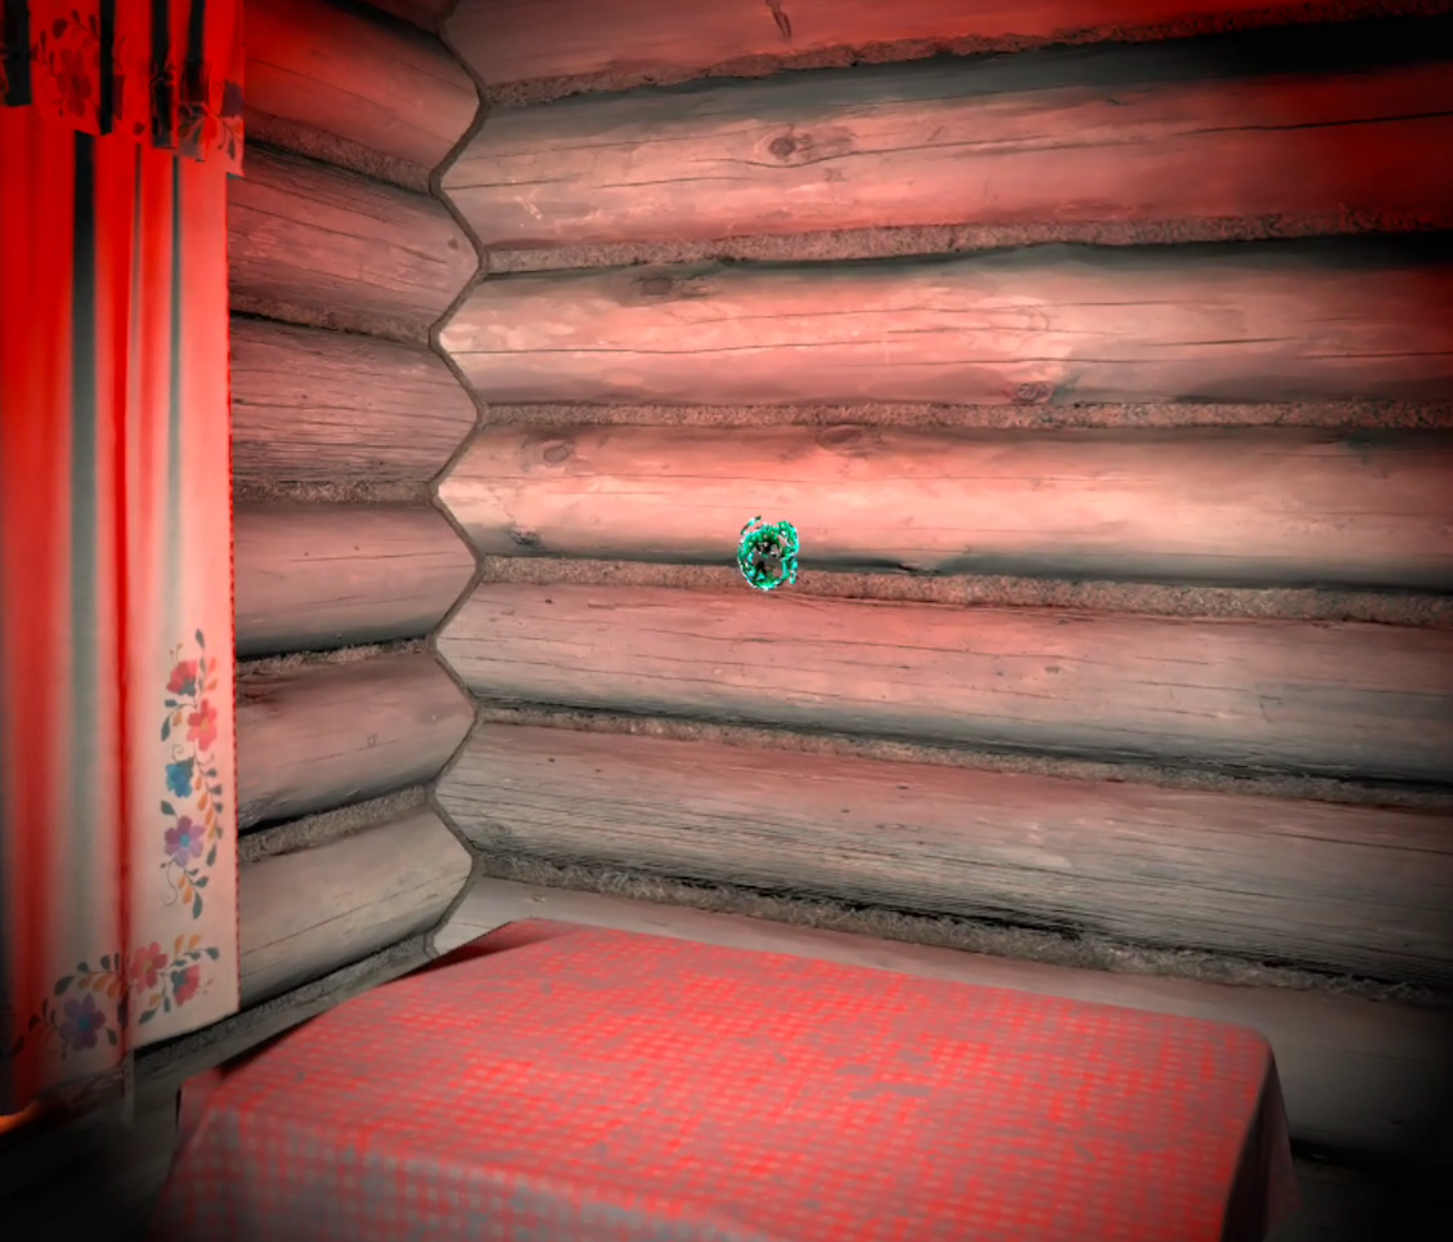
The artifact that appears after adding the items to the table
Take the artifact and then retrace your steps back to Vanno.
Normally this would be simple, but the BTR may complicate your way back. Just remember that if the BTR is blocking your path just wait in cover where it can’t see you until it goes away.
Buildings are the best places to hide from the BTR.
Anyway once you get back and turn in the artifact congratulations! You’re now Security Level 5, the highest Security Level in the game.

Security Level 5 achieved
You now have access to every single piece of equipment in Into the Radius, which is good because you’ll need them to complete the final two missions of the game.
Next time we’ll be talking about one of those in the eighth Top Priority mission in Into The Radius in Part Nine of our Into The Radius VR Walkthrough.