


Into The Radius Walkthrough And Guide - The Final Mission - Ouroboros
Stuck in Into The Radius? Wondering where to go and how to get there for your next mission?
Well don’t worry we’ve got you covered with this walkthrough and guide for Into the Radius VR.
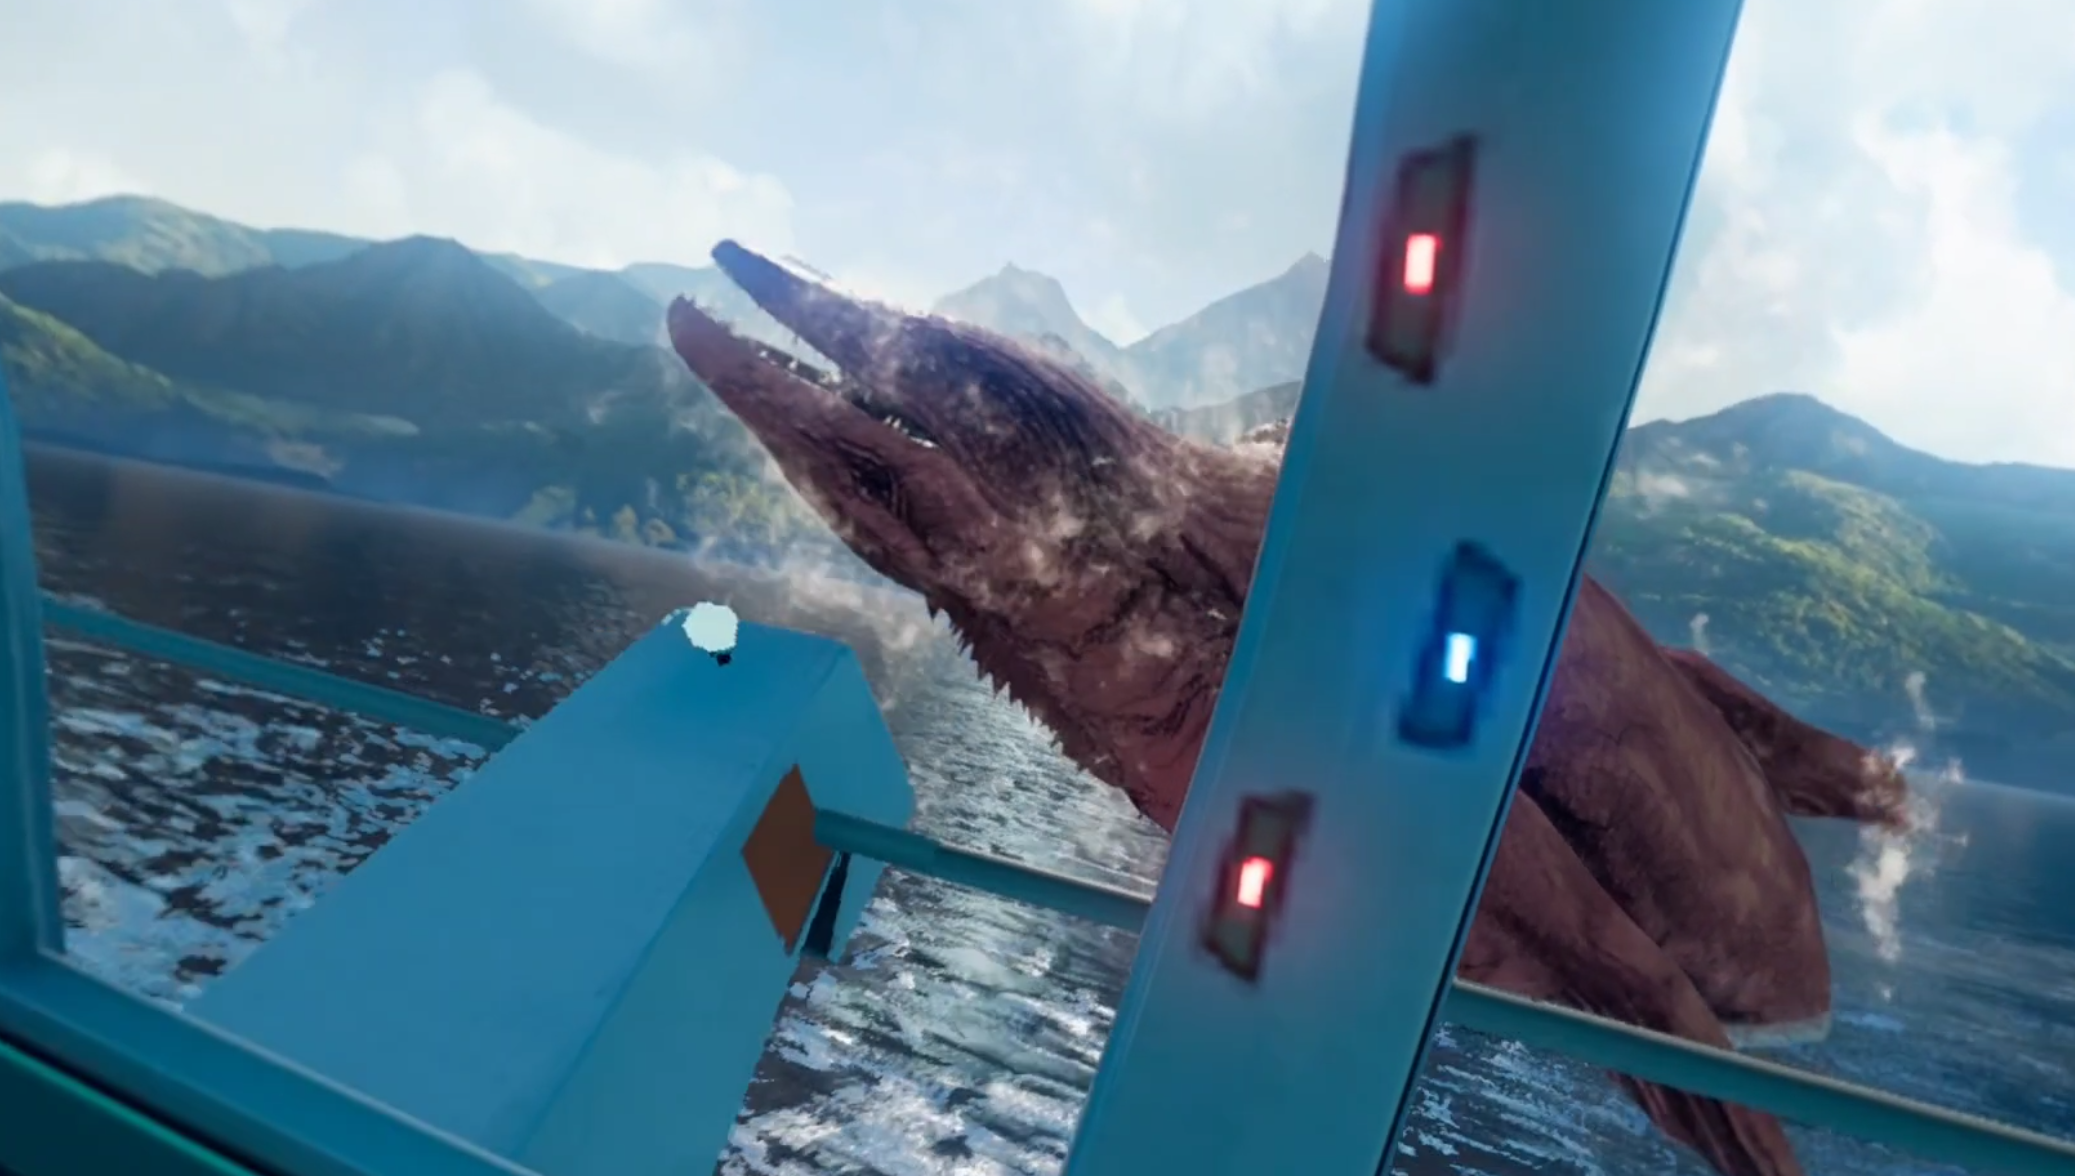
Here we’ll be talking about the final mission of Into The Radius, Ouroboros, which brings you to Pechorsk Castle to get some answers, and more mysteries, at the center of the Radius. Ouroboros is the final Top Priority mission of this game, and the most illuminating and difficult of all of them.
Stuck in Into The Radius? Wondering where to go and how to get there for your next mission?
Maybe you would just like to see what is in store for you before you get there, or you’d like to know if you’re properly prepared for your next mission in the Pechorsk Zone.
Well don’t worry we’ve got you covered with this walkthrough and guide for Into the Radius VR.
In this Into the Radius walkthrough we’ll detail how to progress through the main story “Top Priority” missions, with a couple of guiding tips thrown in here and there to make your adventure smoother.
The focus of these walkthrough articles will be the story missions, but we’ll throw in some general gameplay tips and other useful loot locations near your objectives.
These articles will also assume you’re playing the game on the Normal difficulty mode with Tutorials turned on, which is highly recommended for your first playthrough. This walkthrough will still be useful if you’re playing on Realistic difficulty, but some details like vendor prices or enemy placement and numbers will be different.
Here is every article in our complete Into the Radius VR Walkthrough:
Into The Radius Walkthrough And Guide - The First Mission - Equipment Retrieval
Into The Radius Walkthrough And Guide - The Second Mission - Total Recall
Into The Radius Walkthrough And Guide - The Third Mission - Fixing A Leak
Into The Radius Walkthrough And Guide - The Fourth Mission - Flash In The Dark
Into The Radius Walkthrough And Guide - The Fifth Mission - A Probing Move
Into The Radius Walkthrough And Guide - The Sixth Mission - The Intrusion
Into The Radius Walkthrough And Guide - The Seventh Mission - A Farewell Feast
Into The Radius Walkthrough And Guide - The Eighth Mission - Kids Playground
Into The Radius Walkthrough And Guide - The Final Mission - Ouroboros
Here we’ll be talking about the final mission of Into The Radius, Ouroboros, which brings you to Pechorsk Castle to get some answers, and more mysteries, at the center of the Radius. Ouroboros is the final Top Priority mission of this game, and the most illuminating and difficult of all of them.
Ouroboros - Loadout
Congratulations, you’ve made it to the final mission of Into the Radius! Get ready for the hardest fighting in the most difficult map of the game. More than ever being properly prepared is important and will help you win.
This mission brings you to Pechorsk Castle, which has a variety of indoor and outdoor areas. As you make your way through the inside and outside of Pechorsk Castle, you’ll be fighting a lot of enemies in both very close quarters, and once or twice from far away. So it’s best to be prepared for a lot of close range, and some long range combat.
There will be a smattering of all of the enemies you have encountered so far like Fragments, Spawn, Seekers, and Sliders. Though most dangerously of all you’ll be coming up against a lot of heavily armed and armored Mimics like Mimic Soldiers, Mimic SWAT, and Mimic Snipers.
The automatic weapons they’ll be using are very effective and if you aren’t careful can take you down in a few short bursts at close range, so it’s best to arm yourself with weapons that are capable of taking down Mimics very quickly.
So more than anything rifles that hit heavily and have a decent rate of fire are recommended like the FN 17 “SCAR” that you can see in this example loadout. They can hit enemies at medium and long ranges with some skill and patience, and also offer more than enough firepower for close ranged fighting.
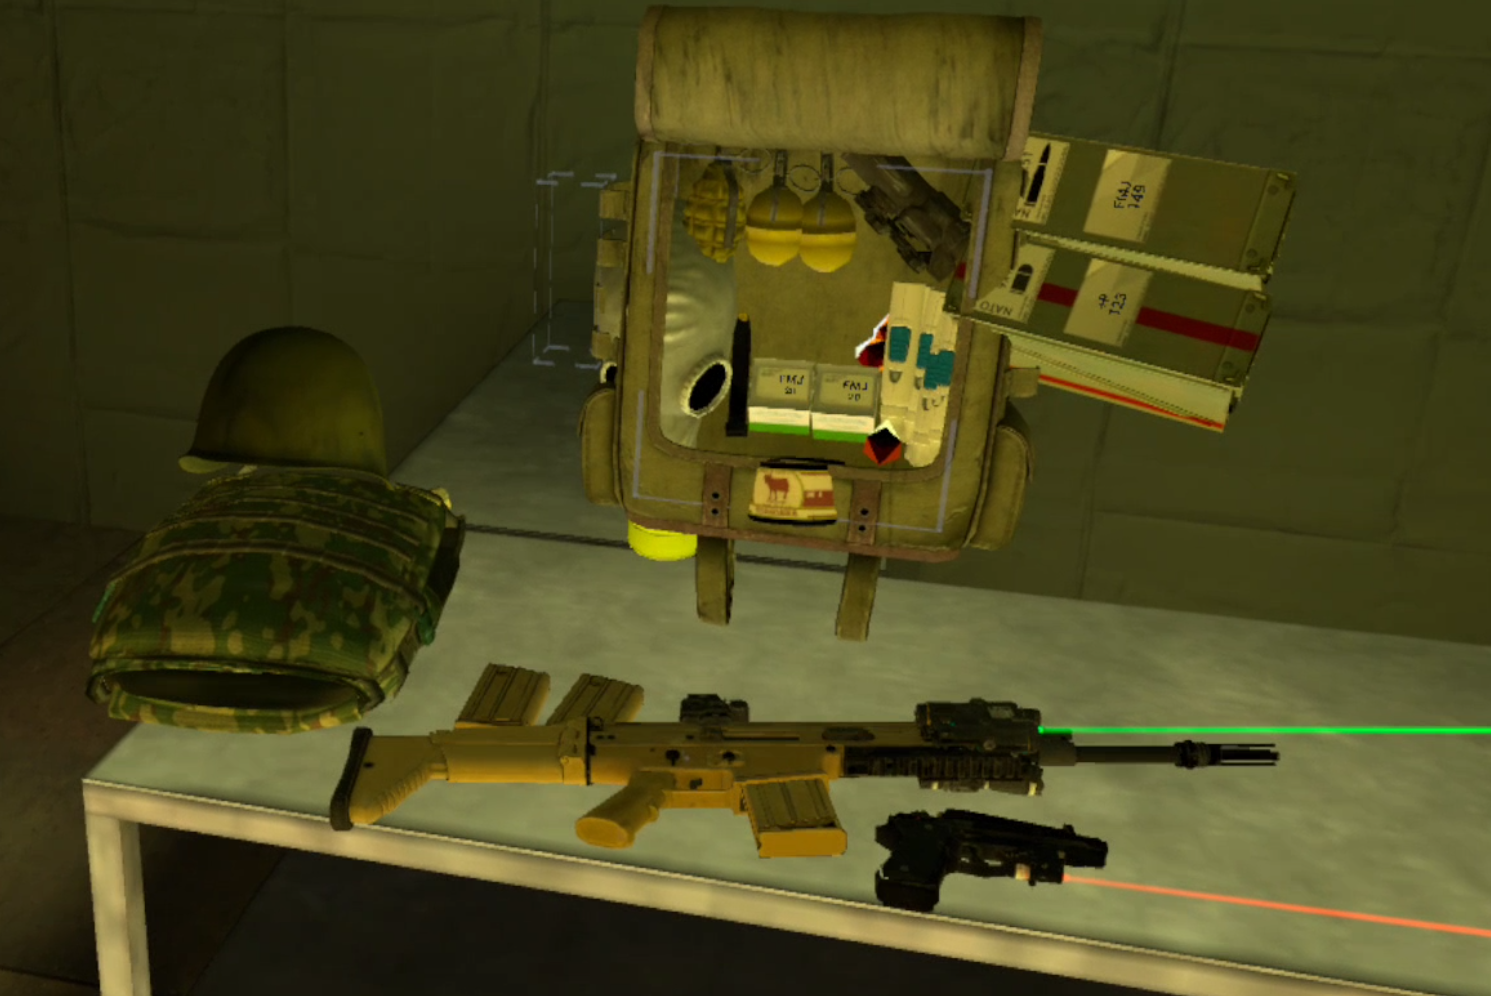
A sample loadout for the last Into the Radius mission
This is the final mission and so there’s no need to spare any expense on your equipment. A good sidearm is also very useful in the close quarters fighting you’ll be doing inside of the castle, preferably with a laser pointer for easy aiming as well.
Having a good pistol to quickly switch to if your main gun runs dry is more helpful in the final mission than anywhere else, and more likely to happen and save your life. While I used the M9 in this sample loadout, which is an all around very reliable and hard hitting pistol, you may want to use the extremely heavy hitting Desert Eagle, or something that can fire automatically like the OC-33.
It’s also not a bad idea to bring two long arms, one for up close and medium ranges, and another for longer ranged shooting. Though you don’t necessarily have to have a sniper rifle with you it can be helpful, and you can always keep a longer ranged optic in your pack to swap on to your rifle, as you can see in the top right hand corner of the backpack in the example loadout.

Upgrading an M9 before heading out on the final mission
You also might want to upgrade what weapons you do bring with you if you can afford it, and adding attachments like optics or lasers if you haven’t already can be extremely helpful.
More than anything else make sure you have a lot of healing items like Healing Injectors and Regen artifacts. Bring more than you think you’ll need. In this mission one wrong step can drain most if not all of your health pool.
Also invest in the best possible ammunition for whatever weapons you are bringing, and bring at least a whole crate of it. As always healing items and ammunition are the number one thing that might force you to quit and turn back. So go ahead and get the best, and have a lot of it.
A little food is a good idea to have, though you’ll find more in various loot areas inside the Castle, and you will definitely want to bring your Gas Mask. While not strictly necessary it will make some of the anomaly fields in the exterior of the castle a lot simpler to navigate and survive.
You’ll also notice that I brought a few grenades. While not necessary they can be useful in flushing out Mimics that are waiting to ambush you in the next room, and so they’re worth having a few of just in case.
You’ll also notice in this loadout that there aren’t any silencers or subsonic ammunition. Unlike in other missions stealth isn’t very useful in Ouroboros, as your enemies will generally be right in your path and impossible to avoid, so don’t bother, this will be a loud mission.
Of course the usual Head Lamp, Detector, Probes, and melee weapon of some sort are necessary as well. Make sure all of your equipment is fully repaired and loaded before you head out. Don’t spare any expense, you’re about to finally enter the center of the radius and master it.
The Last Mission - Entering Pechorsk Castle
As always accept the mission at the terminal before heading out. You’ll see that you’re in for a challenge as the briefing ominously indicates. Don’t worry, you’ll be alright.

The briefing for the last mission of Into the Radius. Combat Training will definitely be required.
Once you do head out of the gate, double check your gear, and take the left most rope line out, which leads to Kolkhoz Zarya.
Once you find yourself in Kolkhoz Zarya take a look at your map and get your bearings.

The path from Kolkhoz Zarya to Pechorsk Castle
Luckily you won’t have to go far to get to Pechorsk Castle, though there will be some enemies and anomalies in your way.
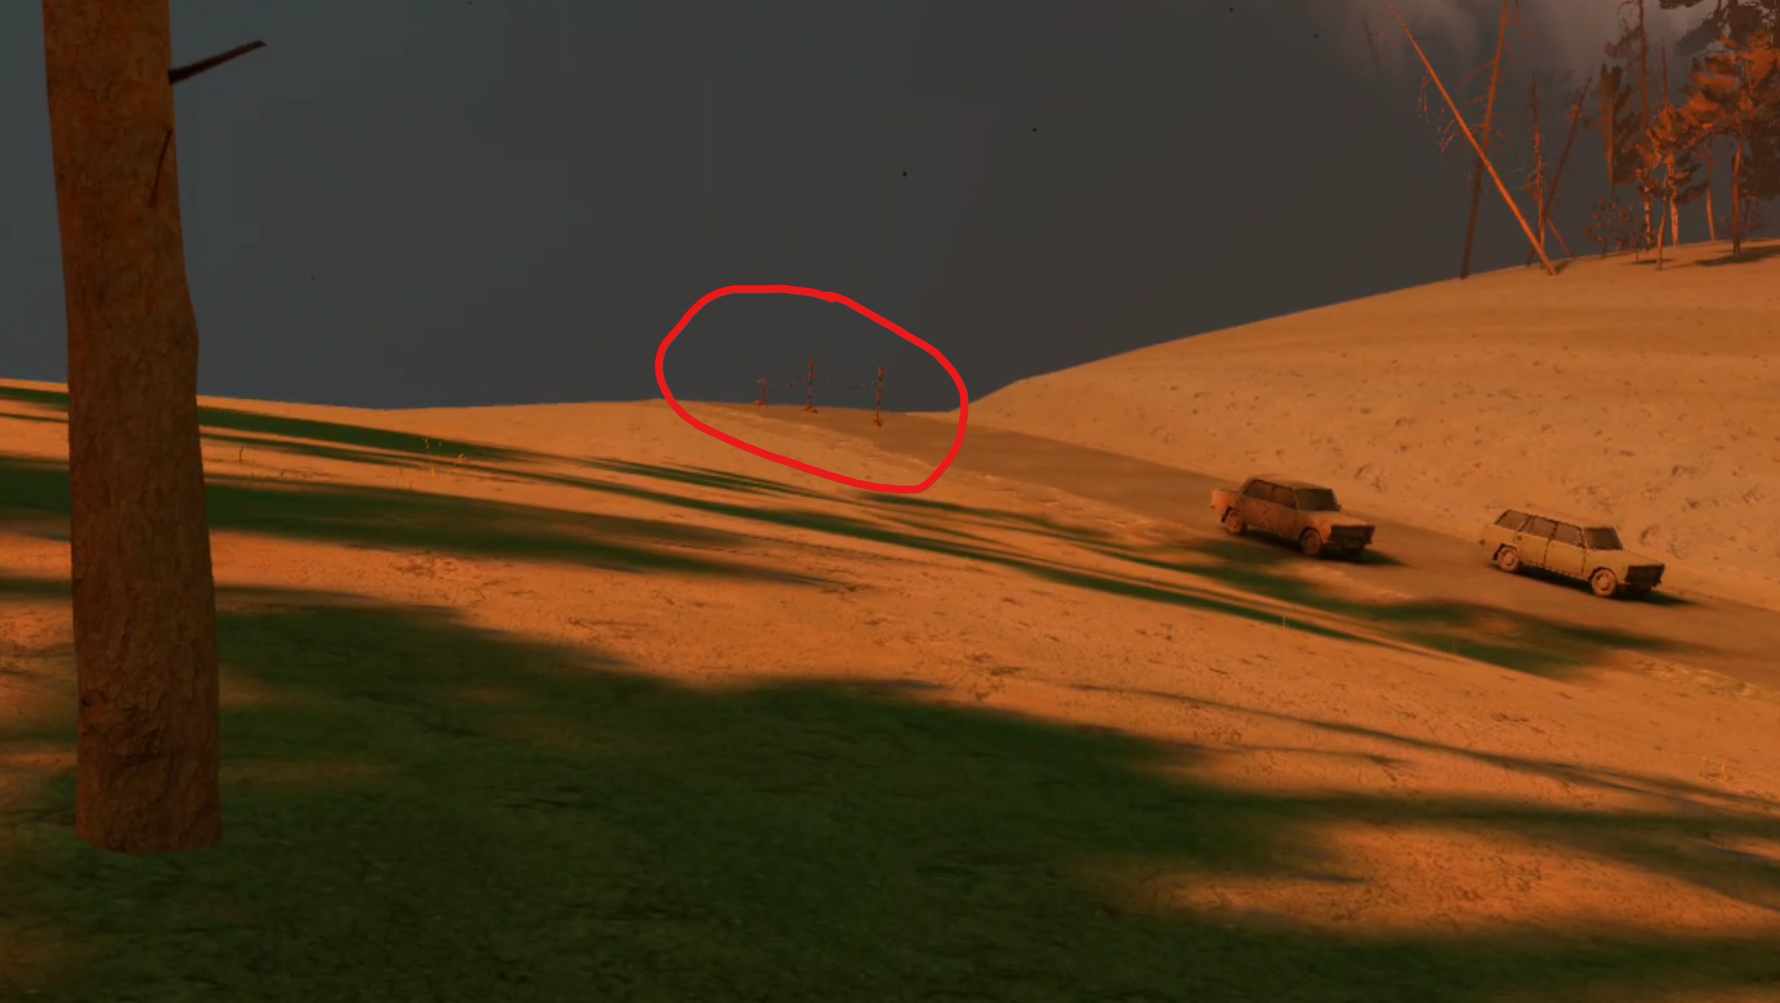
You can head straight down the railway in front of you towards the bridge and fight your way through the Mimics that patrol by the bridge before taking a left down the road.

The Mimics guarding the bridge. You can sneak past them by going through the woods.
You can also go left off of the railway down the embankment, swim through the water, and skirt around the anomaly field in the trees to avoid those mimics if you like. Either way you should be very prepared for a fight if there is one, and these few enemies will be the least of your worries.
However you get there, enter the rope line heading to Pechorsk Castle.
The rope line leading to Pechorsk Castle, the final map of the game
Once you’re through to Pechorsk Castle you’ll see a large house ahead of you, and hear a lot of Stomper Anomalies around. Just head towards the house, eliminating the few Fragments and Spawn that might see you on your way towards the castle.
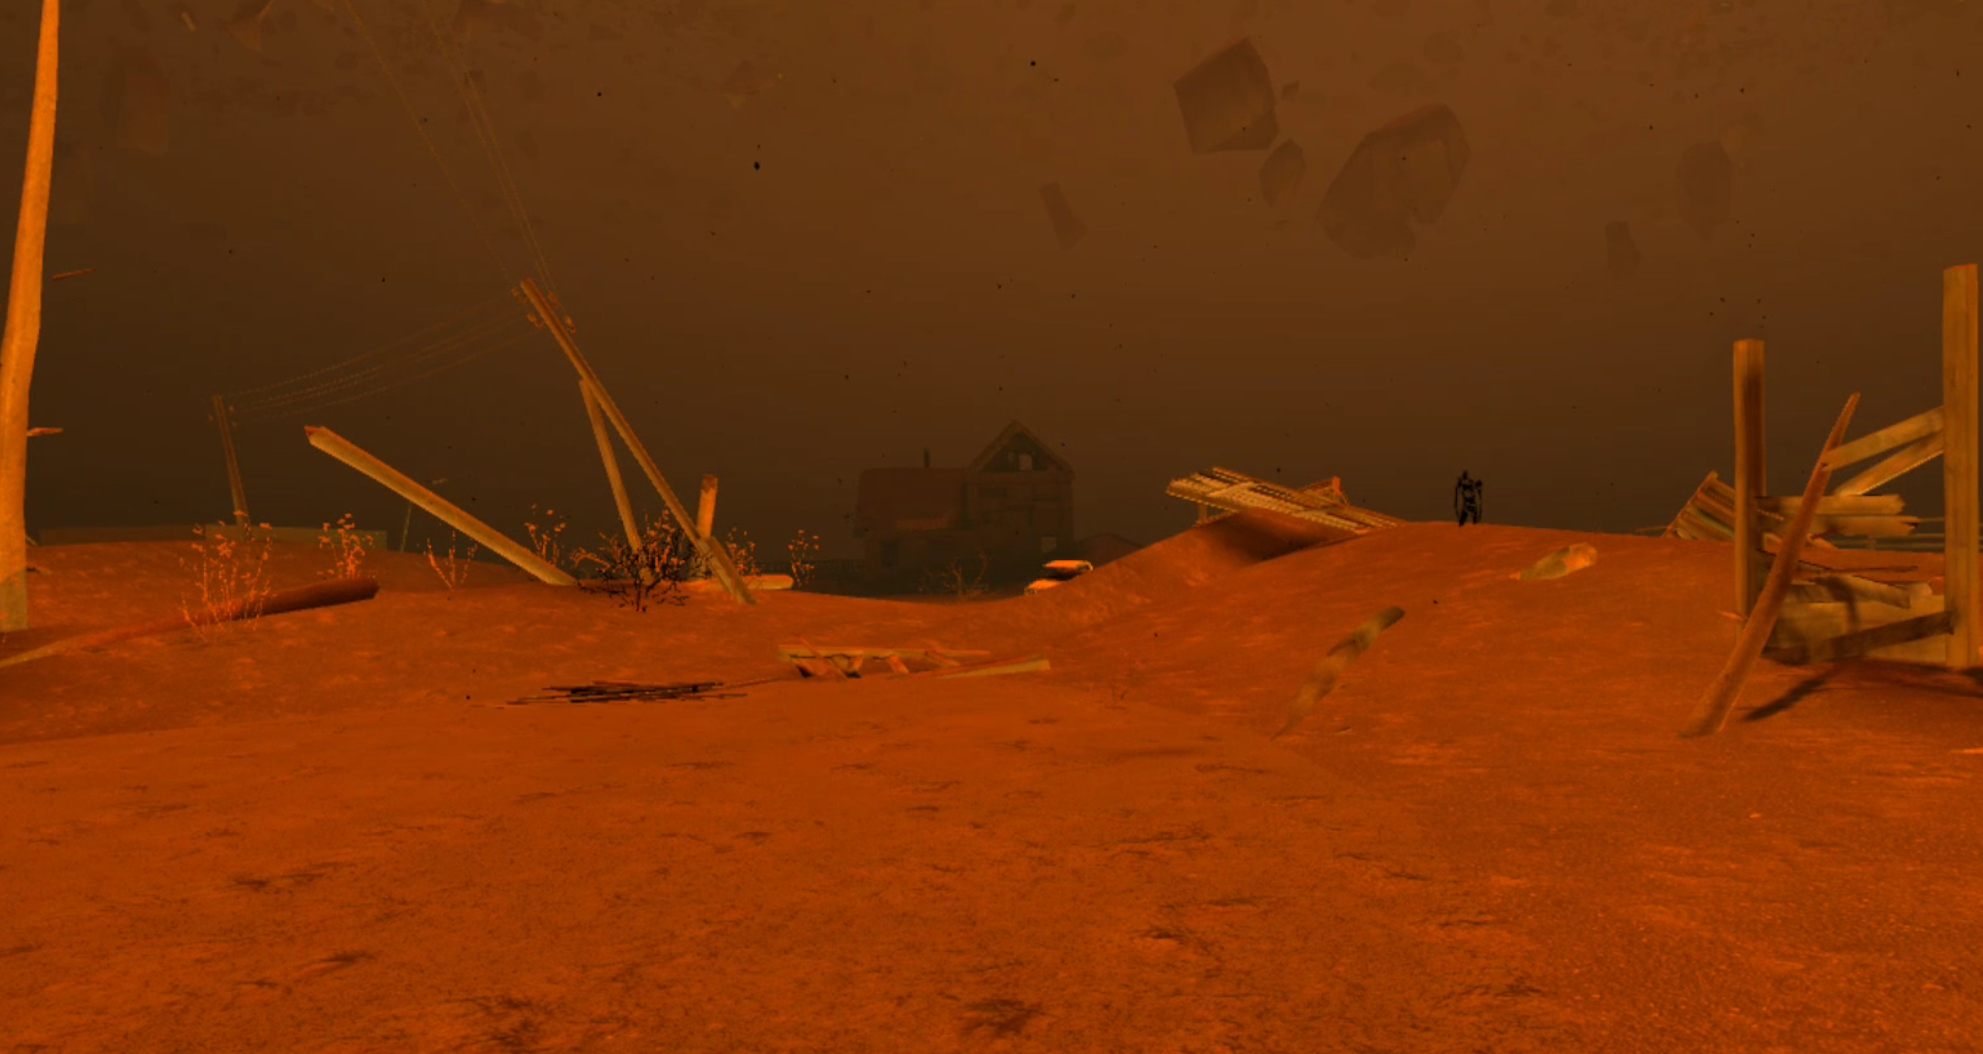
Head towards the house, and you’ll see the bridge heading into the castle right past it
You’ll soon see the castle ahead with a bridge leading to it.
As usual during a Top Priority mission you’ll also see the white form of friend Katya standing near the bridge. Touch her to get some more story details before you head inside.

Katya once again waits for you
Then double check and make sure you’re completely ready. Load your magazines, and make a save if you’re not playing in Ironman mode.
When you look from the end of the bridge towards the castle entrance you’ll see that the gate is open and the way in. The orb that has always stood in the center of the radius is just above you.
It’s time to complete the final mission of the game and discover what is at the center of the zone. Here’s where things get heavy.

Fighting Through The Castle
Take a glance at your map, while it won’t be as useful here as in other missions, this is the approximate route we’ll be taking through the castle.
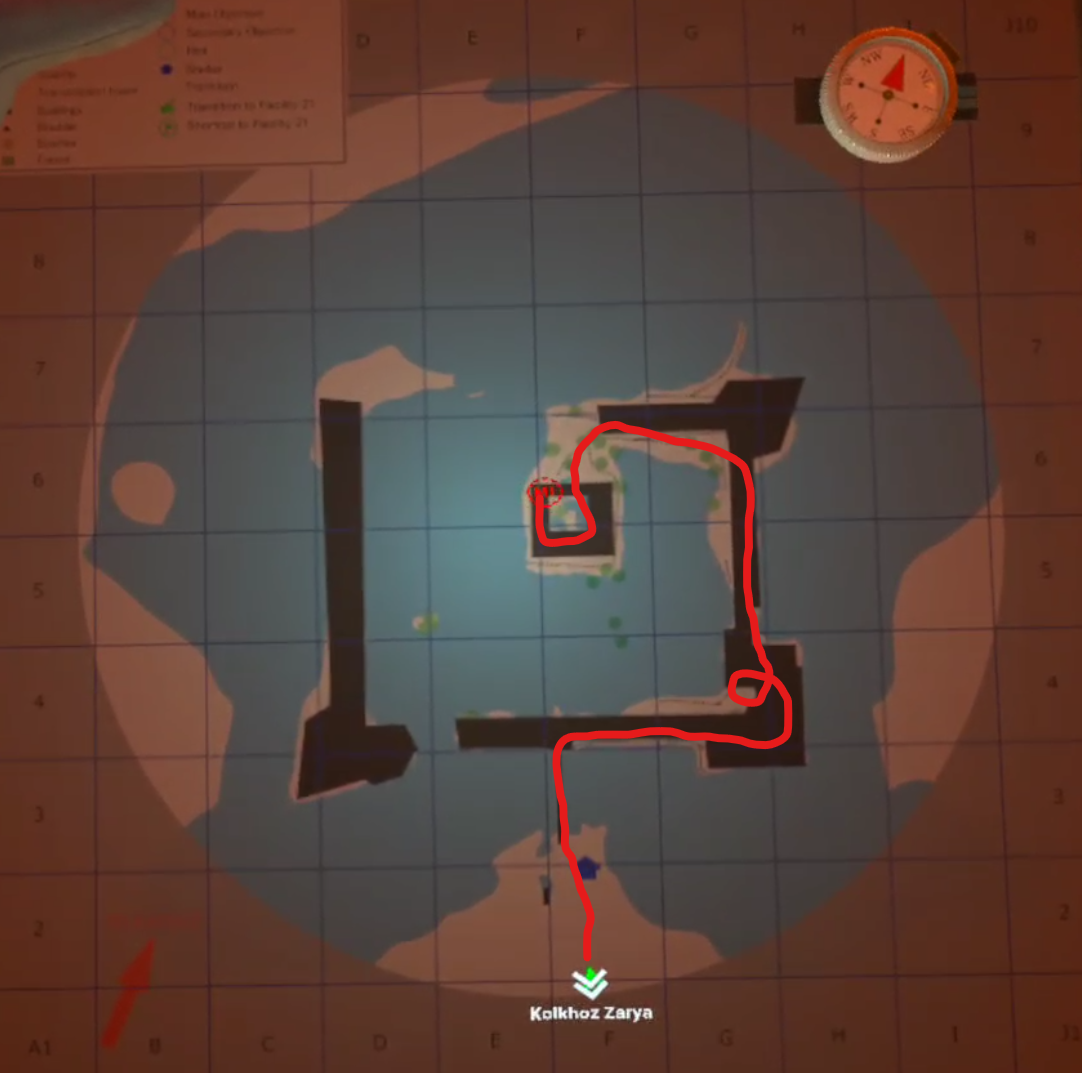
The route through the Castle for the Ouroboros mission
It’s pretty linear, so you’ll have a hard time getting lost even if you tried.
Steel yourself and walk across the bridge. You’ll hear a lot of enemies inside, and a stray Mimic or Spawn might greet you by coming through the gate and attacking, so keep an eye on it and your weapon drawn as you approach.
Though if you decide to go down the dirt path directly to the right of the gate you can follow it past the walls and find a grate with a dead soldier in front of it and a small stash of Saiga 12 magazines and shotgun slugs.
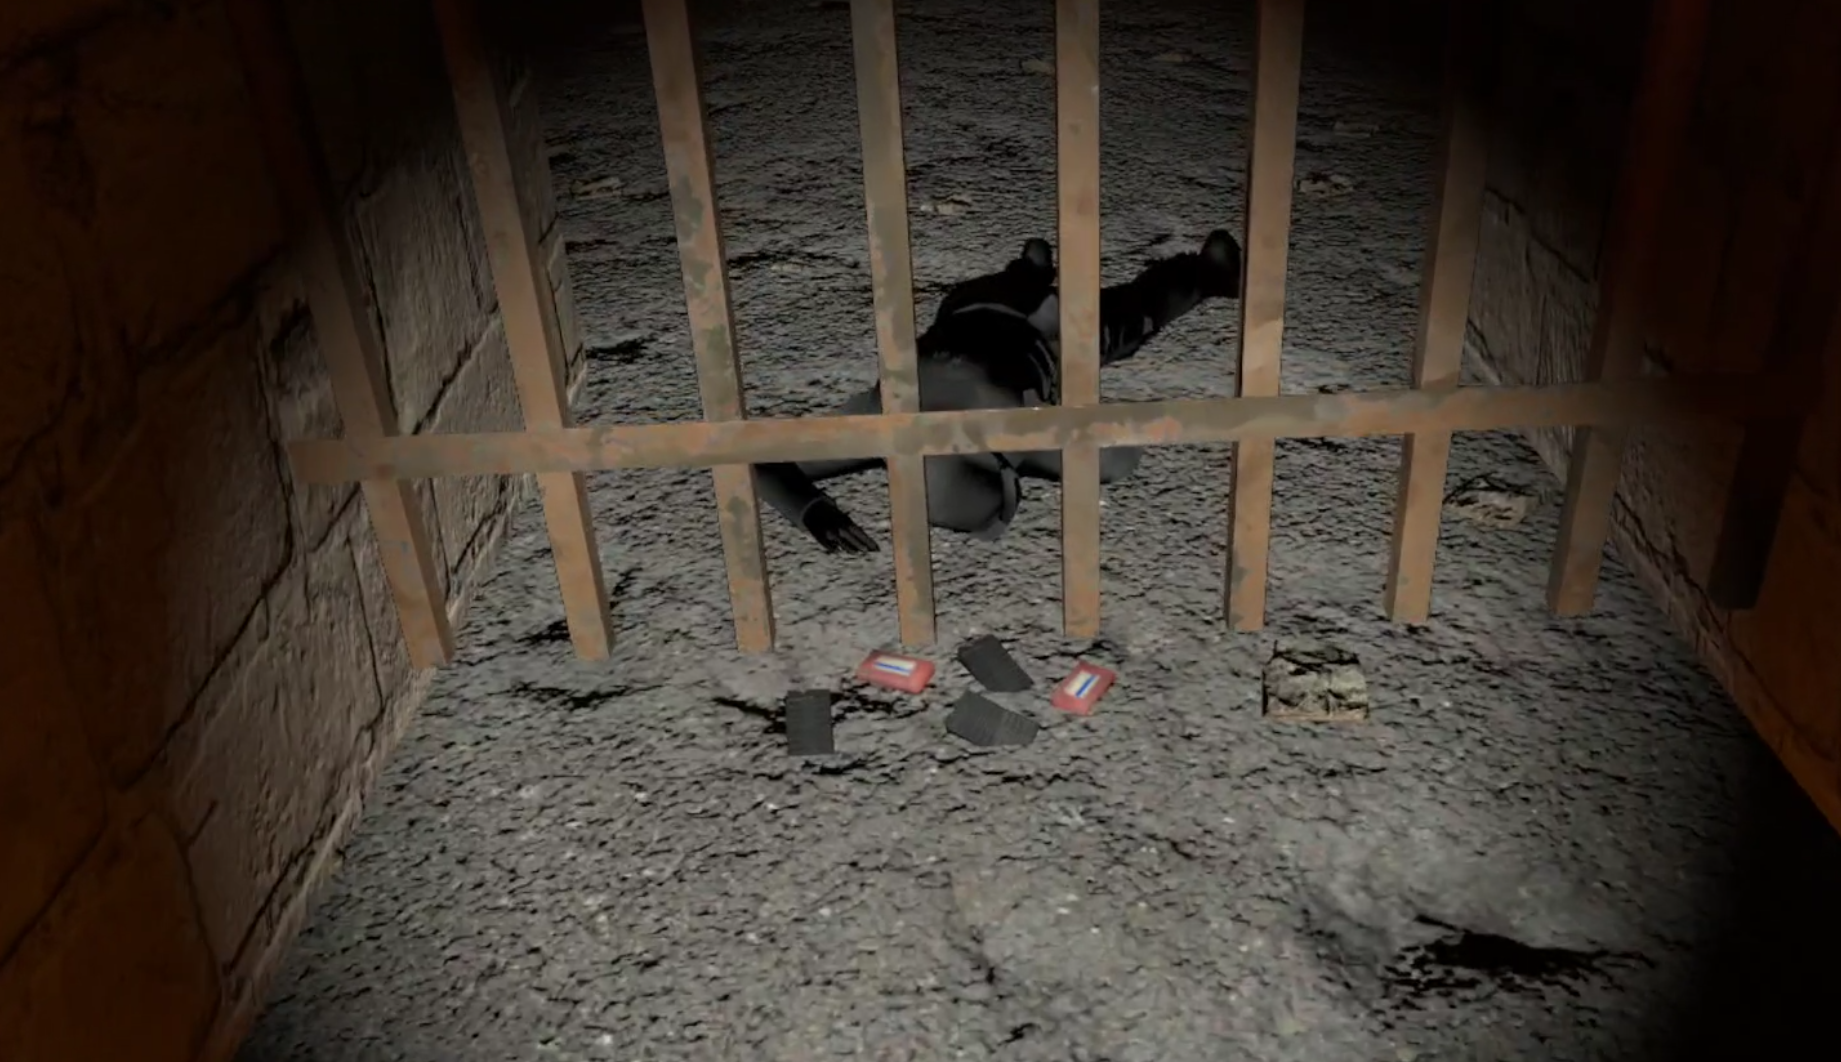
A small stash of Saiga 12 magazines and shotgun slugs
Go out of your way to pick them up or don’t, it’s up to you, and you can always get them later inside the castle. Either way there’s no way through around the side, you have to go through the front gate.
From here on out be ready for enemies around every corner.
Through the gate you’ll see a dark version of Katya, who you can touch for some more story dialog. You’ll be seeing her periodically throughout the Castle, and there will also be other black statues that you can touch for some extra lore.
I won’t be pointing all of them out here, from now on we’ll focus on fighting your way through to the end. There are also numerous crates and small side areas throughout the castle that you’ll find with a ton of loot. Since this is the final mission of the game we won’t be focusing much on looting in this walkthrough guide either, and will be focusing on getting you into the central keep and completing the game.
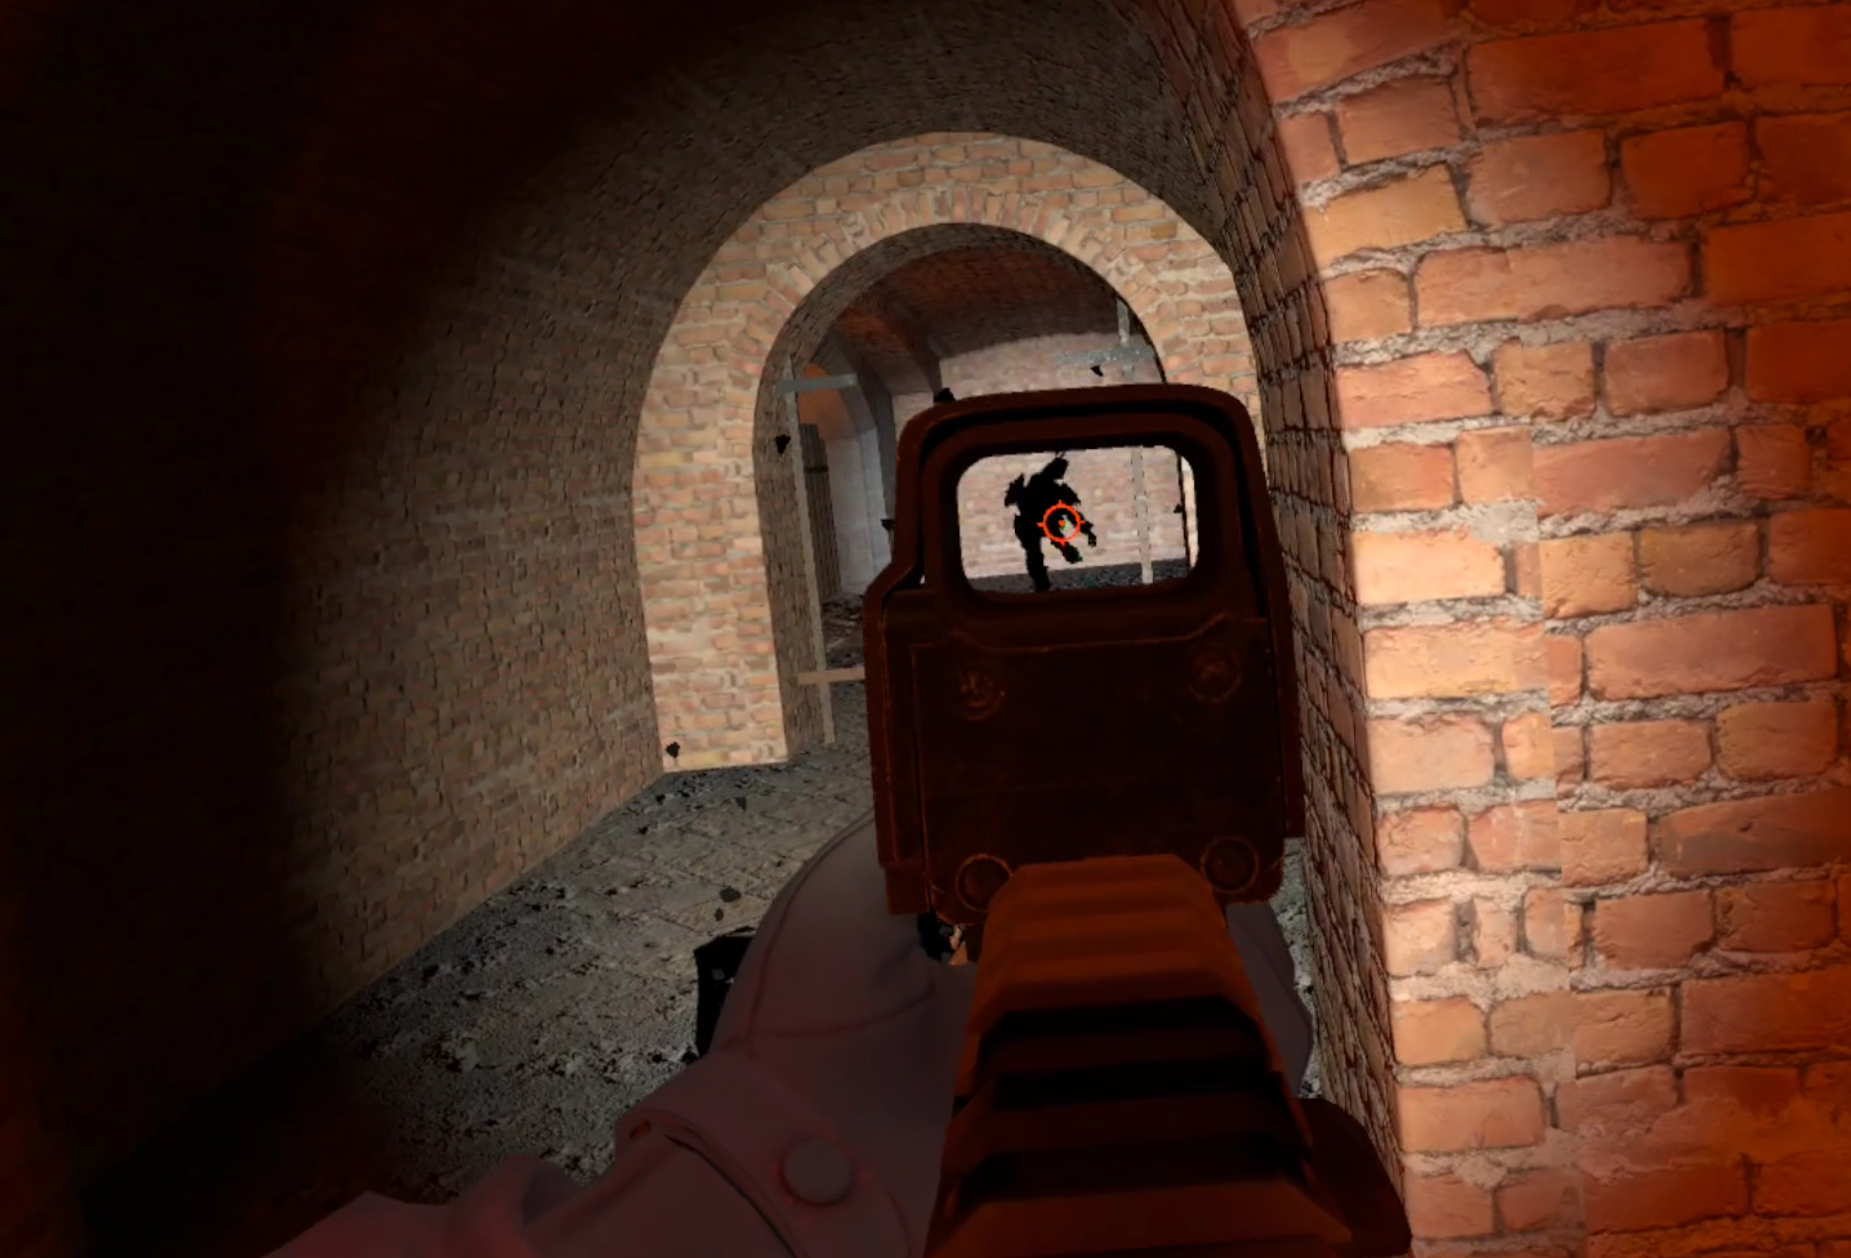
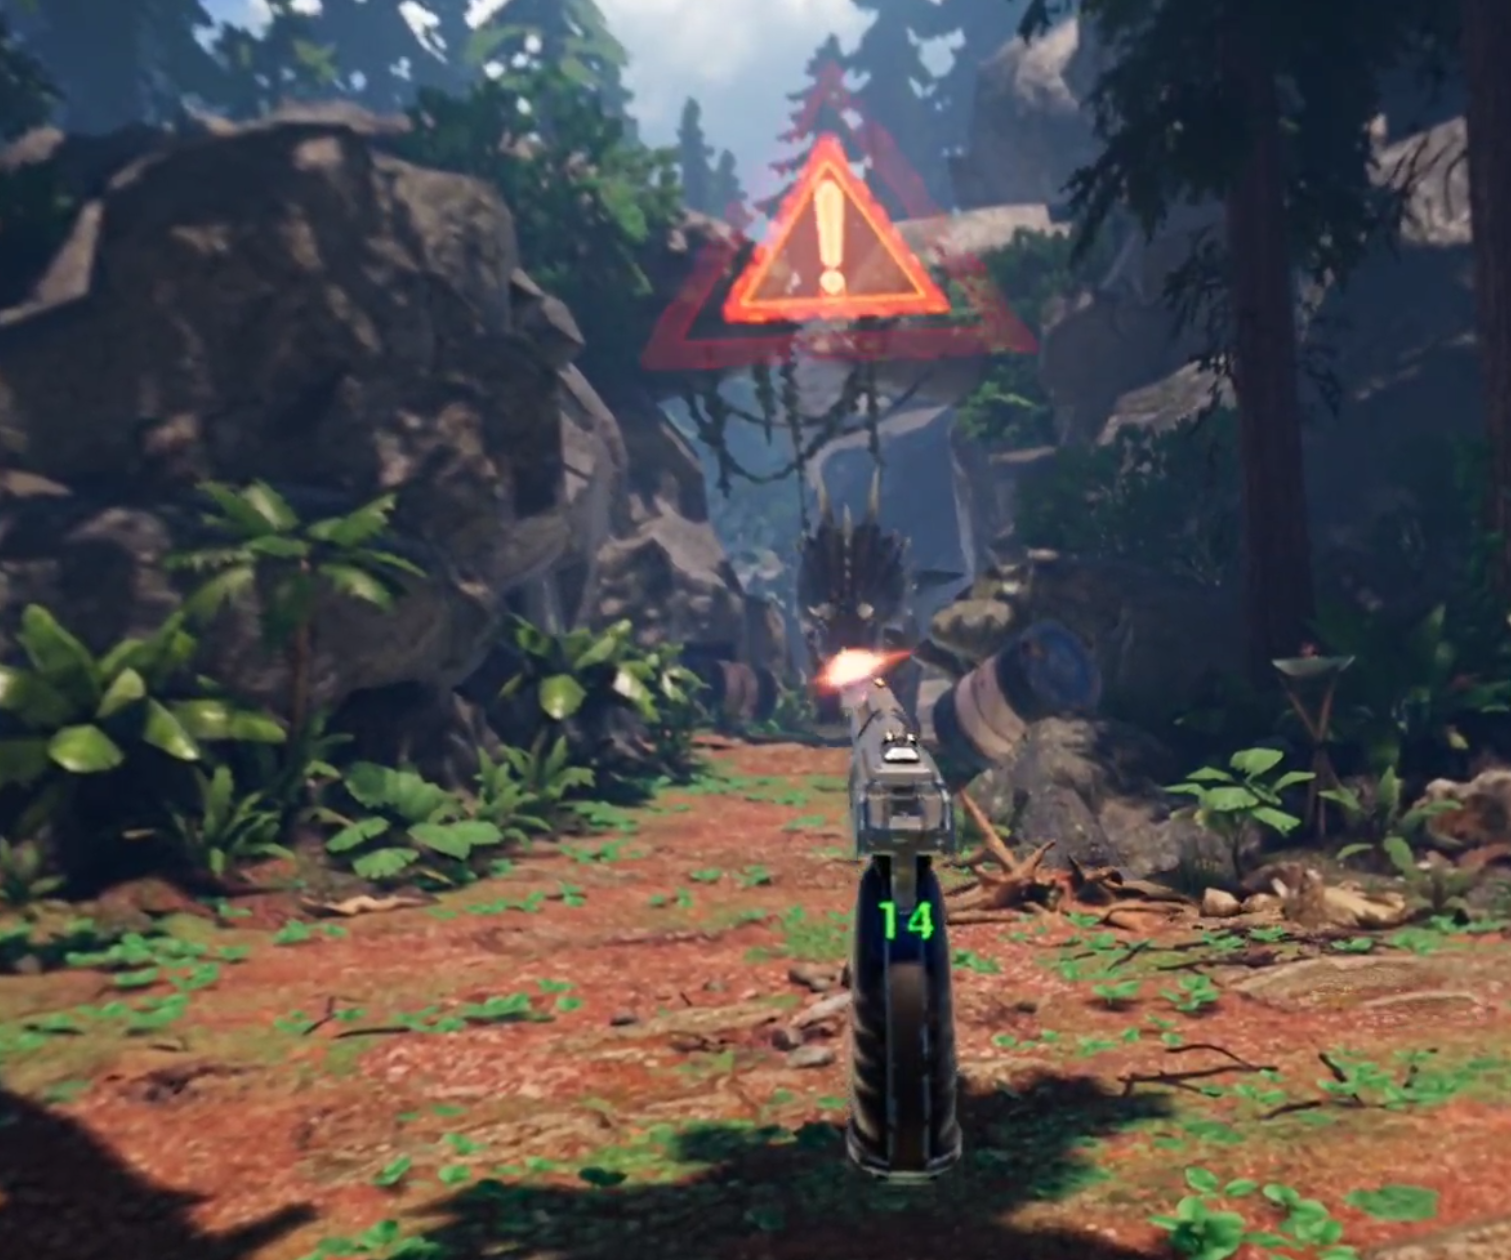
Directly to the right as you enter the gate is a doorway, and that’s where your enemies will be coming from. Expect Seekers, Fragments, and Spawn to come rushing out.
Gunning down a Seeker as it rushes out of the castle
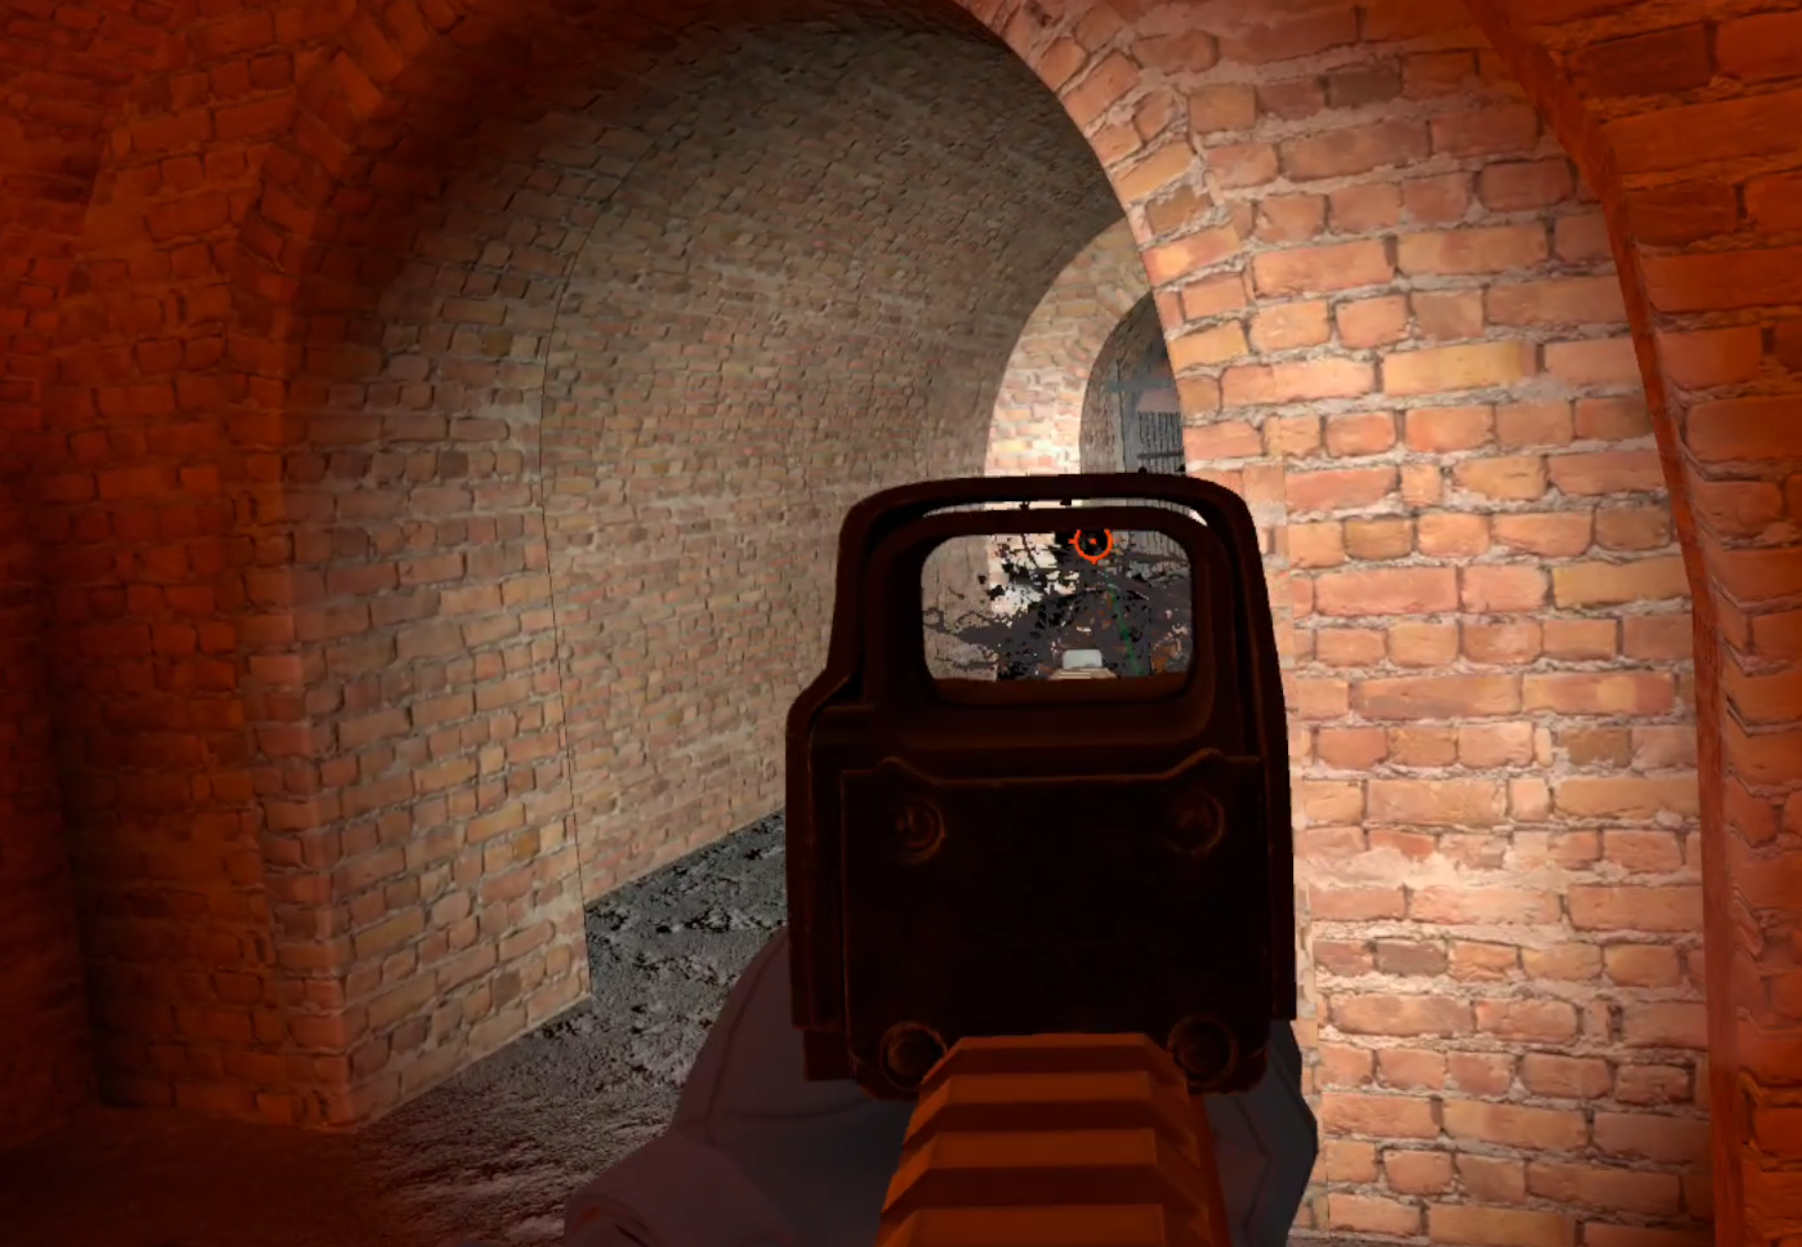
When you see one shoot them down and push forwards to destroy the Rift Anomaly on the other side before it spawns any more enemies.
A Rift Anomaly right inside the castle entrance
It’s a good idea to wait for at least a few seconds after you’ve made a bunch of noise with gunfire to see if any more enemies run around the corner to attack you.
Once the coast is clear head forwards and take a right. Past the room containing the Rift you’ll take a quick left down a very short hallway pictured below into another. Be careful here. It doesn’t look like it but this room expands to your left and right, and there will be a squad of mimics in the next room waiting to ambush you.
If you wait for a moment or two you can hear them talking. If you’re lucky one or two might walk out to meet you, but most likely they’ll wait for you to walk further inside.

Mimic Soldiers wait in ambush around each corner here
You can flush them out by throwing some grenades around each corner, or try blind firing around the corners when you hear them, or quickly peak, take a shot, and fall back. You can also push a little bit into the room and hide behind the pillars inside to block the lines of sight of the other Mimics inside.
This many mimics can take you down very quickly if they fire together, so don’t expose yourself for too long. Once you’ve made some noise and have their attention fall back, heal, and then peeking back in to take one or two down quickly, or try to bait them into coming towards you.
This is definitely the section of the castle where grenades are the most useful, so don’t spare them if you’ve got them. You’ll probably have to take a few shots, but this room is very clearable if you’re careful and quick about it.

The bed inside the castle, just ahead and to the right is a doorway leading forwards
Past this room you can take a left and see a long corridor with a bed in it. This bed is actually useable, though right now isn’t a very good time to use it. As you walk towards it there will undoubtably be more enemies through the doorway on your right, which is also guarded by a patch of Black Grass.
There will also be some arches that you can’t walk through because they have grates on them, don’t be lulled into a false sense of security by these grates. Mimics can still shoot through them, and so can you, so always watch them as you go by.
Once you’ve cleared the first group of Mimics, and whatever Fragments lied beyond them near the bed, your path continues past the Reflector anomaly after the doorway covered in Black Grass.

A Mimic lying in wait past the indoor Reflector Anomaly. Always stay alert while you go forwards
As always constantly be on the lookout for enemies ahead of you, and squeeze past the anomaly on the left to go to the store room beyond it.
This room will have some shelves with various pieces of loot on them, so feel free to grab a snack. This is also not a bad place to reload some magazines and heal.
There is a short period of relative calm here after the huge firefight you just had. Keep going forwards through the corridors. You’ll pass some metal beams and large pieces of concrete, and a room that’s dominated by natural rocks.

A caved in room inside the castle
There may be some sparse enemies here, but most if not all will have been drawn by your huge firefight earlier.
After the caved in hallways you’ll find yourself in a large room, the room on the other side of the grate with the dead soldier near the entrance. If you didn’t grab those Saiga 12 magazines you can grab them here as well.

The other side of the grate with the saiga magazines
Going to the other side of the huge room you’ll see another manifestation of dark Katya facing another doorway.
Head through it, and be wary that more enemies might come at you as you make your way through the next hallways, which are all full of Black Grass.
Use your Head Lamp to deactivate the anomalies and run through them. Though you’ll start to hear the telltale sounds of Lightning anomalies as you head into this room.

Be careful in this room, it is full of lighting anomalies
This room is filled with Bolt Anomalies, though luckily they are all very small and it is complete possible to make your way through without being hit by a single one of them.
Throw a probe very gently, and just a little bit in front of you. If the probe doesn’t trigger the anomaly then follow its path directly, just a little deviation can get you a serious shock and a lot of damage.
First hug the left hand wall and then head between the shelf and the cable reel to the left of it. Then go straight towards the shelf next to the doorway leading out and hug that shelf as you go through the doorway.

The doorway leading out of the Lightning Anomaly room
Take your time and you’ll be alright, you can make it through the Lightning Anomaly Room. Once you’re through there will be another room with some Black Grass in your way.
Though once you find yourself at some wooden planks leading across some water be careful, as there’s very likely going to be a Mimic waiting to ambush you on the other side.

Ambushed by a Mimic. Always stay on your toes in the Castle
After dealing with this ambush keep going onwards past a ton more Black Grass.
Making your way past this anomaly should be easy by now, and after shining your way through some more patches of it you will find yourself finally free from the confines of the inside of the castle, with the light of day greeting you.

The ladder up to the walls
Past a blue wall you’ll see a ladder leading upwards to the walls of the castle. Head towards it and climb up.
Once you’re at the top take a left instead of going straight forward from the ladder, so that you’re facing this tower and the huge anomaly field surrounding it.
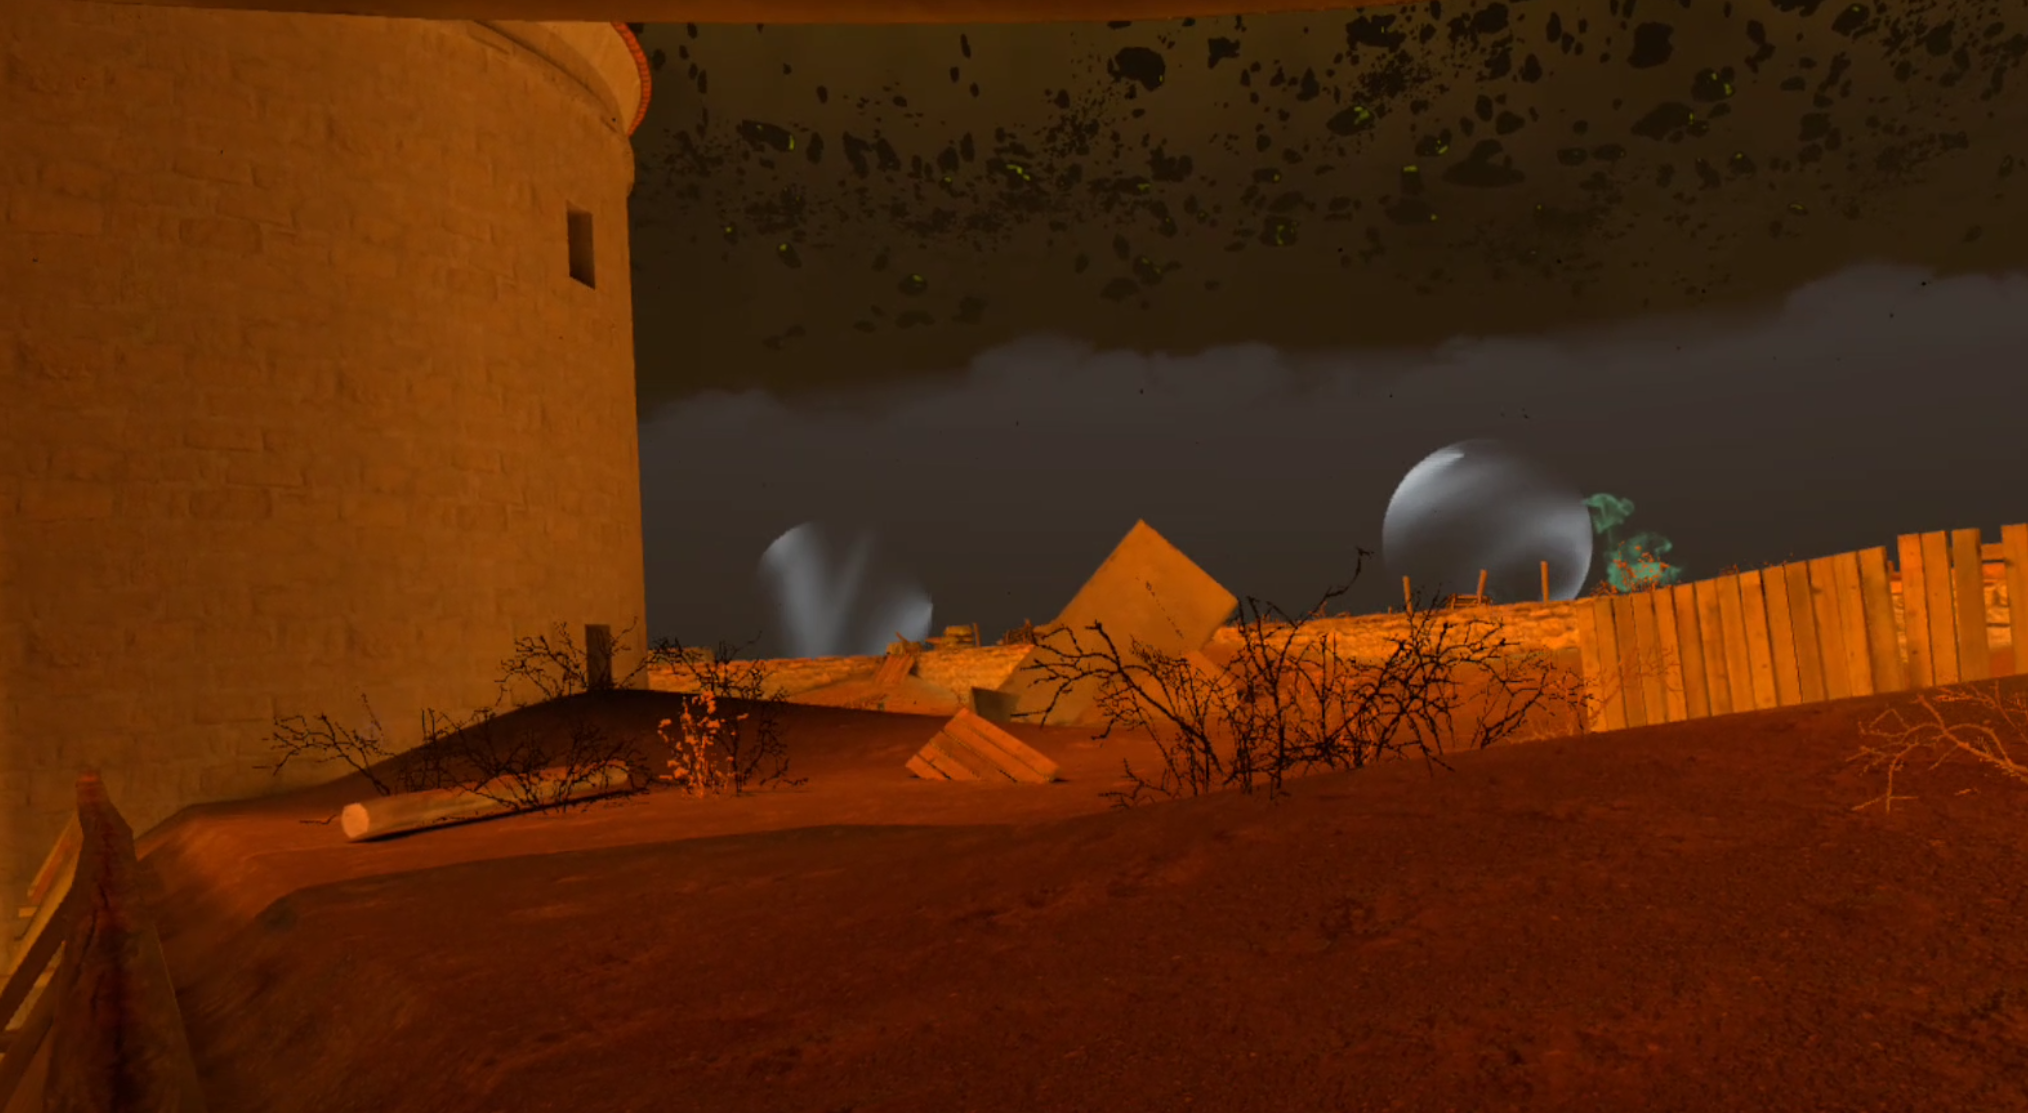
A huge anomaly field you’ll have to find your way through
Now is a good time to take off your helmet and put on your gas mask. You’ll have to head straight through this anomaly field.
It should be pretty easy if you use your probes, you should have a lot of practice by now. At first the anomalies will be mostly Reflector and Distortion Anomalies that you’ve been avoiding ever since the very first map of the game.
Weave your way through the anomalies until you’re on the other side of the tower, and take a little wooden ramp leading up to the top of the wall.

This ramp leads between the anomalies and up to the next level of the wall
You’ll start to see some more gas anomalies once you’re on the upper level, just keep making your way to the north.
You’ll see more gas anomalies once you’re on the other side of the tower, that’s why it’s so important to have brought a gas mask. Once you’ve made your way through the worse of the field you’ll see a long stretch of open wall in front of you.
Now is a good time to get your long ranged weapon ready. If there was ever a time for a little sniping in Into the Radius, it’s coming up now.

A long ranged scope is very useful here
Make sure your magazines are loaded. Once you go further down the wall you’ll see the central keep of Pechorsk Castle on your left.
In front of the gate leading in on the north end of the keep, and ahead of you on the wall, there will be another group of mimics spread out. There will also be at least one sniper among them.
As you make your way up the wall through the gas anomalies it’s important to stick to cover as much as possible. The Sniper Mimic will inevitably see you and open fire, though at such a long range they’ll probably miss at least the first few times.

The keep is on the left, keep going up the wall to your right and stick to cover
Where the two walls meet and become a corner you’ll also see some rocks floating in the air.

The floating rock formation at the corner of the walls
The Sniper will be perched on the wall to the left of these rocks, and other Mimics of various types will be near the sniper, near the rocks, or near the front of the castle to your left.
There are a number of ways to approach this situation. Sniping is the easiest, start by taking out the Mimic Sniper and then pick off the others as they try to sneak closer to you.
You can also get closer to them by moving a little down the wall to your right and advancing forwards towards the rock anomaly. There’s a lot of cover near it that you can work your way through to get closer to the enemy Mimics. Though this comes with the risk of being surprised and gunned down.
Also keep in mind that you’re also very likely to be attacked by Sliders, and possibly Spawn and other melee enemies. If you hear the telltale sound of Sliders teleporting closer to you then immediately break off fighting the Mimics and wait for the Sliders to appear, gun them down immediately. It can be easy to be clawed to death by the sliders while you’re busy with a firefight.
As always take your time when you can, and if you take a hit take cover and heal up.
Once you’ve cleared a path through the Mimics the entrance to the Keep is on the north side of it. Get ready for the final leg of your assault. Load your magazines before heading to the gate.

The entrance to the inner keep of the castle
Ouroboros - Finishing The Mission
Be careful going through the gateway to the inner keep. Immediately inside of it is a large courtyard, and just running out into it is very dangerous.
Instead keep your eyes upward and look to the top of the wall surrounding the inner courtyard. There will be mimics all around it waiting to shoot you.

The courtyard is a death trap if you don’t snipe the Mimics before they all see you
Slowly walk into the gateway, and when you see a Mimic stop and take them down. Rinse and repeat until you slowly reveal the entire wall.
If multiple Mimics see you at once it can be an easy recipe for disaster, but taking them out one by one makes this ambush very easy to fight through.

Carefully clear these walls before walking out into the open
Once the courtyard is clear of Mimics walk up the wooden stairway to the second level, and continue around the wall.
You’ll see a doorway leading to some stairs headed upwards, and another Rift Anomaly inside as well.

Be careful going up these stairways
Go up the stairway and through the small maze of rooms and stairways leading upwards. Be very careful turning each corner.
There can be Spawn, Mimics, and other enemies waiting inside, though hopefully at least some of them have been drawn out by your previous battle through the courtyard.
Be very careful when you see the light of day again. The last stairway leading to the top will have a Mimic waiting to ambush you on it.

This Mimic can take you down by himself if you let him
Once you’ve fought your way through them you’ll find yourself in the room at the very top of the keep, and your Detector beeping like crazy.
Next to you is another black Katya, and a pedestal.
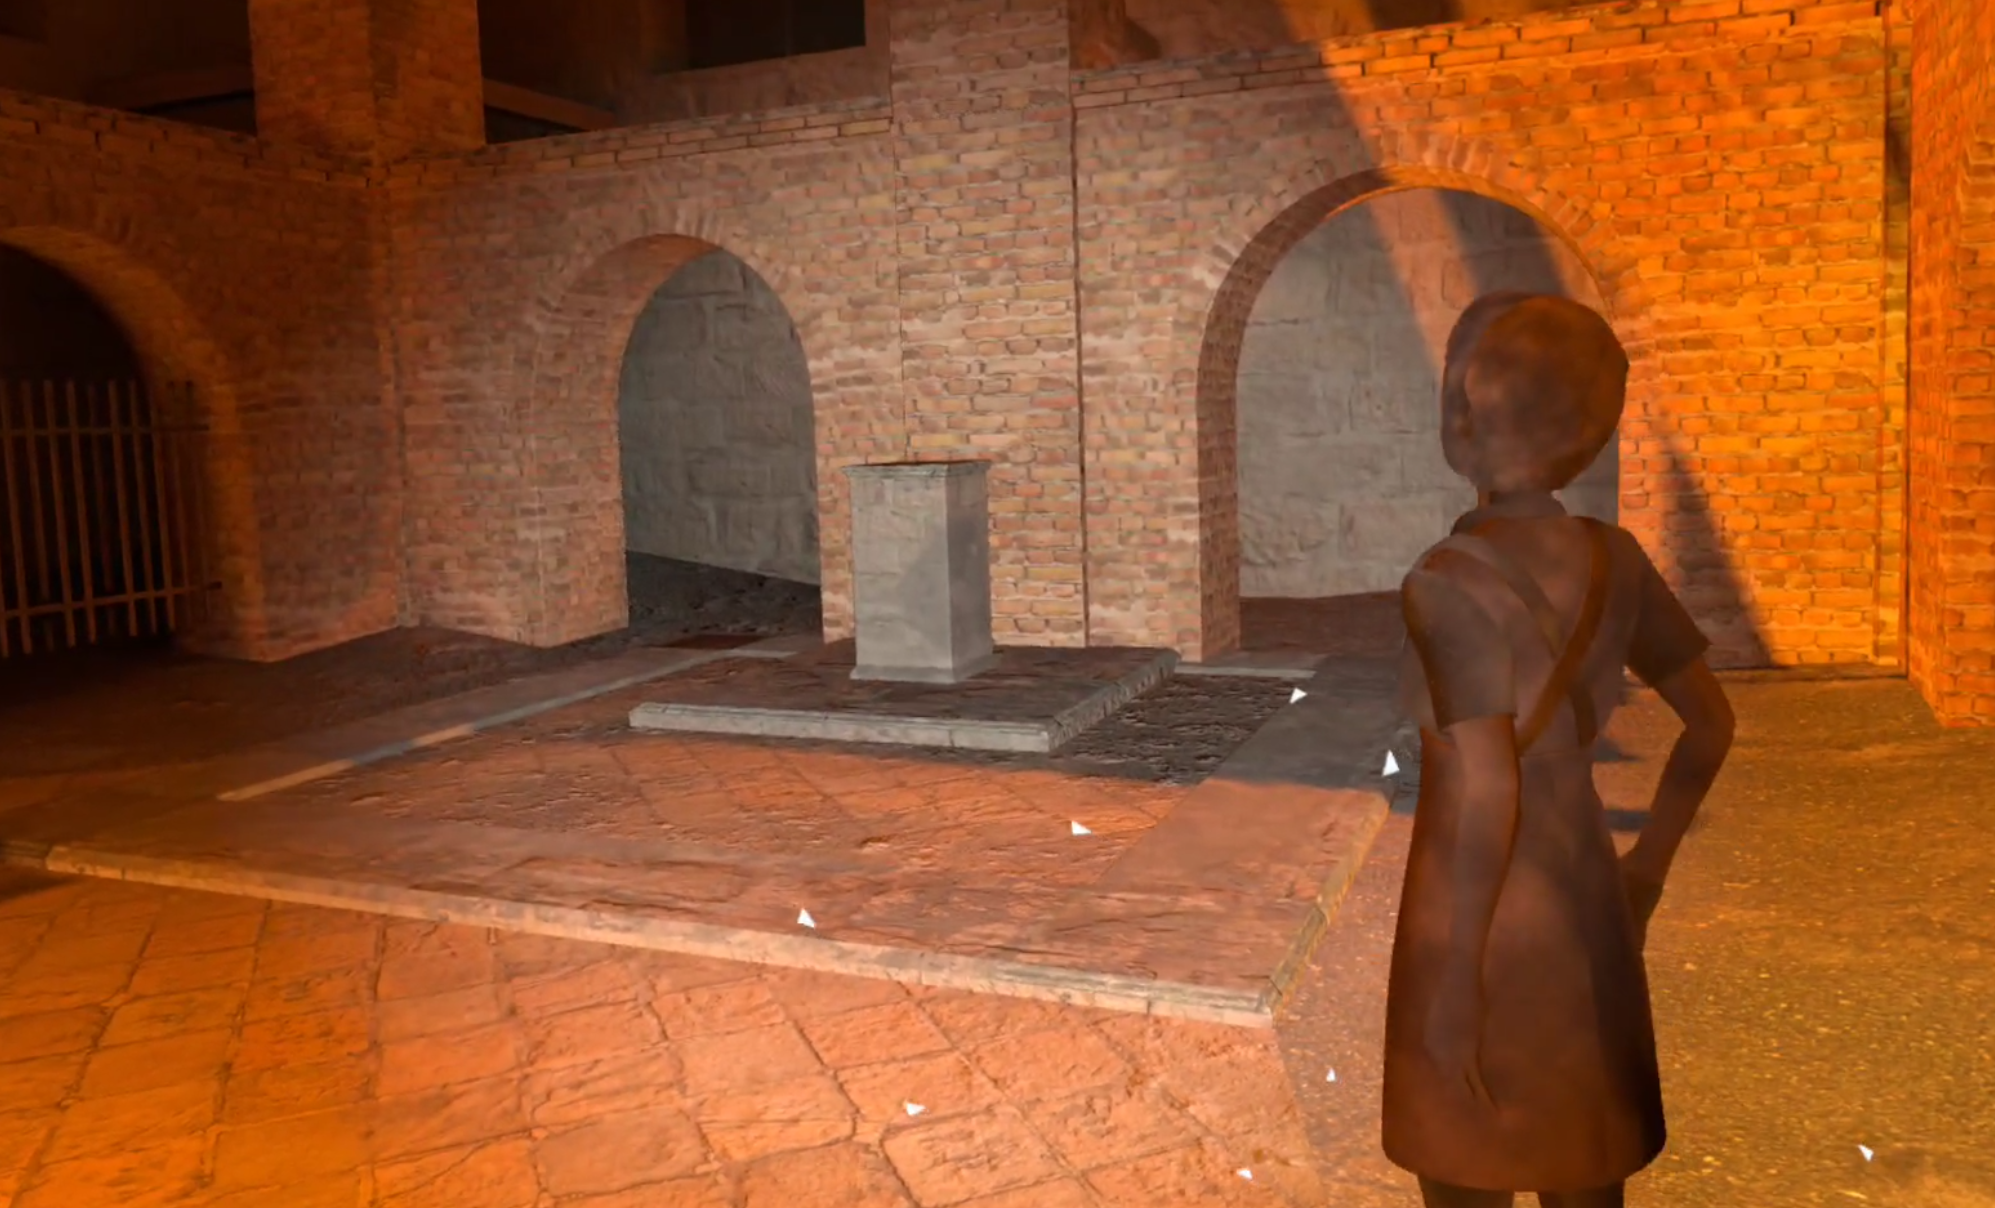
The final room of the game with the final Katya of the game
That pedestal contains the goal of this final mission, and the game. This is the end of Into the Radius. Once you’ve made it here you’ve made it to the end.
Take out your detector and use it to reveal the final artifact, the Grail, on the pedestal.

The Grail artifact revealed
Pick up the grail to reveal the ending to the game, though to avoid spoilers we won’t be talking about that here.
I highly recommend that you play through this level, experience it, and experience the ending of Into the Radius before reading about it here. This game is fantastic, and it deserves to be experienced first hand if you can do so.
For now this is everything you need to know to complete the final mission of Into the Radius Ouroboros. Whether you’ve already completed it or not, or when you do, take a moment before picking up the Grail to be satisfied with your accomplishment.
Getting this far is really hard, and Into the Radius is a very challenging game. So congratulations! Once you pick up the Grail you’ve accomplished a truly difficult victory in the world of VR gaming.
Also take a moment to think about the wonderful people over at CM Games who made this fantastic VR experience. Into the Radius took years of hard work from them to create, and they deserve some gratitude for crafting such a wonderful game.
If you want to see what happens at the end of the game after you’ve completed this last mission, then head over to our endings guide.

Gym Class VR Gets New Basketball and Baseball Modes
Gym Class VR has been around for a long time as one of the best VR basketball games out there.
Though as you can see from the title of this article Gym Class is no longer just focused on the world of VR basketball, and now also includes game modes for Baseball and Football.
So let’s take a look at Gym Class VR Baseball and Gym Class VR Football to see what’s currently being offered by this VR sports game, and where future developments might hopefully take them.
Gym Class VR has been around for a long time as one of the best VR basketball games out there.
Over time it has seen a lot of improvement with refining of its physics and mechanics, the addition of new game modes, AI opponents, courts, and cosmetics.
Though as you can see from the title of this article Gym Class is no longer just focused on the world of VR basketball, and now also includes game modes for Baseball and Football.
At the time of writing Gym Class’s Baseball and Football game modes are very rudimentary when compared to the long existing Basketball portion of the game, but they have also been very recently released and haven’t seen nearly as much development time and attention.
So let’s take a look at Gym Class VR Baseball and Gym Class VR Football to see what’s currently being offered by this VR sports game, and where future developments might hopefully take them.
Gym Class VR Football
Gym Class might not be a titan in the world of Virtual Reality Football yet, but it’s fantastic to see another VR football game out there, as there aren’t currently a whole lot to choose from.
Currently Gym Class Football is multiplayer only, with no Singleplayer bots, but a game is very easy to find by going to the multiplayer menu and joining a Football room.

Joining a Gym Class VR Football game
As for what you can do once you’ve entered a room… well as I’ve said previously it’s a bit limited at the moment.
Gym Class Football is less of an organized game of football with all of the rules enforced as in other VR football games.
It’s more of a loose practice arena, though if you really tried and got everybody to cooperate you could theoretically play a game of football.
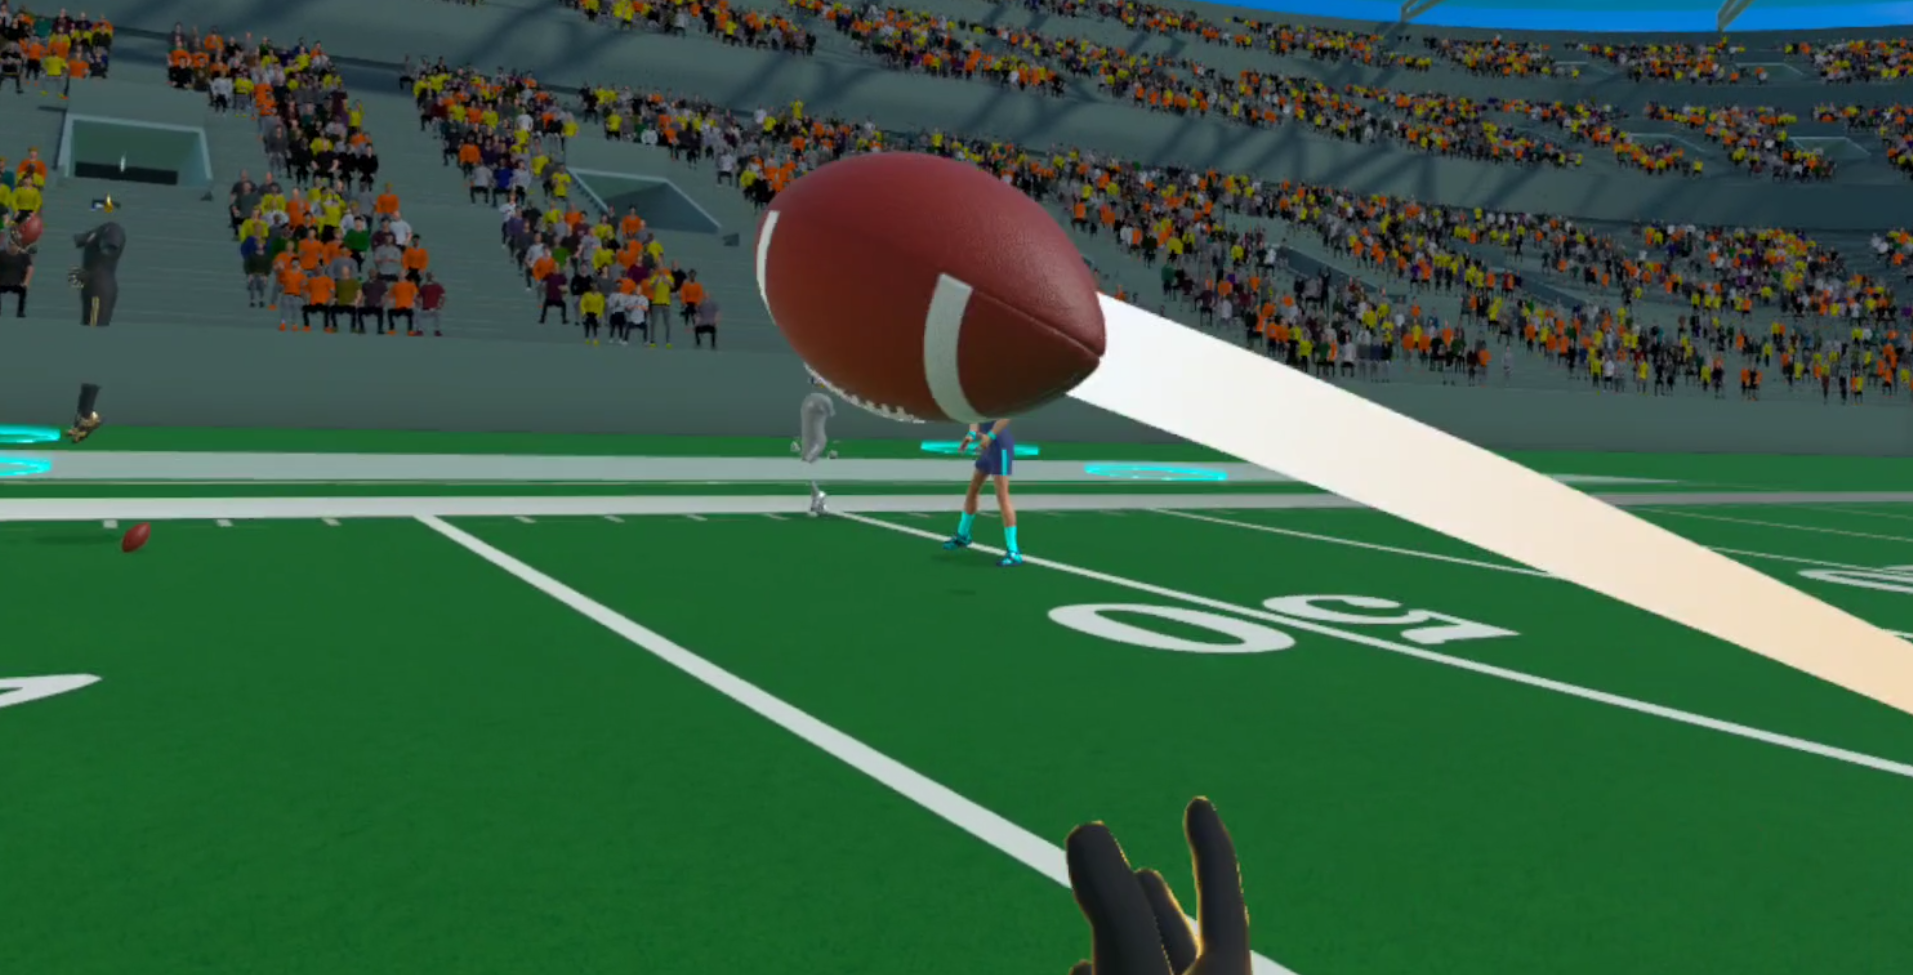
Throwing the Football
Currently you can only really spawn Footballs and throw them around to other players.
So running some passes and drills is completely possible, and it is a lot of fun to go for a really deep pass that your buddy throws at you, but if you want a more organized football game you might want to go elsewhere, like NFL Pro Era 2.
Still, as far as arenas for messing around with a VR Football in multiplayer go, Gym Class’s Football mode gives a lot of freedom and it’s still a lot of fun to mess around and throw passes with others in Virtual Reality.

Another player failing to catch a deep pass
As for what would be nice to have in the future, the option to start a more formal game of football with some rules enforced, just as in Gym Class VR’s Basketball mode, would be fantastic, though maybe not as easy to create for the developers.
The physics could also possibly use a little improvement, though there are still some options for tweaking how your VR Football throws and handles. As always VR ball physics is sort of up to your opinion. What already exists is definitely serviceable for throwing passes and having fun.
It’s already enough to call Gym Class VR Football one of the best VR football games from the limited selection that we have, mostly because it’s Multiplayer, and the only other Multiplayer VR Football game option is NFL Pro Era 2.
Gym Class VR Baseball
Now for Gym Class’s Baseball game mode.
Just like with Football the Baseball mode is Multiplayer only and there are a ton of rooms available to join.

Joining a Gym Class VR Football game
Straight out of the gate it already has more options than the Football mode currently has. You can spawn baseballs at will and throw them for fun games of catch just like in the Football mode.
Now you can also pick up one of the baseball bats lying around and hit pitches.

Holding the bat and ball is a little janky
You don’t even need someone else to throw them to you, though that’s certainly an option. You just hit the ball spawning button while standing in one of the several batters boxes scattered around the field and a ball will come hurtling towards you.
This is great fun on its own, but does still need some work. The number one thing that would be nice to have in Gym Class VR Baseball would be adjustable strike zones. Hopefully there’s already a way to do this I couldn’t find, but looking everywhere and even asking other players didn’t reveal one.
As they are right now they’re extremely close to the ground and hitting the ball feels more like golf than baseball. The box that you see floating above the ground is where the ball will come towards, and they’re at about groin height for an adult.

Missing a swing when the ball is coming towards my knees
Not to mention that you can only hold the baseball bat with one hand, which is definitely the number two thing that would be nice to have in Gym Class Baseball.
It feels very awkward to swing the bat with one hand, though the bat does have some nice weight to it. Overall the physics feel even more rudimentary than the Football mode, and so the Baseball game mode does definitely need some work.
While it’s just as possible to get a game of Baseball together if the other players cooperate, it would also be nice to be able to start a game with scoring and rules enforced. Though the throwing physics are so difficult it’s hard to even throw a pitch from the mound to the batter’s box.

Another player throwing a patch from the mound, this took a lot of tries
Just like Gym Class Football, Gym Class VR Baseball is more of a sandbox than a way to play the game of Baseball, but it’s also a fun way to mess around with some VR Baseball.
Well that’s all for Gym Class’s new Baseball and Football game modes. While they really could use some work at the time of writing, it’s doubtful that the developers of Gym Class will leave them the way they are.
Just as with their Basketball game mode I have no doubt that they’ll continue to change and develop the Football and Baseball portions of the game over time so that they’ll stand as very fun experiences of their own.
For right now though, Gym Class is still free, and if you want to throw some passes with a friend in VR it’s still a great way to do that. Whether you try out Gym Class’s new game modes now or later, enjoy!

The 3 Best VR Football Games On the Oculus Quest 3 and 2
VR Football Games, like so many VR Sports games, are a fantastic way to enjoy one of your favorite sports in virtual reality.
Now you can run plays and throw epic touchdown passes in the comfort of your living room.
Whether Football is in season or out of season you can always enjoy this sport in the comfort of your own home with these 3 great Virtual Reality Football Games on your Meta Quest device.
VR Football Games, like so many VR Sports games, are a fantastic way to enjoy one of your favorite sports in virtual reality.
For those who might be coming here looking for VR games about soccer, then check out the article about VR Soccer Games. This article is about VR American Football games.
Anyway on to American Football. Now you can run plays and throw epic touchdown passes in the comfort of your living room. No need to get dirty and muddy, no need to go outside and find a game when it’s cold or rainy outside.
Whether Football is in season or out of season you can always enjoy this sport in the comfort of your own home with these 3 great Virtual Reality Football Games on your Meta Quest device.
NFL Pro Era 2

The NFL Pro Era 2 Logo
NFL Pro Era and its sequel NFL Pro ERA II are the best looking and most thoroughly polished VR Football Games out there.
You really feel like you’re playing in an actual NFL game each time you play, surrounded by your teammates and trying to avoid opposing players. The sights and sounds of an actual stadium are all there and look about as good as they can as a standalone quest game.
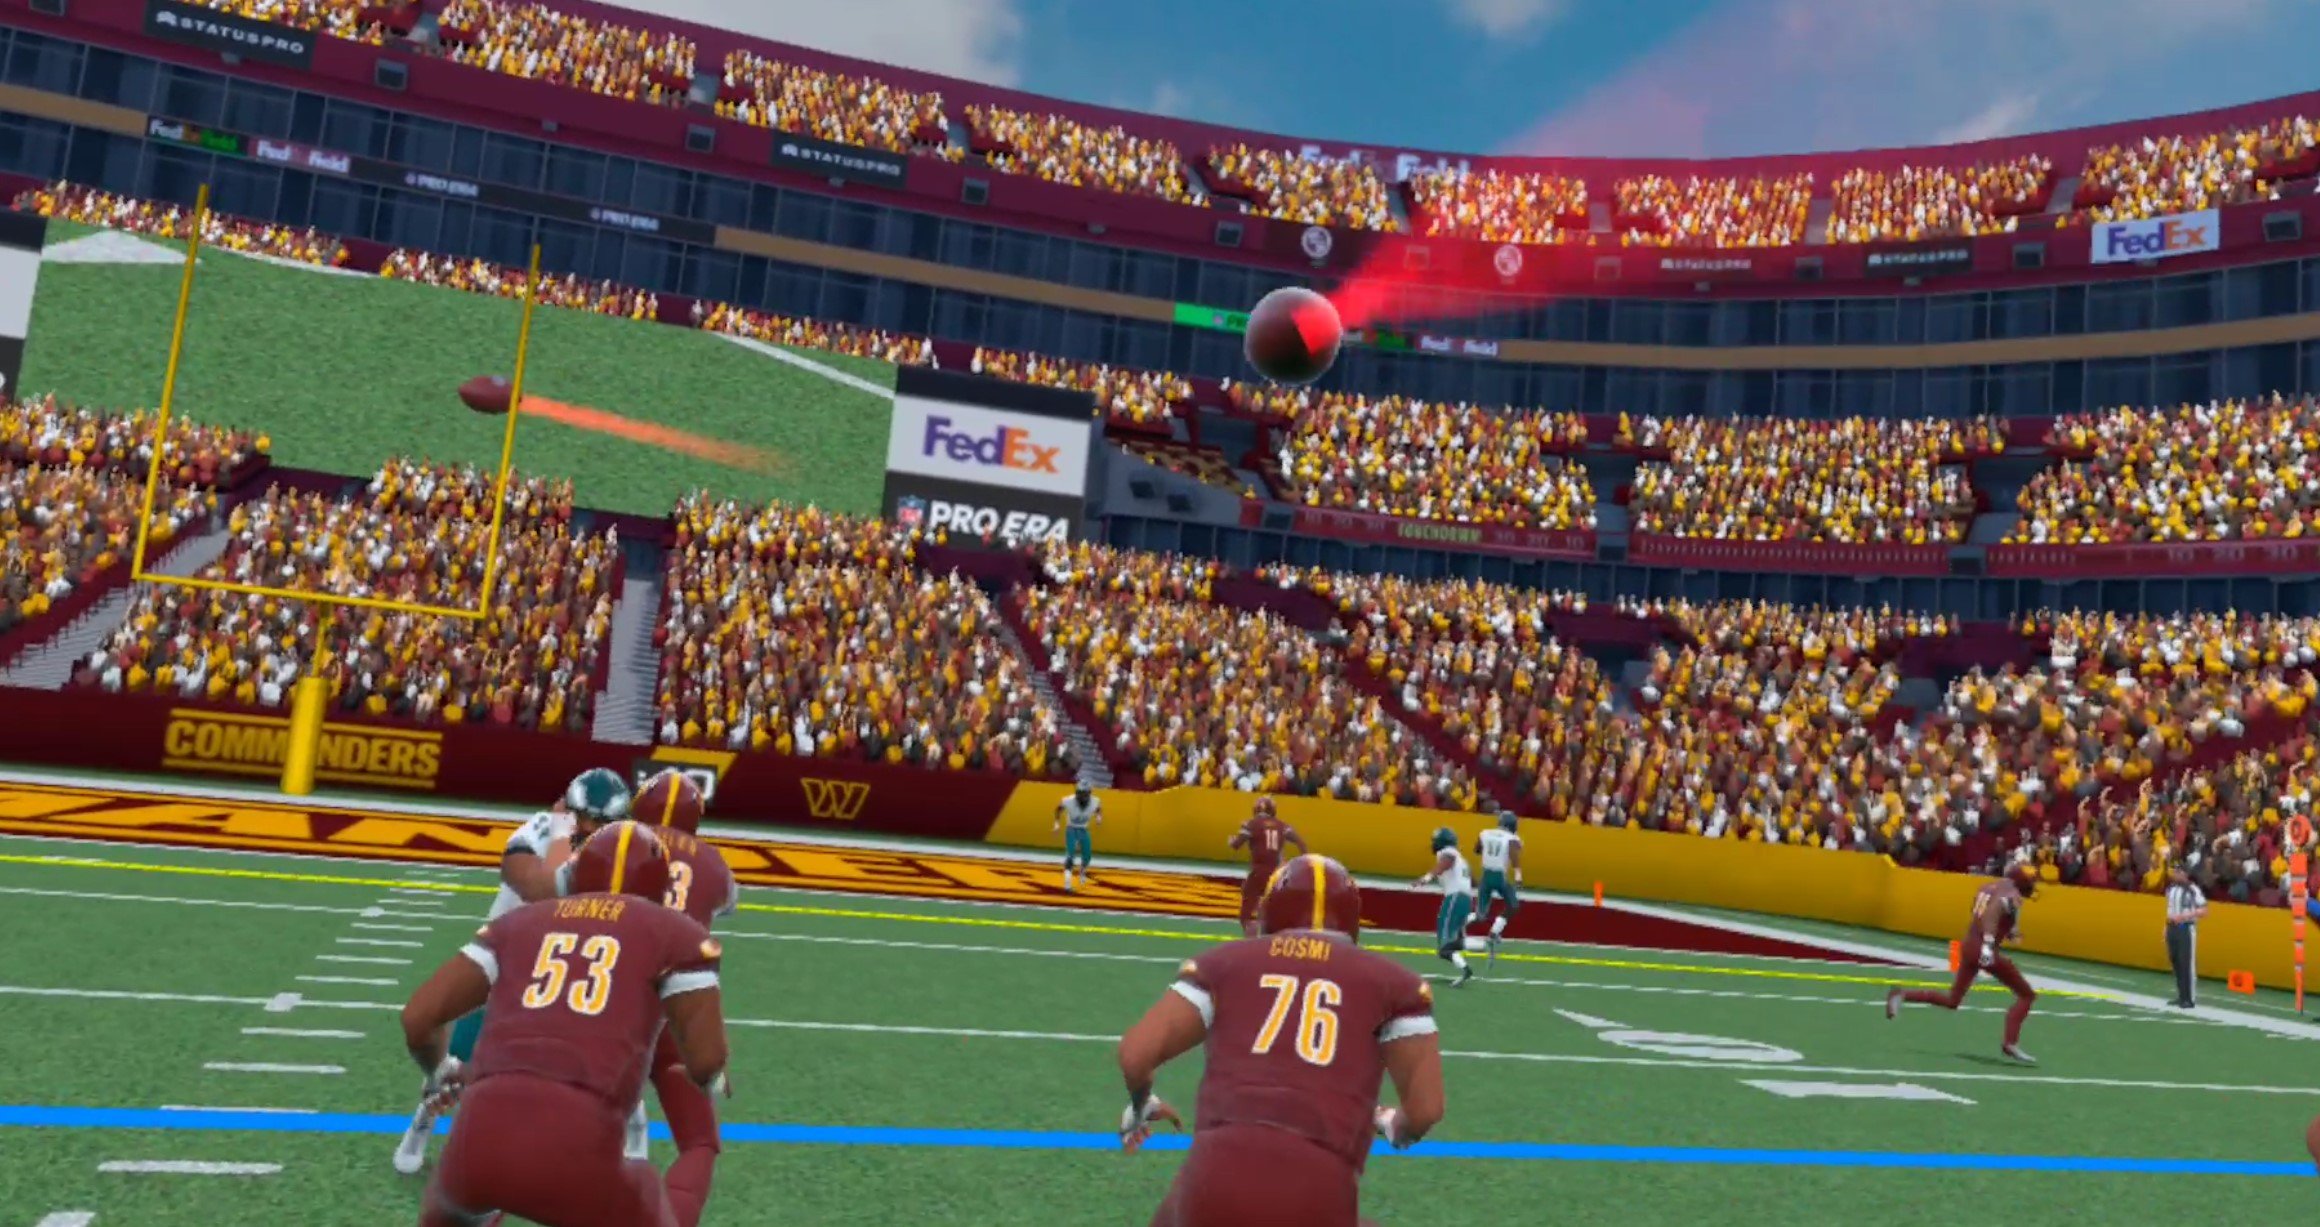
Throwing a Touchdown in NFL Pro Era
In NFL Pro Era you can pick your favorite Football team and play through entire seasons of Football with them.
You can customize your character, collect achievement trophies, and most importantly play a lot of games of Football against both AI opponents, and now with NFL Pro Era 2 you can also play Football games against other players in Multiplayer.
The one biggest downside of the NFL Pro Era VR Football Games is that the only position you can play is Quarterback. So a lot of the possibilities that you have in flatscreen games like Madden just aren’t there.

Getting rid of the ball before being sacked in NFL Pro Era
This will be a trend in the Virtual Reality Football Games here, but it’s such a shame that in such a polished VR Football Experience most of what you’ll be doing is throwing the ball or handing it off for running plays.
While all of that is great fun, and NFL Pro Era definitely does well in simulating being a quarterback, a lot of the game is up to your semi random AI teammates in Special Teams or playing defense.
In NFL Pro Era you’ll be doing a lot of standing on the sidelines while your team doesn’t have possession of the ball and is on defense.

You’ll watch a lot of kickoffs in this game
If you want to know more about NFL Pro Era then check out our review of the game for more information on it.
If you do decide to get into NFL Pro Era then definitely skip the first game and just buy the sequel, NFL Pro ERA II.
The sequel has some enhanced Singleplayer features, and most importantly adds the ability to play games against others in Multiplayer, which the original was severely lacking. Otherwise the two games are very similar.
Gym Class VR - Football

The Gym Class Logo. It doesn’t show any Footballs, but it’s got footballs
You might be familiar with Gym Class as one of the best VR Basketball Games on the Oculus Quest 2.
Well now it’s also one of the Best VR Football Games as well. That’s right, Gym Class VR recently added, at the time of writing, a Football mode to their game.
Just like in these other Football VR Games you can go to a Football field in Virtual Reality and throw the virtual Football around.

Throwing the ball in Gym Class
Unfortunately at the time of writing that’s about where the Gym Class Football experience ends. It’s a little undercooked and experimental at the moment, and doesn’t really do much of anything any of these other games don’t do.
All you can really do is throw passes with other players, and playing an actual game of Football even with a full lobby is hard to put together, though it’s possible if you have a whole lobby of friends willing to do so.
The throwing physics aren’t great, and you can’t really tackle an opponent outside of slapping the ball out of their hands. It clearly needs more work to be a truly great VR Football Game.

Gym Class is a very social VR Football Game
So now you might be wondering why Gym Class is even on this list. Well that’s because Gym Class has come a long way in VR Basketball over time, and it’s likely to come a long way in VR Football.
I have no doubt that the Gym Class developers will be adding new features and making their Virtual Reality Football experience better over time. So even if it’s not great now you can still easily find a big lobby of other players, often much easier than in other multiplayer games like NFL Pro Era 2.
So if you want to throw the pigskin around with a stranger or get some friends together, keep an eye on Gym Class’s Football mode. We’re not exactly spoiled for choice when it comes to VR Football games, and Gym Class has shown that it can grow and become vastly better over time.
With some more updates, Gym Class’s Football mode might become the go to VR Multiplayer Football experience. Oh, and it’s free!
2MD: VR Football Unleashed ALL STAR

The 2MD: VR Football Unleashed ALL STAR Logo
Now when you first look at 2MD: VR Football Unleashed ALL STAR for the first time you might not be very impressed because of how the game looks.
You can see it in the logo. The players are blocky and not very realistic looking, but that’s part of the intended charm of 2MD.
While other VR Football Games are going for a more realistic look and gameplay like the Madden series of flatscreen games, 2MD is a more arcadey, fast paced, and goofy experience.
It’s not trying to play like a real game of Football, and plays more like the old NFL Blitz game on the N64, or the more modern Wild Card Football.

Making a pass while the ball is on fire
So sure 2MD isn’t much to look at, and most notably doesn’t feature a multiplayer mode, but in so many ways it offers more customizability, game modes, and things to do than any other VR Football Game on this list. (Side Note: There is a local multiplayer option in the PSVR version where a non VR player can play as the defending team on the TV, but according to the developer not many used this game mode.)
Most importantly of all, 2MD: VR Football Unleashed ALL STAR lets you do more than just throw, pass the ball, and occasionally run the ball.
It also lets you kick field goals, and most importantly of all lets you receive and run the ball after you throw it. This is simply an amazing addition to the VR Football scene, and while it’s fairly difficult it is absolutely awesome once you get the hang of it.

Receiving and trying to run the ball in 2MD: VR Football Unleashed ALL STAR
When you throw the ball as the Quarterback and it gets near it’s landing zone the game will switch your perspective to the closest receiver.
Then you try and catch the ball and run it as far as you can, spinning around and stiff arming opposing team members as you go.
You can also keep the receiver as a bot if you don’t want to do this, but being able to receive and run the Football yourself is absolutely fantastic and gives you many more options and control over how well you do in the game.

You can even make your own plays in this game
Of course you’ll also see that 2MD, as its art style suggests, is pretty goofy and arcadey. The gameplay is fast paced and gets you right back into throwing the ball as quickly as possible.
Even in exhibition games there’s no waiting and watching the opposing team play. You’re quickly told if they scored or not and get back into the game.
The players all move extremely fast and tumble into and over each other hilariously. The only annoying part about this is that it can be kind of hard to see over your linemen in front of you when you’re trying to throw the ball, and whenever you back up they immediately back up with you. So you can’t get a lot of space.

It would be nice if the defensive line was a little shorter, or a little further away
Still, 2MD lets you draw plays however you want to, giving you even more options. Despite how unrealistically the gameplay itself can seem this is really the most in depth Virtual Reality Football simulator for the Oculus Quest 2 and 3 out there right now.
Nothing else comes close in your options for strategy and execution, and if you don’t mind the cartoony look or rapid pace of gameplay then 2MD is a fantastic VR Football Game for huge Football fans and casual enjoyers alike.
As mentioned, the only downside is that it has no multiplayer, though there are a massive variety of Singleplayer teams to play against and game modes to try.
Well that’s all for the Best VR Football Games out there. Whichever you pick from this list, have fun out on the field. VR Football is a ton of fun, and hopefully after reading this list you find the game that lets you enjoy it too.

ARK VR Review and Setup Guide - ARK: Survival Evolved VR and ARK Park
So, you want to play ARK VR.
Of course you do! ARK: Survival Evolved is a hit survival game on the flatscreen for its incredible mix of base building, survival mechanics, and most importantly the ability to train and ride your very own dinosaurs.
Of course not all games with VR support are necessarily great to play in VR, and so here we’ll delve into whether or not VR ARK is worth it and taking a look at the ARK game made specifically for Virtual Reality, ARK Park.
So, you want to play ARK VR.
Of course you do! ARK: Survival Evolved is a hit survival game on the flatscreen for its incredible mix of base building, survival mechanics, and most importantly the ability to train and ride your very own dinosaurs.
Of course the only thing greater than nurturing a dino egg, raising a dino baby, and then riding that dinosaur on the flatscreen is doing all of that in VR! So ARK: Survival Evolved VR is a fantastic idea, and luckily the developers of ARK added VR support some time ago.
Of course not all games with VR support are necessarily great to play in VR, and so here we’ll delve into whether or not VR ARK is worth it and taking a look at the ARK game made specifically for Virtual Reality, ARK Park.
To give a quick answer, no ARK: Survival Evolved VR is not very good. In fact it’s pretty terrible, though you might be able to get it sort of kind of working correctly with a little luck and some patience. ARK VR hasn’t received an update from the developers in ages and was clearly not very well supported from the beginning.
ARK Park is an actually okay ARK VR experience, but also suffers from being old, looking bad, and not having extremely engaging touch controls or gameplay.
Though if you are really craving the dinosaur raising and riding experience, then ARK Park is probably your best bet, unfortunately it isn’t nearly as expansive as ARK: Survival Evolved, or offer nearly as much of an engaging experience.
That’s the verdict, but if you want to find out how to set up ARK VR and why we’ve come to these conclusions, then check out the detailed ARK VR review and setup guide below.
ARK: Survival Evolved VR Review
So as I just mentioned ARK: Survival Evolved in VR is bad, really, really bad.
It might be the worst VR mode to a flatscreen game that I’ve ever written about here on Reality Remake.

See how fuzzy anything past the rock looks? It’s even worse when you’re in VR
It’s very clear that the VR support is extremely minimal, and as we’ll cover in the setup section below, weirdly difficult to even get running due to poor optimization.
Though you don’t need to know about that to realize how poorly optimized ARK VR is, it looks absolutely terrible.
Everything is fuzzy even up close. The lighting is overwhelming in VR and looking anywhere near the sun is uncomfortably bright on reasonable settings, so you have to turn your brightness down, but then even somewhat dark areas are almost impossible to see properly.
These screenshots don’t look good, but even they don’t do justice to how difficult this game was to play in VR.

The settings menu doesn’t even look right
You have to squint a lot, whether it’s to see at anything more than five meters in front of you, or to look at any of the menus.
More than anything else what makes ARK VR hard to play is how poorly the VR view is adjusted for more modern VR technology like the Oculus Quest 3 or 2.
Your right eye and left eye pictures are smashed too closely together by default, and this not only makes the already poor visuals headache inducing, but also makes reading menus next to impossible unless you close one eye and focus really hard on the blurry letters.
Even getting some footage and screenshots was hard in ARK VR
Even when you get ARK VR running this is something you’ll have to do a lot, because unless you’ve gotten really lucky and your settings already happen to work well in Virtual Reality, you’ll be doing a lot of adjusting your graphical settings to get VR ARK looking at least somewhat presentable.
If you can deal with that then you might find ARK VR somewhat enjoyable.
All of the gameplay of ARK: Survival Evolved is still there, though the added immersive benefits of Virtual Reality are kind of lacking not only in the visuals.
There are no touch controls, and you’ll be using your mouse and keyboard still, which isn’t necessarily bad in and of itself. You control your arms with whatever tool you are using by moving your mouse around, and instead of moving your entire head like on the flatscreen your tool will point in the direction you’re moving your mouse.

If this worked well then it could be a fun VR game
This is actually a pretty cool system, but what makes it extremely annoying is just how broken ARK: Survival Evolved VR is.
I could never get my head to line up with my arms, so I always had to look over awkwardly to the right a little bit to actually see what I was facing.
Interacting with a lot of objects is also annoying, and you’ll often have to look up above the thing you’re trying to interact with for your interaction button to work. The hotbar doesn’t show up either, and so you’ll have to go into the inventory menu to change what you have equipped, or memorize what’s assigned to what key on your hotbar.
ARK VR is an unsupported mess that clearly never got the time and attention it needed to be playable. If you’re still interested then the guide on setting up and running ARK VR is further down in this article in the section marked “How To Set Up ARK VR.”
So what about the game that was meant for VR?
ARK Park Review
So the Virtual Reality mode for ARK: Survival Evolved is hot garbage, but there is also an ARK game made specifically for VR called ARK Park.
Though if you already own ARK: Survival Evolved keep in mind that ARK Park is a separate game that at the time of writing costs forty dollars on Steam. Whether or not this is worth it for a functioning ARK VR experience depends on how badly you want it.
When first starting ARK Park and (thankfully) launching it just like any other PCVR game with no additional setup steps or difficulties, it is clear pretty quickly that this game hasn’t seen a meaningful update in years.
It looks very fuzzy, but not as bad as ARK: Survival Evolved VR.

ARK Park is functional, if a little confusing, from the start
At least unlike ARK: Survival Evolved’s VR mode, the pictures of your two headset lenses are properly spaced apart, and you can see everything as intended. So while ARK Park doesn’t look great it is at least functional.
That’s going to be a theme here, it’s not great, but it does at least work.
Anyway your hands become futuristic teleporters in the game, even if you have slide movement enabled, and right when you start things are a little weird with the controls.
You’ll notice in the controls information screen and all of the tutorial prompts that ARK Park was clearly meant to be played using HTC Vive wands, which can be kind of confusing when you’re trying to figure out how to do things in the game using different controllers Even when the game tells you how.
ARK Park’s tutorial does have some obvious omissions like how to use slide movement. Move the left joystick while pushing it in.
I have no idea why the developers thought this would be a good idea, maybe to prevent you from moving yourself accidentally, but it is really awkward. Especially since slide movement is so slow.

Education game or dinosaur shooting simulator, you decide
ARK Park is one of the few VR games in which I’d actually recommend using teleport movement instead of slide movement.
Anyway once you figure all of that out you’re off to a tutorial that has some very cool moments but is far too long. You’re a tourist on one of ARK’s dinosaur islands, and instead of putting you in front of dinosaurs to start with you’re instead feeding and interacting with holographic dinosaurs first.
Considering there are many actual dinosaurs to interact with in the game, adding holographic versions to start with seems like kind of a waste of time, and just adds to the cumbersome length of the tutorial.
Though there is a very cool train ride, and soon enough you’re in the park itself.
At least seeing dinosaurs up close in Virtual Reality is awesome
From here ARK Park soon introduces you to what you do in the game. Collect dinosaur eggs, hatch them, nurture the babies, and then use, ride, and collect those dinos.
The first dinosaur ride is very cool, and then you’re off to learn how to collect resources, craft a weapon, and then shoot some dinosaurs in a tower defense segment.
Oh, were you expecting to fight hostile dinosaurs out in the wilds as you collect resources, keep yourself fed, and build a shelter? Well unfortunately ARK Park doesn’t provide a real ARK: Survival Evolved experience like that.
All of the combat is done in these odd tower defense segments where the dinosaurs run at an object you defend, and then you just shoot them with a variety of guns that all do not feel at all like guns.
You don’t even load them yourself like in most VR shooters, they just do a reload animation automatically when they’re empty.
The tower defense segments get very old very fast
There is some gathering and exploring a world, but not a huge overworld like in ARK: Survival Evolved.
Instead you get a few different and very small maps with some paths going through them. You gather resources by swinging a tool at an object, and you scan various pieces of wildlife as you look for eggs.
That’s about it. Looking at dinosaurs in Virtual Reality is cool, but the game itself is actually incredibly dull. There’s not much to do, and there’s not much to see other than the aforementioned dinosaurs.
So if you are really dying for any kind of ARK VR experience, give ARK Park a look as it’s the best one you’ll find right now. Though keep in mind that the only thing that makes this game like ARK: Survival Evolved or ARK: Survival Ascended is that you can raise dinosaurs. Interacting with them is the only interesting part, and that can’t prop up the game on its own.
Otherwise this game is probably never going to receive an update, and does not match the modern standards of VR gaming. It might have been okay five years ago, but now it looks bad and has repetitive and boring gameplay.
ARK Park is not even really a survival game, and all of the combat is just shooting dinosaurs that slowly run towards you.
How To Set Up ARK VR
When running ARK Survival Evolved in VR start by connecting your headset to your PC as you normally would to run any PCVR game.
If you’re using a Quest device such as an Oculus Quest 2 or 3 then start by connecting your headset to your PC using Airlink or Steam Link. If you’ve never done this before then check out how to do so in this article. While the article is specifically aimed at VTOL VR, you’ll find that the same steps work for any PCVR game, just run ARK: Survival Evolved instead of VTOL VR.
In short either run Oculus Airlink and run Steam VR from airlink, or run Steam Link to go directly to Steam VR. Then in your Steam VR home select ARK: Survival Evolved and start it.
Be careful once you actually start ARK: Survival Evolved though, because on your PC you’ll get a new window from steam asking you which of the various options you want to launch the game with. Only two of these will work in VR without crashing the game. The “extremely low memory” option or the “DirectX 10, Low-End Graphics” option.
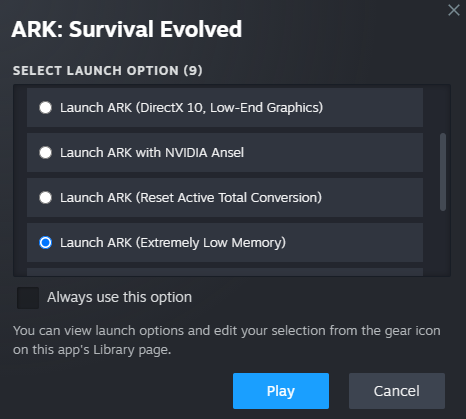
The launch options for ARK: Survival Evolved
Since ARK VR is so poorly optimized any other option will cause the game to crash when you try to run VR mode.
Now you may or may not see the main menu of ARK appear in front of you in Steam VR home, and from there you can use your mouse to start or join a game. If you don’t see the ARK menu in Steam VR home then do so on your PC monitor.
Get into the game and once you’re there go to your Settings menu and go to Graphics. In the bottom right you’ll see a button that says “Enable VR HMD.”

The button to hit to enable VR mode in ARK
Once you do that put your VR headset back on if you were using your monitor, and you should now be seeing the game in Virtual Reality.
Of course as I mentioned in the review above you may have trouble seeing things. It’s hard to specifically tell you how to make your VR experience more pleasant, as that will depend a lot on what headset you are using and your graphics card.
If it’s difficult to see things then play around with your graphical settings like resolution and HUD scaling. ARK VR will never look great, but it can be manageable if you get your settings just right.
After running the game once and giving it a look you can also enable these options in Steam to try to get the game looking a little better by right clicking on the game in your Steam library, selecting Properties, and adding “-sm4 -d3d10” to the Launch Options at the bottom of the General tab.

Some additional launch options that may make the game look better
Anyway that’s all for this setup guide for ARK VR, and the review of both ARK: Survival Evolved VR and ARK Park. Hopefully this will work well enough for you to experience ARK in VR.
Hopefully the sequel to ARK: Survival Evolved, ARK 2, will offer better VR support some time in the future, or a mod will add decent Virtual Reality options to the game. For now that remains to be seen, and hopefully you can enjoy what VR ARK experiences are already available.

VTOL VR Gets New Plane: The EF-24G Mischief and Electronic Warfare Update
A couple of weeks after its announcement VTOL VR solo developer Baha has released the new VTOL VR plane known as the EF-24G Mischief to the public.
The EF-24G Mischief is intended as an Electronic Warfare fighter in VTOL VR, using jamming pods and sensors to hide from or confuse enemy missiles and radar systems.
Of course this new plane isn’t going to be the only one capable of utilizing jamming technology, with jamming equipment now available for other planes in this fantastic VR flight simulator.
A couple of weeks after its announcement VTOL VR solo developer Baha has released the new VTOL VR plane known as the EF-24G Mischief to the public.
This new plane is purchasable as DLC on Steam for the price of twelve dollars, and is based on the real world F-14 tomcat. This plane also happened to be released on the exact same day of the year as the first flight of the Tomcat in 1970.
The EF-24G Mischief is intended as an Electronic Warfare fighter in VTOL VR, using jamming pods and sensors to hide from or confuse enemy missiles and radar systems.
Of course this new plane isn’t going to be the only one capable of utilizing jamming technology, with jamming equipment now available for other planes in this fantastic VR flight simulator.
There’s even some other new equipment available like the AIM-54 missile, but for now let’s talk some specifics on exactly what you can do with the EF-24 and more about the electronic warfare update, which massively changes VTOL VR.
The F-14 Tomcat In VTOL VR
The EF-24 is a very fun new addition to VTOL VR that makes great use of the new Electronic Warfare system.
On it, and various other aircraft like the F/A-26, you can mount AN/ALQ-245 Jammer pods, which allow you to spoof and jam signals for the enemy team.
We’ll talk more about this and the new Electronic Warfare system here shortly, but suffice to say it’s a massive change to VTOL VR that will completely revamp how the game is played, especially in Multiplayer, and the EF-24G is tailor made for it.
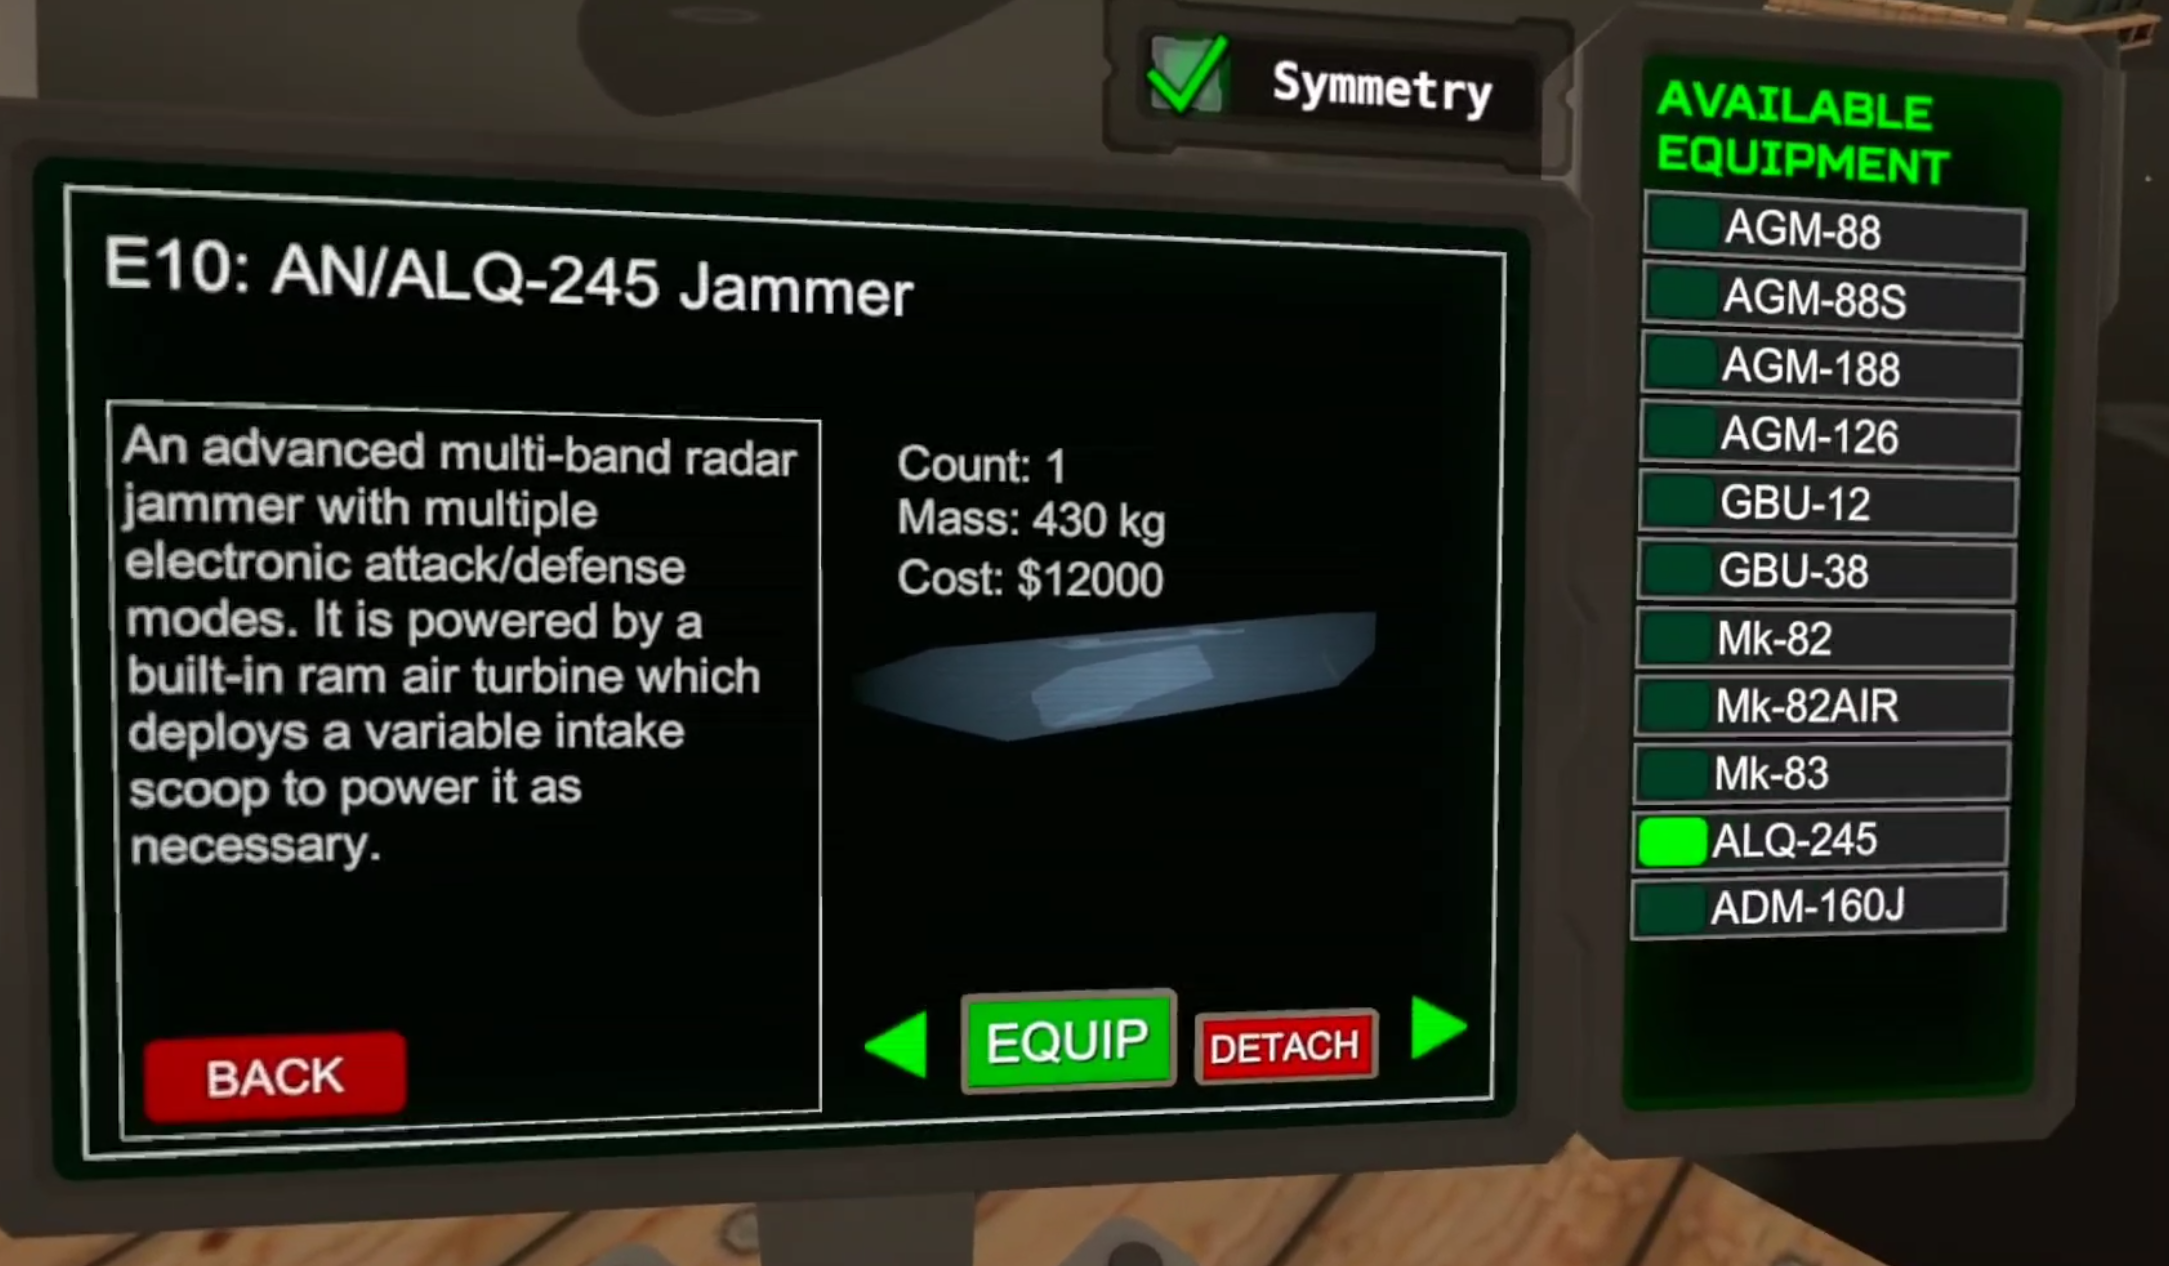
The AN/ALQ-245 Jammer Pod
The EF-24G Mischief itself bears many similarities to the F-45 (based on the real like F-35) in that the cockpit is extremely high tech when compared to older aircraft like the AV-42 or F/A-26. Though in many other respects this new plane is unlike any other.
Especially when using Electronic Warfare, there’s a lot of buttons to press on your various configurable touchscreens, and a lot of things to do to fly and fight as effectively as possible.
That’s why it’s great that the EF-24G is also a two seater plane. You can have a copilot in the back to handle the Electronic Warfare pods or weapons.
While it’s completely possible to fly this new plane by yourself, it’s much harder to manage everything on your own.

Being the passenger can be just as fun as being the pilot
Still, you can always by yourself a little time by zooming away, which the EF-24G is very capable of doing just like it’s real life inspiration the F-14 Tomcat.
It’s now capable of the highest speeds in the game, at least when you sweep the wings back, because just like the F-14 the EF-24 can sweep its wings forward or back for maneuverability or straight up speed.
This, coupled with the new missiles available to it, make the EF-24G a fantastic plane for countering enemy air defenses, and generally confusing them.
There are a ton of features, old and new, that you can use with this plane. So many that we won’t discuss them all here, though the size of the EF-24Gs manual speaks for itself.
If you’ve just gotten ahold of the EF-24G there’s also a whole new Singleplayer campaign for the plane which focuses on its strengths in countering enemy ground based air defenses. It’s a ton of fun and a great way to get to know your way around the new aircraft.

The new campaign is hard at first, but fantastic
Electronic Warfare in VTOL VR
Though by far the biggest change to VTOL VR is not only the addition of the EF-24G, but the addition of Electronic Warfare in general in this fantastic modern VR flight simulator.
You used to always be able to trust your radar and radar warning system to show you exactly where enemies were and what type of craft they were flying. That’s no longer the case.

That’s a lot of incoming missiles, shame they’re aiming at imaginary planes
The new jammer pods, which can be mounted on many of the aircraft already present in the game as well as the EF-24G Mischief, mean that no electronic system is guaranteed to work as you’d expect it to anymore.
These jamming pods are capable of doing a number of different sorts of electronic warfare and different frequencies. Guidance systems can be flooded with noise to become unreliable, DRFM can be used to make one aircraft seem like a whole wing of them, and even basic functionality like navigation and communications equipment can be interfered with.
It’s truly a massive change for VTOL VR, and opens up many more options in how you can approach each combat encounter, or how you can be tricked into approaching them in the wrong way.
What’s even more incredible is the further addition of the ADM-160J decoy missile.

The ADM-160J Decoy/Jammer Missile
This is a missile that, like the name says, functions as a decoy and is capable of making itself look like an entire aircraft.
Not only that, but it can help you triangulate targets for your own missiles, and has jamming technology of its own to misdirect enemy air defenses. Suddenly what might seem like another EF-24 approaching you could just be a decoy missile.
There’s no limit to how these new technologies present in the game can be used for any number of operations, and makes the depth of the air combat simulation of VTOL VR far better.
That’s not even mentioning all of the new assets available not only in the new campaign like huge Early Warning Radars, Enemy Radar Jamming Trucks, and Missile Silos, but also in the VTOL VR mission editor for mission creators to use.
So if you’ve always wanted to feel like Maverick from Top Gun yourself and rule the air in an F-14 Tomcat, or want to see the new ways the game can be played, now is a fantastic time to get back into VTOL VR or try it for the first time. Though all of this new technology does make an already complicated game even more complicated. Once you understand it though, it’s truly a masterpiece.