

The Walking Dead Saints and Sinners Aftershocks Walkthrough and Guide - Part 1 - Bywater
Stuck in The Walking Dead Saints and Sinners: Aftershocks? Wondering where to go next? Maybe you just like to see what is in store for you before you get there, or want to look back and see if you missed anything in The Walking Dead: Saints & Sinners: Aftershocks.
Don’t worry, I’ve got you covered with this complete walkthrough. These articles will detail how to progress through the main story missions as quickly as possible, with a couple of guiding tips thrown in here and there to make your adventure smoother.
This guide assumes that you are starting Aftershocks with the "Aftershocks Quickstart” option in the main menu. If you’re playing Aftershocks after completing the main campaign then some details might be slightly different, but the challenges you face in the missions will be the same.
If you are missing some of the recipes then you can still pick them up while doing the missions in this walkthrough, though they won’t be explicitly pointed out here. For a full list of all recipes in The Walking Dead: Saints & Sinners, check out our recipe guide article.
Spoilers will be as light as possible, but there will be story spoilers by necessity in this walkthrough. There won’t be any explanation of what is going on in the story beyond what is necessary to make the walkthrough make sense.
The Resting Place
The Walking Dead: Saints and Sinners - Aftershocks, and this walkthrough, begins with you waking up in the Resting Place. Your radio will be on and tuned to channel 61, and you’ll hear a stranger talking about a cache in an auto shop.
Once the message plays, make sure to change the station to 47 to get the usual Tower messages about caches and whatnot. The information from channel 47 is still useful, even when you go to a location for a mission. For instance, if there is a weapons cache in Bywater during this mission it will be there when you go there for this mission.

Home sweet home. If you used the “Aftershocks Quickstart” option your bus will be packed with materials and weapons to use.
So, as with any trip in The Walking Dead: Saints and Sinners, it is time to prepare.
As always, make sure you’ve got a melee weapon or two with you for walkers, and if you’ve got the Jambalaya recipe, or any other recipe for food that gives you a beneficial buff that you want, make sure to make and eat some.
In the Aftershocks DLC you will be facing a lot more human enemies than in the main game, and so for your first foray back out into Bywater make sure you bring some firepower.
You’ll already have an absolute ton of weapons on the wall in the school bus, but whatever you pick be sure to be ready to fight a lot of heavily armed and armored human opponents if need be. I personally recommend the Nova 1014 pump action shotgun.
Bows can also be very effective and can help if you prefer a stealthy playstyle. Regardless, you should definitely bring enough weaponry in case you fail at stealth and end up in a big fight. It is possible to get the cache in Bywater without fighting, but it’s better to be prepared.
I also recommend you bring a pistol in addition to at least one larger weapon. The FS92M 9mm semi automatic pistol is overall a fantastic and versatile choice. The .45 Revolver is also a solid choice for human opponents.
As always bringing a bandage or two is also a good idea in case you get hurt. Bringing other utility items like bombs is also a good idea.
You’ll notice that you start Aftershocks with a lot of resources, and the caches themselves will all contain fantastic loot. Aftershocks is less about carefully building up your resources, and more about using all of the cool items you got over the course of the main game. So enjoy yourself and use all of your toys.
Maybe even bring some food if you want to take your time, because you can. In this mission and all other Aftershocks missions there are no bells and no time limit. The closest thing to a time limit is your stamina bar depleting whenever you swing a weapon or run.
Bywater
Once you’re armed and ready head to the boat and off to Bywater.

Travelling to Bywater.
Once you arrive and get off of the boat, the first thing that you will notice is a peculiar wire leading from the back of a truck right in front of you to a propane tank.
Just hang back for a second, and a walker will come around the side of the truck and walk into the wire, which will cause the propane tank to blow up.

A walker a moment before it walks into one of the explosive traps.
This is the newest danger added in the Aftershocks DLC, explosive traps. Get used to them, because there are a lot sprinkled throughout Bywater. Always stay on the lookout for wires and the tanks they are connected to. Keep in mind you can always shoot the propane tank or trigger the wire by throwing something at it from far away to safely detonate the trap.
Head straight down the street and soon you’ll run across an absolute ton of Tower soldiers standing in front of the main entrance to the auto body shop. Since the reserve was flooded they really beefed up on security.
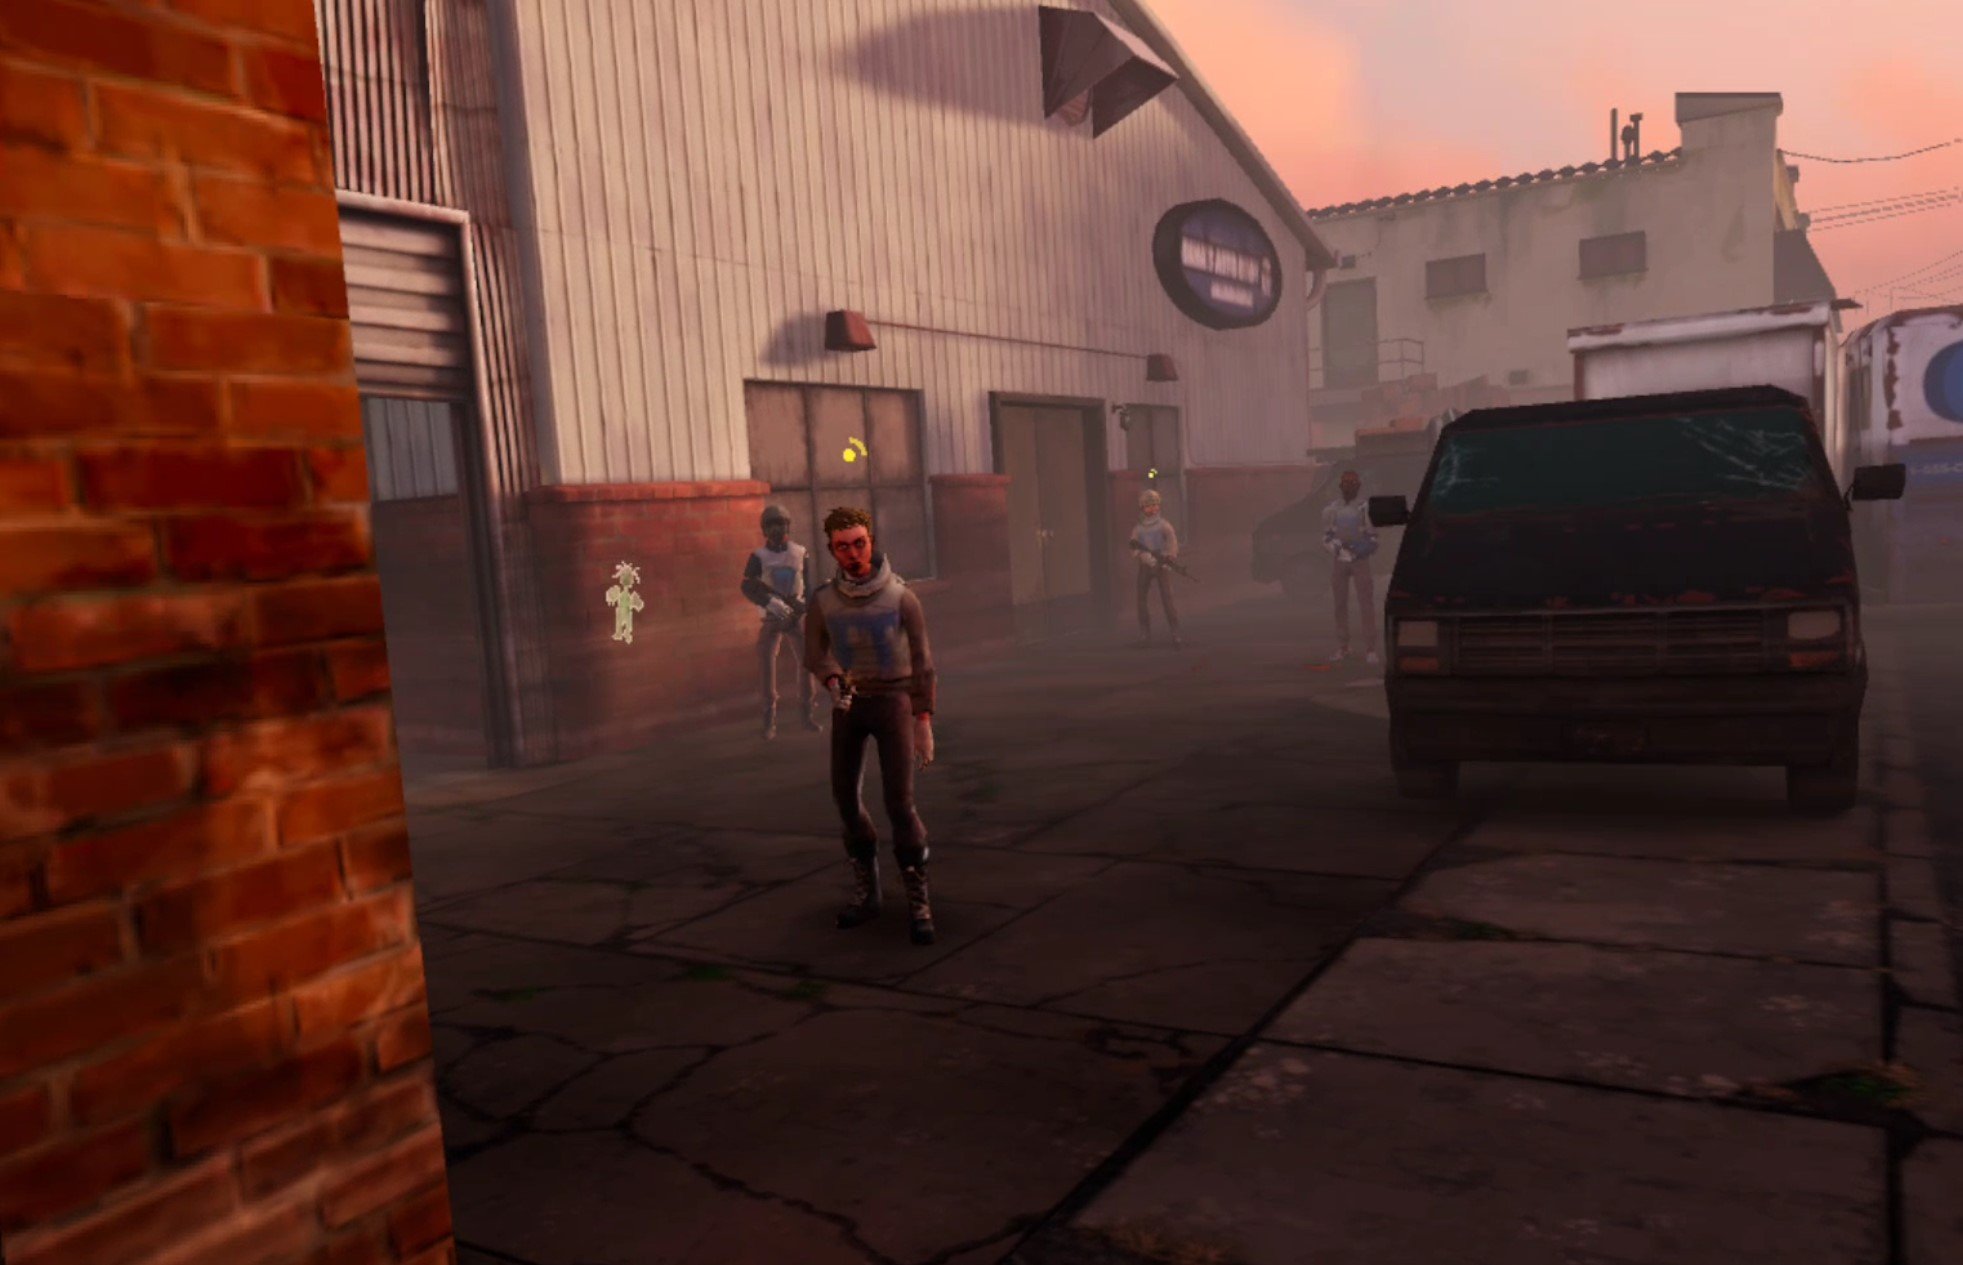
There are a lot of tower soldiers guarding the front entrance to the auto body shop.
Bywater - Getting The Key
You don’t have to deal with them yet, because you won’t have to go for the cache in the back office of the auto body shop immediately.
There’s no point right now, because the cache is locked, and the key is actually located inside of the old cannery. It’s the building marked by the fish on your map.
Oh, and don’t worry too much about picking up loot or anything like that, when you reach the end of this mission you’ll have a ton of loot to bring back with you. Though, as always, if you see any boxes of loot items, make sure to take those.

The in game map of Bywater.
The problem is that the cannery is absolutely packed with explosive traps. So many that if you set one off all of the others will explode.
If you like you can head to the lumberyard marked on your map as the pinkish building with pieces of wood as its icon and retrieve a map from the trash bin in the main office. This map shows you a route through the traps inside of the cannery.
You don’t have to get the map and can just go straight to the cannery if you like, so just skip ahead in this walkthrough if you just want to use the screenshot of the map I’ve included below, or find your way through the cannery traps yourself.
To get the map keep heading down Barthalemy street, and then take a right once you hit Madrid street. Head down Madrid until you see an opening in the fence surrounding the lumber yard with a truck sitting in the middle of it. This is the ideal way in, but be careful, there are traps on either side of that truck.
Luckily those traps are not bulletproof. Just shoot the propane tank or throw something at the wire from far away to make the trap explode.

Shooting an explosive trap to get into the lumberyard.
If you keep to the right of the truck you should only have to shoot a couple of traps before you can safely enter the courtyard and head to the trailer which contains the map.

The lumberyard office containing the map.
Inside the office search through the trash can next to the desk and you’ll find the map, as well as a pistol and some other junk.

The map in the lumberyard that shows you how to get through the traps in the cannery.
Now that you’ve got the map head back to Madrid street and head up the street (towards the top of your map) until you see this hole in the wall on the side of the street. It’s right on the top right corner of the cannery on your map.

A convenient and sneaky side entrance to the courtyard connecting the cannery and auto body shop.
Watch out for the traps near the hole, and after you destroy them you can also knock down the boards over the hole in the fence. There are other ways to get to the cannery garage entrance, but this route will have the fewest Tower soldiers between you and the garage.
You will see that just past this hole you can enter the cannery through the garage entrance on the left. Be careful though, as there are Tower soldiers patrolling the area. Slipping past them towards the cannery entrance should be pretty easy, and you can always take down the patrollers silently with a bow or melee weapon if you’re careful.
If you’re spotted, or you just don’t want to bother with stealth, then just use some of the vast arsenal at your disposal to blast your way through. At this point in The Walking Dead: Saints and Sinners you are very well armed and experienced.
However you get into the garage, be very careful once you enter. Just to be safe always stay ducked and don’t stand up fully until you’re out of the trapped area. It’s very dark so always keep your flashlight on, take your time, and go slowly. Don’t shoot or set off any of the traps, as this will cause the entire building to explode.
Walk past the forklift on its right side and climb up the box with the white paint on the side to your left.

The box you must climb over to enter the cannery proper.
Once you’ve dropped down on the other side of the box reference the map from the lumberyard, if you didn’t get it then just scroll up a bit in this article for a screenshot. You don’t strictly need the map though, if you just slowly crouch walk around you will eventually find the route yourself, though it might be a little frustrating if you get lost.
Remember to stay low and go slowly. If you get turned around don’t panic. You’ve got plenty of time, so take your time, and you can totally do this. Once you climb up the stairs that lead to the second floor of the cannery you’ve made it past the traps.
When you’re on the second floor head through the door leading to the main office. Propped up next to one of the desks you’ll see a guy with no legs sitting next to a radio with the key to the cache in one hand.

The guy you heard on the radio with the cache key.
Bywater - Unlocking The Cache
Now that you’ve got the key the next part is much more straightforward. The cache itself is in the back office of the auto shop. Yes, the same auto shop that is heavily guarded by Tower soldiers. It is possible to sneak past them, and also to fight your way through them. Fighting does also have the advantage of the potential for the tower soldiers to drop crafting recipes or boxes of loot.
The quickest way out of the cannery’s second floor is to go out on to the balcony and jump down, but it’s also an easy way to get spotted by the tower troops standing around in the area below it. If you want to just fight your way to the cache going out by the balcony does offer you a great vantage point to shoot down at them or throw bombs at them.

The balcony exit from the cannery. The entrance to the auto body shop garage is to the right and not visible in this picture.
If you prefer the stealthy approach then quickly jump off of the balcony before you’re seen, or head back into the cannery and jump down to the first floor and weave your way back through the traps so that you can head back out through the garage entrance the way you came.
There will only be a few tower troops patrolling the courtyard full of boxes behind the cannery. You will also notice that there is an open garage door leading into the auto body shop itself.

The side entrance to the auto body shop. The easiest way to fight or sneak in.
Going in through this way will bypass most of the tower defenders between you and the cache, which is in the back office right beside the garage. The back office is located on the side of the building closer to the top of your map, slightly to your right when you enter through the open garage door.
There is only one Tower soldier in the garage itself, so you can easily sneak past them or take them down quietly. Once you are in the office there’s a note with some story about the cache, and more importantly the cache itself! Open it up with your key and loot the treasure trove inside to your heart’s content.

At long last, the cache.
There are a ton of food items inside of this cache, make sure to prioritize taking the boxes of loot and then the dragon bars before anything else.
Once you’ve looted the cache all you’ve got to do is leave through the boat you came in or the one at the end of Eloise street. I recommend the one at the end of Eloise.
All you’ve got to do is exit the office through the door next to the cache and head to the right. There will be a guard or two between you and Eloise street, but at least one will have their backs turned to you and be easy prey.
Once you’re on the street take a right or a left to go to whichever boat you please, though going to the right is the more direct route.
Back At The Resting Place
Once you’re back home head to the bus as usual and scrap all of the fantastic loot you got before going to sleep. Keep your radio tuned to channel 47, there will be another cache tomorrow.

Sleeping before another day of The Walking Dead: Saints and Sinners - Aftershocks.
Need a guide on what comes next? Want to find out how to get the next cache in Rampart? Then head over to Part 2 (coming soon).