


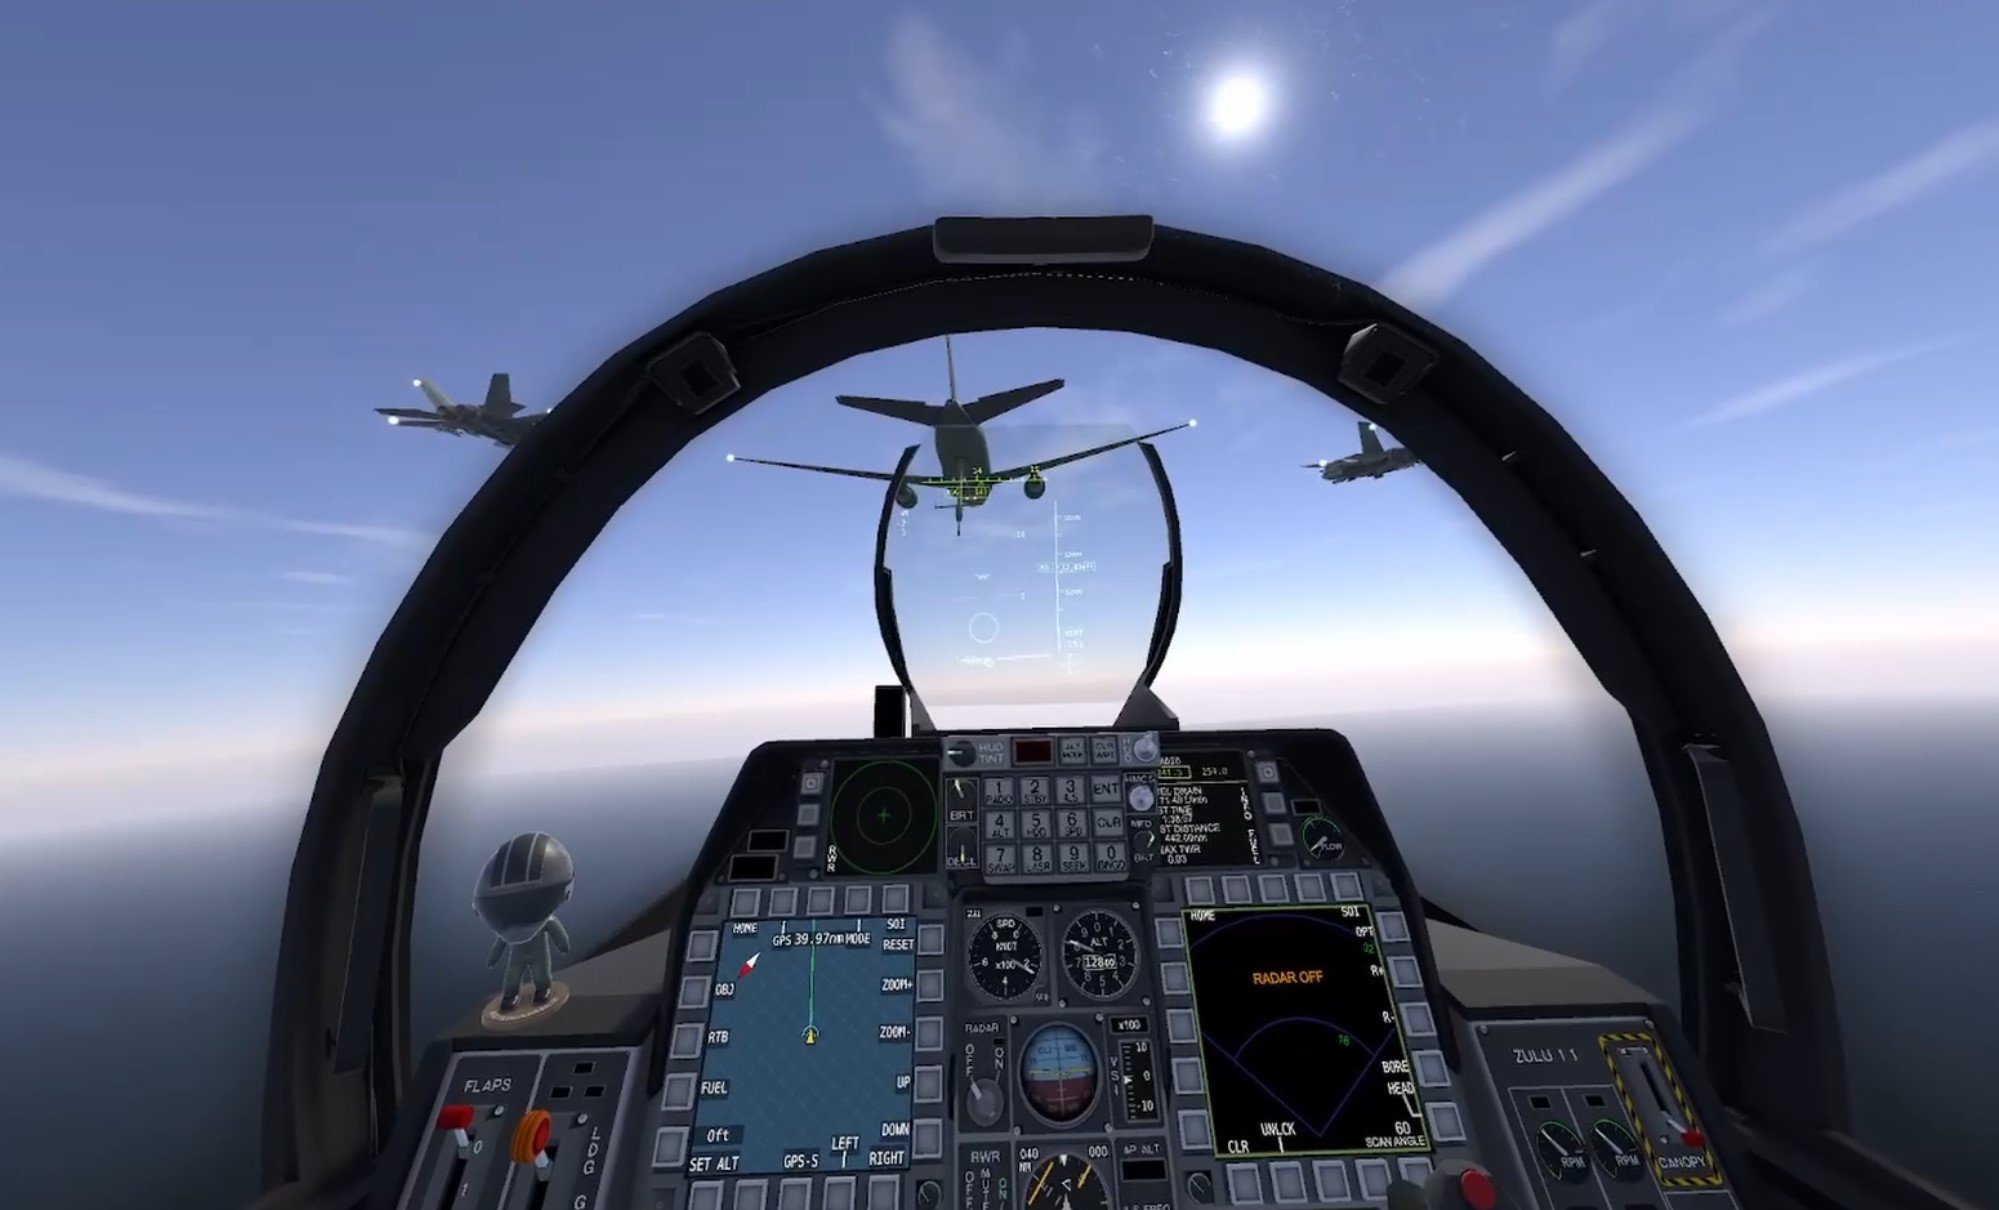
5 Epic VTOL VR Campaigns for the F/A-26B That You’ll Love
Did you know that VTOL VR has an absolute ton of free community made singleplayer content?
Well here are just a few of the many free enjoyable singleplayer campaigns for the F/A-26B.
Did you know that VTOL VR has an absolute ton of free community made singleplayer content? Here are just a few of the many free enjoyable singleplayer campaigns for the F/A-26B.
You might also be interested in:
New Planes for FREE In VTOL VR By Easily Installing VTOL VR Mods
Flying VTOL VR Planes Is Some Of The Greatest Fun In Virtual Reality Gaming
Sky Wars

Flying over a city in the Sky Wars VTOL VR singleplayer campaign.
Let's start off with the highly rated Sky Wars. If you couldn't tell from the logo, this campaign by Fyrcat is very loosely based on the Star Wars movies, though everyone will still be using the usual VTOL VR aircraft instead of X-Wings and TIE fighters.
There's a story here, also loosely inspired by Star Wars, except instead of fighting an evil empire the enemy are the Oil Cartels. Though that's not really very important, really this is all just a vehicle for some vaguely Star Wars themed missions and opportunities for the campaign author to use a few sound bytes from the movies.
Not to spoil too much, but there is a sort of Death Star Trench scene, and you even get to be Red 5! Of course even if the Star Wars references don't sound all that appealing, this is a pretty great campaign for the F/A-26 that can be difficult without being unapproachably hard.

Strafing a ground target with guns in Sky Wars.
Though I did run into some bugs and failed triggers once or twice. Such as during an escort mission. The transport to be escorted ended up just flying in circles when a batch of enemy planes were supposed to spawn. Also, the author does have a habit of spawning enemy planes extremely close to you.
This is probably to force you to have intense close ranged dog fights instead of the usual AIM-120 missile duels. While this worked sometimes, most of the time it just ended up feeling cheap and unfair to suddenly be barraged with multiple close ranged missiles from a place that had been completely threat free moments ago.

The trench scene in the Sky Wars VTOL VR campaign.
Regardless, Sky Wars is a great campaign that is full of memorable and unique missions. I highly recommend it, and if you're a Star Wars fan then you'll get some fun references and chuckles out of it too.
Operation Tollgate

Striking ground targets as other explosions go off in the Operation Tollgate VTOL VR campaign for the F/A-26B.
Next let's talk about a campaign that is pretty new and, highly underrated, Operation Tollgate for the F/A-26 by Liao and Zulu.
I'm shocked there aren't more subscriptions and positive ratings for this campaign, because it is an absolutely fantastically varied and creative campaign for the F/A-26. The maps are an even mix of water and land, which gives a lot of opportunities to face enemy naval and land based units, just as the missions themselves are a fantastic mix of anti air and anti ground.
You might be fairly used to the standard for VTOL VR missions, well Operation Tollgate has some missions where things get really switched up in creative ways.
Like one mission where you must hit some enemy ground targets while evading the Combat Air Patrol above, or another mission where you can't rearm, and can only refuel at a tanker, so you better use your ammunition efficiently.
Flying up to a tanker in Operation Tollgate.
The briefings are thorough, and even have a nice section that recommends a loadout to you in case you're unsure. You also start with relatively primitive munitions compared to the AIM-120Cs, AGM-65s, and AIRS-Ts that you might be used to.
Instead you'll have to make do with AIM-7s and Sidewinders for a while, but when you complete enough missions and you get access to better munitions it really feels like you earned them, and like you need them.
The missions in Operation Tollgate have a very smooth difficulty curve, getting harder as you get better tools to tackle them with, and some missions even have unexpected curveballs and priority targets thrown your way when you might expect it to already be complete.

Defending an airfield from a night attack.
If you want missions that feel unique and have a fair mix of air and ground combat then try out Operation Tollgate. It really deserves more attention than it has gotten.
Artemis Campaign

The Artemis Campaign has the most detailed map I've ever seen in a VTOL VR singleplayer campaign.
Our third singleplayer campaign is the Artemis Campaign by Judge Dredd. The first thing that struck me about this campaign was the map. It is the most well made and detailed map I've seen for any VTOL VR campiagn, and it was actually not made by Judge Dredd, but a different person called ddDeath_666.
This map, called Greek Islands, has numerous cities, settlements, and airfields spread out on several islands. The terrain itself is wonderfully blended so that it looks natural, and the settlements have suburbs, downtown areas, and even remote buildings all connected by roads.
The campaign itself focuses mostly on a single large island, and there are some really great missions here, alongside a few lackluster ones where not much happens and you'll find yourself flying over the water for long periods of time. Still, the missions that are good in this campaign are impressive.

A low level airstrike on an airfield.
Though the odd thing about the Artemis Campaign is that it gets easier as you progress through the missions, rather than harder, the first three missions are actually the best and most impressive of the bunch. The later missions are still good, don't get me wrong, but don't have the same level of challenge and spectacle as the first ones.
Oh, and I do like the thought of only giving the player limited saves in this campaign, this is a great way to add some interesting challenge to missions by making the player wonder when they should use their limited pool of saves. It was a nice change of pace to get out of the habit of saving every five minutes just in case.
Liberation of Kuwait F/A-26

Monitoring a friendly target in the Liberation of Kuwait VTOL VR singleplayer campaign.
Our next campaign is the Liberation of Kuwait F/A-26 campaign by Judge Dredd, not to be confused with a similarly named campaign for the AH-94 (which is also excellent). These missions are very loosely based on the air war and following ground invasion of the nation of Kuwait, which was then occupied by the Iraqi military, during Operation Desert Storm.
The first mission starts off slowly with the some aerial reconnaissance using your TGP, and the rest is a tight series of four bombing and close air support missions.
That's almost entirely the focus of this campaign, close air support and strikes using smart munitions. You'll be spending a lot of time watching prospective targets or friendly forces with your TGP before getting the order on whether or not to engage. Despite not being a very difficult campaign it's a ton of fun and very tightly designed.

The map in the Liberation of Kuwait mod could use a little more detail, but it is serviceable.
The map is a little barren and not the best approximation of Kuwait out there, but the missions do a great job of integrating friendly forces into your objectives.
When you support friendly forces you'll also see those friendlies fighting on the ground, and so the missions really sell that you are giving vital support to real troops below. The missions are well made, immersive, and not overly intense. Mostly you only have to make sure to stay out of MANPAD and AAA range.
If you want a little leisurely precision bombing in missions polished enough to feel like they could be DLC, then give the Liberation of Kuwait campaign a try. Though, expect to spend a lot of time looking at the ground with your TGP.
Surveying an allied attack on a destroyed bunker complex.
Oh, and this campaign does have some fun little touches, like this guy who you are told to stop for to arm your weapons each time you fly a combat mission. Very cool. This is a very well polished and scripted campaign that does a good job of making you feel like part of an operation involving other units.
Defenders Of Kyiv

Defending an allied airfield with a low level airstrike in the Defenders Of Kyiv VTOL VR singleplayer campaign.
The last singleplayer campaign here is based on the still active Russo-Ukrainian war. Defenders of Kyiv by Innocence Of Children focuses on a small group of fighter pilots just before and during the Russian invasion of Ukraine on the northern Kyiv front.
The Russian military attempted to pull off a high risk and high speed operation to quickly capture Kyiv and force the Ukrainian government to flee or capitulate. In this campaign you are part of the Ukrainian military forces that prevented this from happening.
The thing that makes the Defenders of Kyiv campaign stand out from all other custom singleplayer campaigns in VTOL VR, even more so than its setting, are the wingmen that you fly with. Both are actually characters, with dialog and personalities. In fact there's a lot of dialog in these missions.
Your two wingmen, Joker and Queen, go from corny to dramatic very quickly when the invasion starts. Their banter fills out the quiet moments and gives each mission a greater sense of context and drama.

Your wingmen are actual characters in this campaign.
While English is clearly not the author's first language and there are a lot of minor errors in the script, the intent of the writing is a solid story, and the character drama hits as hard as the missions do. In terms of story and drama the Defenders of Kyiv campaign has to be the best one out there.
This campaign also severely limits what equipment you will have access to, especially earlier on. While you'll never get all of the fancy ultra modern missiles and ground attack munitions that you'll have access to in normal play, limiting you to less sophisticated weapons makes the campaign more difficult throughout, and changes the usual flow of air to air fights. It also changes how you engage ground targets, and unfortunately not in the best way.

Using old weapons means you'll be resorting to guns more than ever in the Defenders Of Kyiv VTOL VR campaign.
While being forced to rely on dumb bombs and missiles more than usual is interesting, it's more annoying than anything when you receive objectives to destroy fifty targets... and then even more after that.
While ostensibly you'll have your wingmen and other allied units helping you, they'll inevitably end up being shot down or run out of ammo before chewing through so many enemy ground targets. This leaves you using all your muntiions up over and over and needing to fly back to base a bunch of times to actually complete the objective. This gets kind of tedious, and I wish you didn't get such a massive amount of ground targets to take out at once.
Still, the briefings have great detail, and the battles on the ground are absolutely massive and impressive. This campaign felt really unique and fresh in a lot of ways. I highly recommend it.
If you've got a campaign for any aircraft that you think deserves playing then feel free to let me know in the comments. Have fun flying out there in VTOL VR.
You might also be interested in:

The Easiest Way To Install Skyrim VR Mods
So you want to play modded Skyrim VR, awesome! Unfortunately downloading and installing enough Skyrim VR Mods to create a completely new Skyrim VR experience is a pretty hard task. You’ve got to worry about what mods you want, which ones work, which ones don’t, dependencies, and a ton of other problems that can cause bugs, make your game crash, or make it just not start at all.
Luckily there’s a way, the easiest way, to install a ton of Skyrim VR mods at once that are built to change the game to enhance functionality, graphics, and gameplay. They’ll also all work together, and you don’t have to browse nexusmods.com for hours and hours figuring out what you do and don’t need.
So here’s the easiest way to install Skyrim VR mods using a fantastic tool called Wabbajack.
Wabbajack - Easily Install Skyrim VR Mods
Wabbajack is a community made tool that is used for both Skyrim VR Mods and flatscreen Skyrim Special Edition Mods. Here, of course, we’re going to be downloading and installing Skyrim VR Mods with Wabbajack.
Some warning though, the actual downloading process will still take a while and require some input on your part. While Wabbajack is the easiest way to download and install Skyrim VR mods quickly, there’s still going to be some legwork on your part.
Not only can we download mods through a predefined list of mods that are made to provide a complete modded experience and work together, but Wabbajack also manages the downloads and files so we don’t have to do a ton of boring dragging and dropping ourselves. So let’s get started.
First go to wabbajack.org and download Wabbajack.

Downloading Wabbajack from wabbajack.org
A Wabbajack application file will download to your browser’s usual downloads folder. Don’t run it quite yet though. We want to run Wabbajack in its own folder, not your Downloads folder. Wabbajack will make some extra files, and so won’t run in certain places.
The easiest way to run Wabbajack is just to create a new folder directly on your C:/ drive or any other drive you might have on your PC and name it something like “Wabbajack.” Once you’ve created this C:/Wabbajack folder, move your newly downloaded Wabbajack application into it and run it.

The Wabbajack Start Screen
Using Modlists - Easily Install Skyrim VR Mods
Now that you’re running Wabbajack, hit the “Browse Modlists” button on the main page, and filter for Skyrim VR Modlists at the top. You’ll see there are a few options for you to pick from here. These are your options for predefined modlists that you can use through Wabbajack.
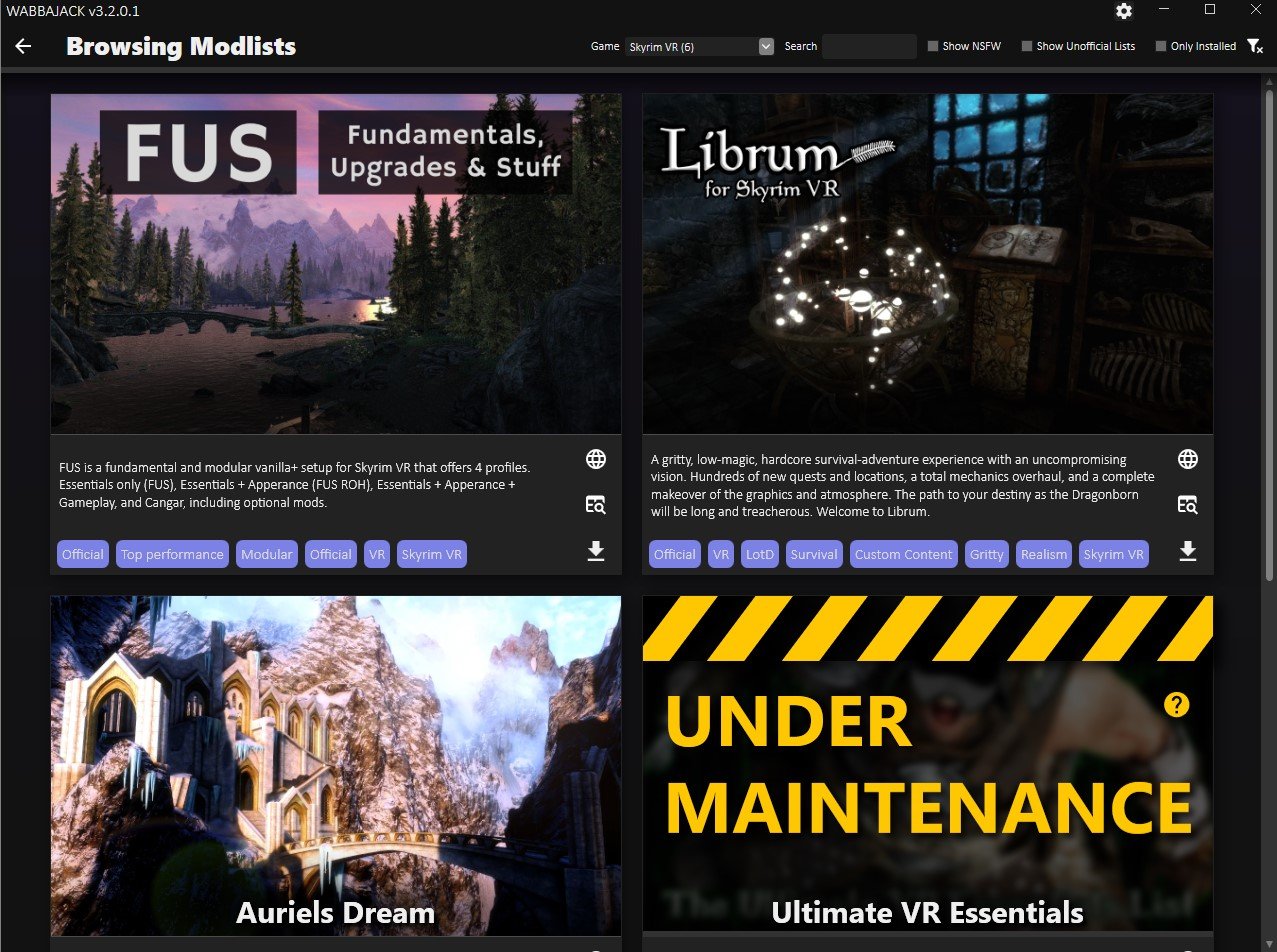
Browsing Skyrim VR Modlists in Wabbajack
There are some great options here, and if you want an improved but still recognizeable modded Skyrim VR experience that doesn’t stray too far from the base game, then you’ll want to go with FUS, which is short for “Fundamentals, Upgrades, and Stuff.”
While the rest of this article is applicable when installing all modlists through Wabbajack, the specifics will revolve around installing FUS. If you want Skyrim VR but better, then FUS will give you that with a ton of improvements. It’s also modular, so you can decide what Skyrim VR mods you want to keep in the modlist.
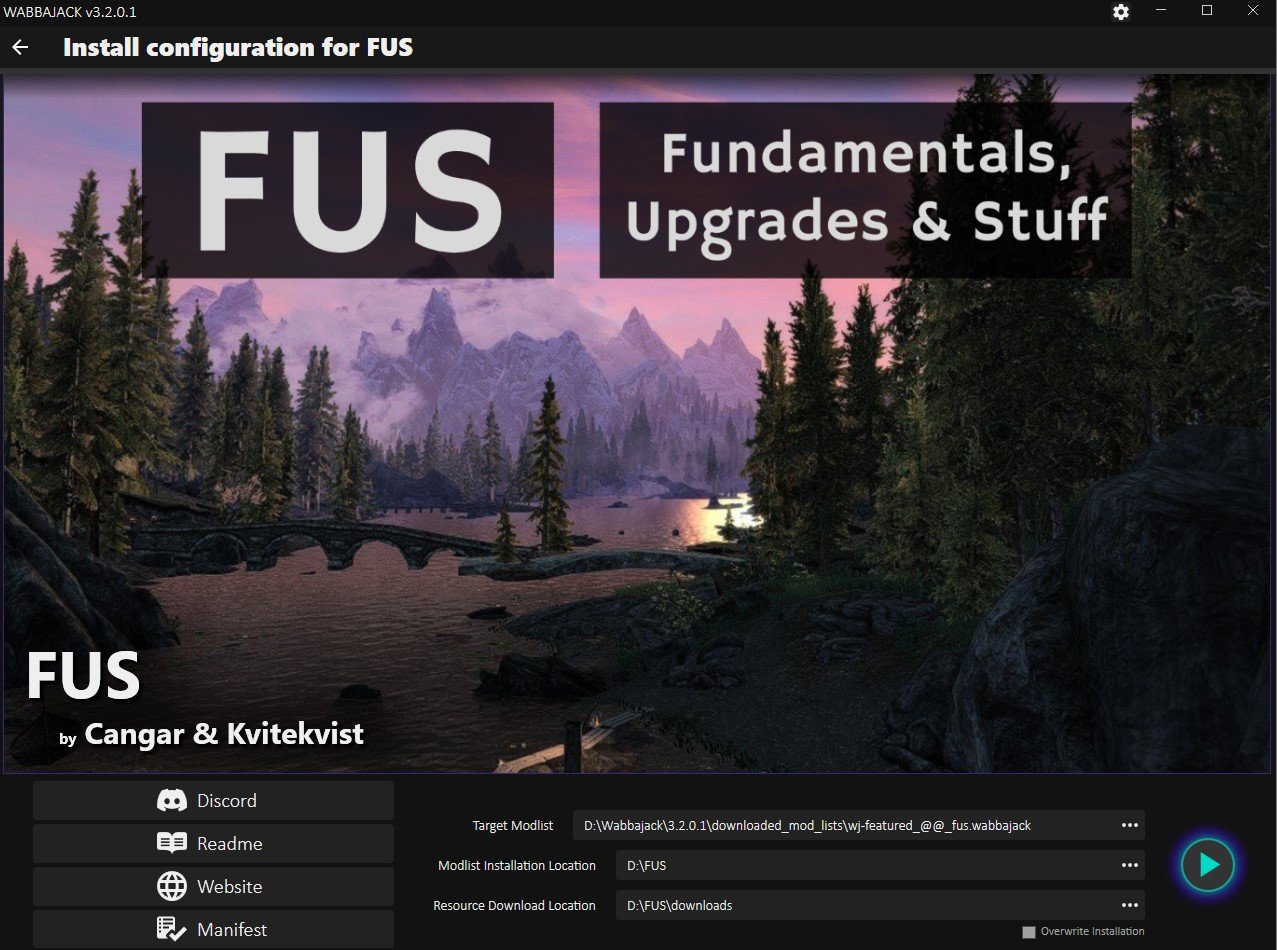
Anyway, since we’re installing FUS, hit the little arrow button in the bottom right of the FUS modlist icon. After a wait it will turn into a play button, hit that. You should see a screen like the one below.

Ready to download the FUS mods
The only difference between this screen and yours will be that the “Modlist Installation Location” and “Resource Download Location” sections will be empty. You’ll want to create another folder in the same location you made your Wabbajack folder earlier, and then add that folder location to both of these paths, except the “Resource Download Location” should have \downloads at the end.
As you can see in this example, the name of the folder here is FUS. So you might think it will be time to hit the play button, not yet though. You might have noticed that a github page appeared right when you got to this screen. Well it will have a long list of instructions and other stuff. It seems complicated, and sure it is, but we’ll distill some of it down for you here to a few simple steps to do before you start.
If you run into issues at any point and can’t figure out why, then check out the “Troubleshooting” section at the bottom of this article.
FUS Preinstallation Steps - Easily Install Skyrim VR Mods
Alright so you’ve got Wabbajack ready to start downloading mods, but haven’t hit that final play button quite yet, time to get your PC ready for FUS. First you’re going to need to install some extra software to support some of the mods in FUS.
You’ll need to make sure you have some Microsoft Visual C++ Redistributable Packages installed. Here is a direct link to them, download the x64 version. Once the installer downloads, run it, though you might get this error.

If you see this you’ve already got the right Microsoft Visual C++ packages installed
If you do, no big deal, you’ve already got the right things installed, and can move on. Otherwise the installer is straightforward so just follow along it.
Next you’ll need to install some old versions of the .NET 5.0 Runtime. Go to this webpage from microsoft and download and install both the console and desktop app versions. This means you’ll end up running two installers, one for each.

Where to download the .NET 5.0 Runtime installers
With that out of the way you’ll want to uninstall Skyrim VR and then reinstall it. You want as clean a version as possible. If you’ve already got some Skyrim VR mods installed, then you’ll want to follow these steps to make sure your installed version is as clean as possible. We’ll want nothing to interfere with the FUS mods.

Advanced steps to clean your Skyrim VR installation
If you run into problems later on you might want to double check this github page for any other things that might interfere. Additionally make sure your language in Skyrim VR is set to English, and if you ever changed your Render Resolution in Steam VR, change it back to 100%.
Now you’re ready to download and install FUS! Oh, and if you run into issues at any point and can’t figure out why, then check out the “Troubleshooting” section at the bottom of this article.
Downloading And Installing the Skyrim VR Mods - Easily Install Skyrim VR Mods
Now you should go back to Wabbajack and hit the play button in the bottom right corner to start downloading your shiny new Skyrim VR mods.
The FUS download screen, time to hit that play button
Once you do the modlist installer will run, and very quickly it will hit a point where you have to start downloading mods. A browser window will appear and ask you to log into a nexusmods.com account. If you don’t have one already then make one, they’re free.
Once you log in the page will automatically redirect to the download page for the first mod in the list. It will look like this.

Downloading a Skyrim VR mod from nexusmods.com
Here’s the boring and lengthy part we mentioned earlier. If you don’t have a premium nexusmods.com account then you’ll have to manually click the “Slow Download” button for each mod that comes up. A premium account will automatically download the mods.
This will take a while, there are over 300 mods to download for FUS, but Wabbajack makes it as fast as possible. Once a mod is ready to be downloaded the page will appear automatically, all you have to do is hit the download button for each one.
You see normally you’d have to go to the Skyrim VR mod page, go to the files page for that Skyrim VR mod page, then download it through this screen, and then move the downloaded Skyrim VR mods folder to the right location.
With Wabbajack all you have to do is hit the “Slow Download” button, wait a bit, and then when another appears click the “Slow Download” button again. Some of these mods also take a while to download, and if that happens another download page won’t appear until there’s a space in the queue for a new download. So you’ll be waiting for a while.

Downloading the FUS Skyrim VR mods with Wabbajack
So kick back, relax, maybe watch a youtube video or five, and hit that download button when it shows up. You can see the Skyrim VR mods that are downloading in the bottom right section of the Wabbajack screen.
Oh, and if a mod seems to never finish downloading and the bar doesn’t move for a long time, you might need to restart Wabbajack and reopen the FUS modlist installer. Just follow the steps we’ve done to get to this point in Wabbajack and it will pick up right where it left off. Do the same if Wabbajack crashes.
Once all of the mods are downloaded the installer will automatically unpack and install them, this will also take a while. Still, all of this is way easier than downloading and installing all of these mods yourself.
If you run into issues at any point and can’t figure out why, then check out the “Troubleshooting” section at the bottom of this article.
Playing Modded Skyrim VR - Easily Install Skyrim VR Mods
So the Wabbajack installer is complete. All your Skyrim VR mods are ready to go. So you might be wondering how to actually run them. Well for FUS you don’t just run Skyrim VR from Steam like you normally would. No, instead you need to go to the FUS folder that you made previously before downloading all of the mods (in this example it was D:/FUS, yours is likely C:/FUS if you don’t remember.)
From this folder scroll around until you find ModOrganizer.exe, and run it.

The ModOrganizer.exe file in the FUS folder
This handy application lets you view, manage, and select which FUS mods you want to use. You’ll see a little dropdown bar with several profiles near the top. There are four, each with a differing amount of mods applied to Skyrim VR.
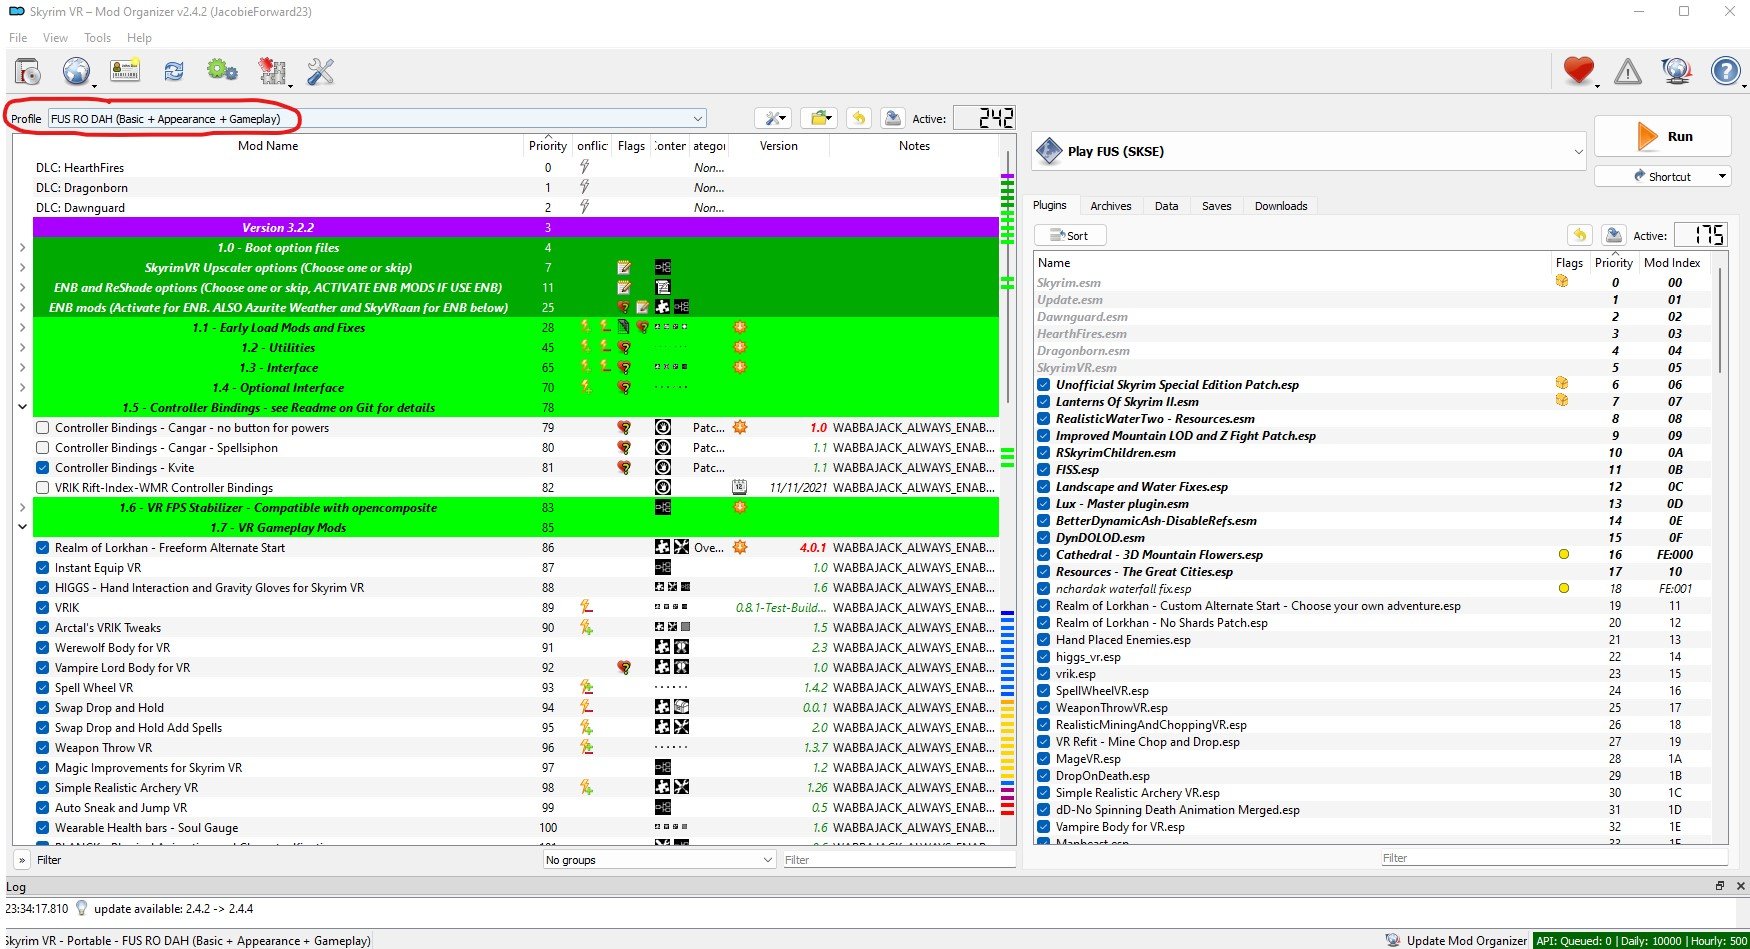
ModOrganizer.exe for your Skyrim VR mods with the profiles section circles
Here we recommend the “FUS RO DAH (Basic + Appearance + Gameplay) mod selection, which not only improves the normal Skyrim VR experience, but also adds some important gameplay improvements as well. There are other profiles that change the game to lesser extent, but after going through all that waiting to download these mods you might as well use them.
Later on you can scroll through the list of mods and activate or deactivate whichever you like, but first you should run your freshly modded Skyrim VR without changing anything to make sure it runs without crashing and to allow important mods to load ingame.
To run your modded Skyrim VR you hit the run button in the top right corner of ModOrganizer.exe, but before you do that make sure your headset is on and connected to your PC, and that your controllers are also on and working. Then run Steam VR so that you’re in Steam VR home in your headset, then click the run button.

You’ll find yourself in FUS’s new starting location and ready to make a character. Congratulations! You’ve successfully downloaded and installed a whole modlist of Skyrim VR mods.
If your game crashes or doesn’t start then retrace your steps to this point and make sure you didn’t miss anything. If all else fails or you get an error you didn’t expect, check out these troubleshooting tips.
Troubleshooting - Easily Install Skyrim VR Mods
Unfortunately even with Wabbajack the process of downloading and installing Skyrim VR mods can be difficult, and some problems might show up on your PC that might not on others.
So here are a list of places you can look if you’ve had problems at any point in this article. Before you look here check back and make sure you didn’t accidentally skip any steps. You may also want to more thoroughly clean your Skyrim VR installation before reattempting to install the modlist through Wabbajack.
Hopefully your journey in installing Skyrim VR mods is as painless as possible. Once you reach the end, enjoy!

Fighting a giant in modded Skyrim VR

Easily Install H3VR Mods - Install Hot Dogs, Horseshoes & Hand Grenades Mods
Welcome to this step by step guide on how to install H3VR Mods! Hot Dogs, Horseshoes & Hand Grenades is an extremely fun VR game, and it’s even better with mods. So keep reading to find out how to install Hot Dogs, Horseshoes & Hand Grenades mods as easily as possible.
Welcome to this step by step guide on how to install H3VR Mods! Hot Dogs, Horseshoes & Hand Grenades is an extremely fun VR game, and it’s even better with mods. So keep reading to find out how to install Hot Dogs, Horseshoes & Hand Grenades mods as easily as possible.
Thunderstore Mod Manager for H3VR Mods
The best way to download and install H3VR mods is by downloading and installing the Thunderstore Mod Manager. The Thunderstore Mod Manager is a useful program that you can use on your PC to install H3VR mods. Since most Hot Dogs, Horseshoes and Hand Grenades mods are stored on Thunderstore you can access most mods available through this mod manager. To download it go to this link. Once you’re there press the red download button.
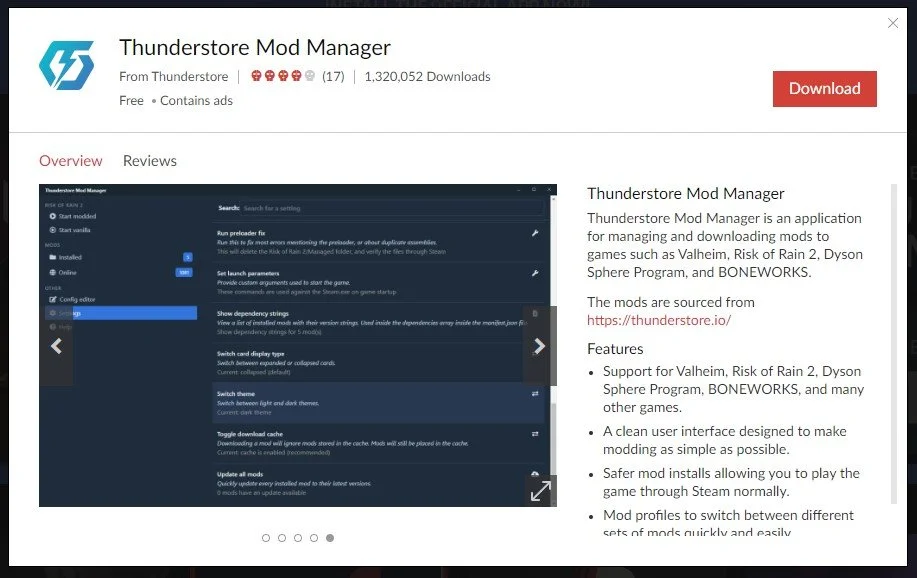
The Thunderstore Mod Manager Download Page
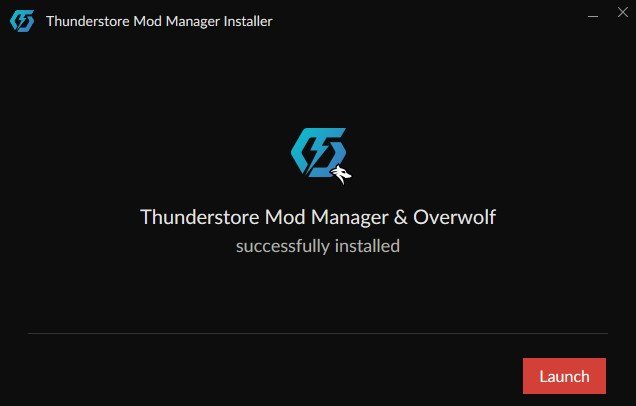
Once the Thunderstore mod manager installer is downloaded, run it and this page will appear.

Thunderstore Mod Manager Installer
Press the red “Next” button before continuing on and going through the installer steps, which are pretty standard. You can change the installation folder to be whatever you please, or just use the default that is filled in for you. When you press the red “Next” button a second time the installer will begin. Give it a few minutes to complete installation until you see the “Successfully Installed” page.
Now that the Thunderstore mod manager is installed, hit the red “Launch” button. Since this mod manager is used for more games than just H3VR you’ll have to search for Hot Dogs, Horseshoes & Hand Grenades in the games search bar. Luckily since there aren’t any other games on Thunderstore that involve hot dogs, just typing in “Hot Dog” will bring up H3VR.

Searching for Hot Dogs, Horseshoes & Hand Grenades
Now mouse over the game logo and hit “Select Game”. This will bring up the profile selection for the game. Profiles are great because you can put mods into different categories and easily switch between selections of mods. For instance, if some H3VR mods have compatibility issues with others, or you want to quickly change between groups of mods you like to use. For now just hit the “Select Profile” blue button to use the Default profile.

Now it’s finally time to look for some fun H3VR mods to install! You’ll see your mod menu for H3VR, and no mods will currently be installed, so hit the “Get Mods” button on the left hand side to look for some mods to install. You can search for a mod by name, or filter by a number of categories.
In this example we’ll be installing the All_American_Fallout_NV mod to add the All American carbine from Fallout: New Vegas. Just click on the mod title to open the submenu for it, and then press the “Download” button.

Downloading the All American Fallout NV H3VR Mod
You’ll be prompted to select which version of the mod you want to install. It’s best to go with the latest version unless you want a specific one already, and then hit “Download with dependencies”. Once the download is complete hit the “Mod Mods” button on the left hand side and see your beautiful new mods. A lot of H3VR mods, like the All_American_Fallout_NV mod, require other mods to function properly. So you might see a lot of additional mods installed, don’t worry about those.

Successfully Installed Mods!
You can disable mods that you’ve installed by clicking the blue slider next to them, but beware that disabling some mods might affect others. Anyway now that your shiny new mod is installed time to launch H3VR by pressing the “Modded” play button in the top right corner.
Hot Dogs, Horseshoes and Hand Grenades will run through SteamVR like usual, and you can put on your headset and check out your new mods in the game. Where your mods will be in the game depends on what kind of mod you’ve installed. For weapons mods like the All_American_Fallout_NV mod, you’ll find them in the spawning menu underneath its weapon type. In this case, Carbine.

The installed mod in the game!
Now go nuts and have fun with your new H3VR mods!
You can also download and install H3VR mods through the Thunderstore website here at h3vr.thunderstore.io using the mod manager. You can also download mods from there manually to import through the Thunderstore application.
If you want an alternative to Thunderstore you can also use the r2modman mod manager. Thunderstore is probably the easiest way to go though. Anyway enjoy your H3VR mods and have fun!

How To Install An Awesome Gorilla Tag Mod Menu
Welcome to this step by step guide on how to install a Gorilla Tag Mod Menu and use it! Gorilla Tag is an extremely fun VR game, and it’s even better with mods. A Gorilla Tag mod menu is great because it lets you easily active and deactivate mods without having to go back to the Gorilla Tag in game PC in your tree house. So keep reading to find out how to install a Gorilla Tag mod menu as easily as possible.
Welcome to this step by step guide on how to install a Gorilla Tag Mod Menu and use it! Gorilla Tag is an extremely fun VR game, and it’s even better with mods. A Gorilla Tag mod menu is great because it lets you easily active and deactivate mods without having to go back to the Gorilla Tag in game PC in your tree house. So keep reading to find out how to install a Gorilla Tag mod menu as easily as possible.
Installing the Gorilla Tag Mod Menu on the Oculus Quest 2
A quick note for all Oculus Quest 2 lovers that are wondering how to get mods directly on your Quest 2. Unfortunately Gorilla Tag mods and Gorilla Tag mod menus can no longer be installed on the Quest 2. There are also currently no plans to bring Quest 2 modding back to Gorilla Tag. Sorry, but if you want to install a Gorilla Tag mod menu then you’ll have to do it on PCVR. Look at this screenshot from the Gorilla Tag modding discord.

You can’t install a Gorilla Tag Mod Menu on an Oculus Quest 2 or 3
If you see a guide that says you can install mods, probably using the QuestPatcher tool, then they won’t tell you that you won’t be able to play Gorilla Tag on your Meta Quest 2 after using QuestPatcher. It just won’t work, and will constantly tell you that you have an outdated version of the game that has to be restored to the newest version.
If you have a Quest 2 and want to play Gorilla Tag on PCVR then you could set up and use Oculus Airlink. The thing about Airlink is that it can drop a ton of frames and be very choppy and look horrible if your internet setup to your PC isn’t very good. If you want to use Oculus Airlink, then make sure your PC is connected to your Router or Modem with an ethernet cable.
If you can’t or don’t want to use Airlink then you’ll need to be able to connect your headset to your PC directly. This is possible with an Oculus Quest 2 using an Oculus Link Cable or comparable USB 3 cable. If you don’t have one there are plenty online that are not as expensive as the official Link Cable, but are possibly not as good.
Monke Mod Manager for PCVR Gorilla Tag Mod Menu
The first step in installing PCVR Gorilla Tag mods is downloading and installing the Monke Mod Manager. It’s a sweet program that you can use on your PC to install Gorilla tag mods. Go to the Monke Mod Manager github page that you can find at this link. Click on the MonkeModManager.exe link under “Assets” to download the installer.

Downloading the Monke Mod Manager to install Gorilla Tag mods
After Monke Mod Manager is downloaded, launch it to start the installer. You might get a prompt like the one you see here if the installer can’t find where your Gorilla Tag launcher is, especially if you’re running it through Oculus.

If you see this error don’t worry
That’s alright. If you run Gorilla Tag through Steam click OK and then find and select GorillaTag.exe at C:\Program Files (x86)\Steam\steamapps\common\Gorilla Tag. If you run Gorilla Tag through the Oculus app then you can find and select GorillaTag.exe at C:\Program Files (x86)\Oculus\Software\Software\another-axiom-gorilla-tag (your filepath might be a little different depending on where you have Steam or Oculus installed, just find the “Steam” or “Oculus” folder and follow the rest of the path from there).
Whether Monke Mod Manager found the path automatically or you had to find it yourself, it will start up and you’ll see a menu with a bunch of check boxes. The box that we’re looking for is the mod menu we’re installing that comes with the Monke Mod Manager, the Haunted Mod Menu. This Gorilla Tag mod menu is great and easy to use. For more information on it you can also check out the Haunted Mod Menu github page.

Installing a Gorilla Tag Mod Menu using the Monke Mod Manager
Scroll up and down the mods available and check whichever other mods you want to install. This Gorilla Tag mod menu is only useful if you have some mods to turn on and off. Then hit “Install/Update” in the bottom right corner, and in a couple of seconds the mods will be installed.

Now installing a ton of Gorilla Tag mods to use with the mod menu
Using Your New Gorilla Tag Mod Menu
So you’ve got some mods installed for Gorilla Tag and the Haunted Mod Menu to activate or deactivate them with. Time to run Gorilla Tag and check them out. Once you start the game you’ll see that the Gorilla Tag mod menu can’t be accessed at first, and if you enter a lobby you’ll find that all of your activated mods won’t be working!
Don’t panic, that’s just because Gorilla Tag will turn off any installed mods by default when entering a standard lobby. If you are joining a normal lobby then you won’t be able to run mods, because if you have a mod like Power Arms then nobody will be able to catch you, and it will basically be like you’re cheating.
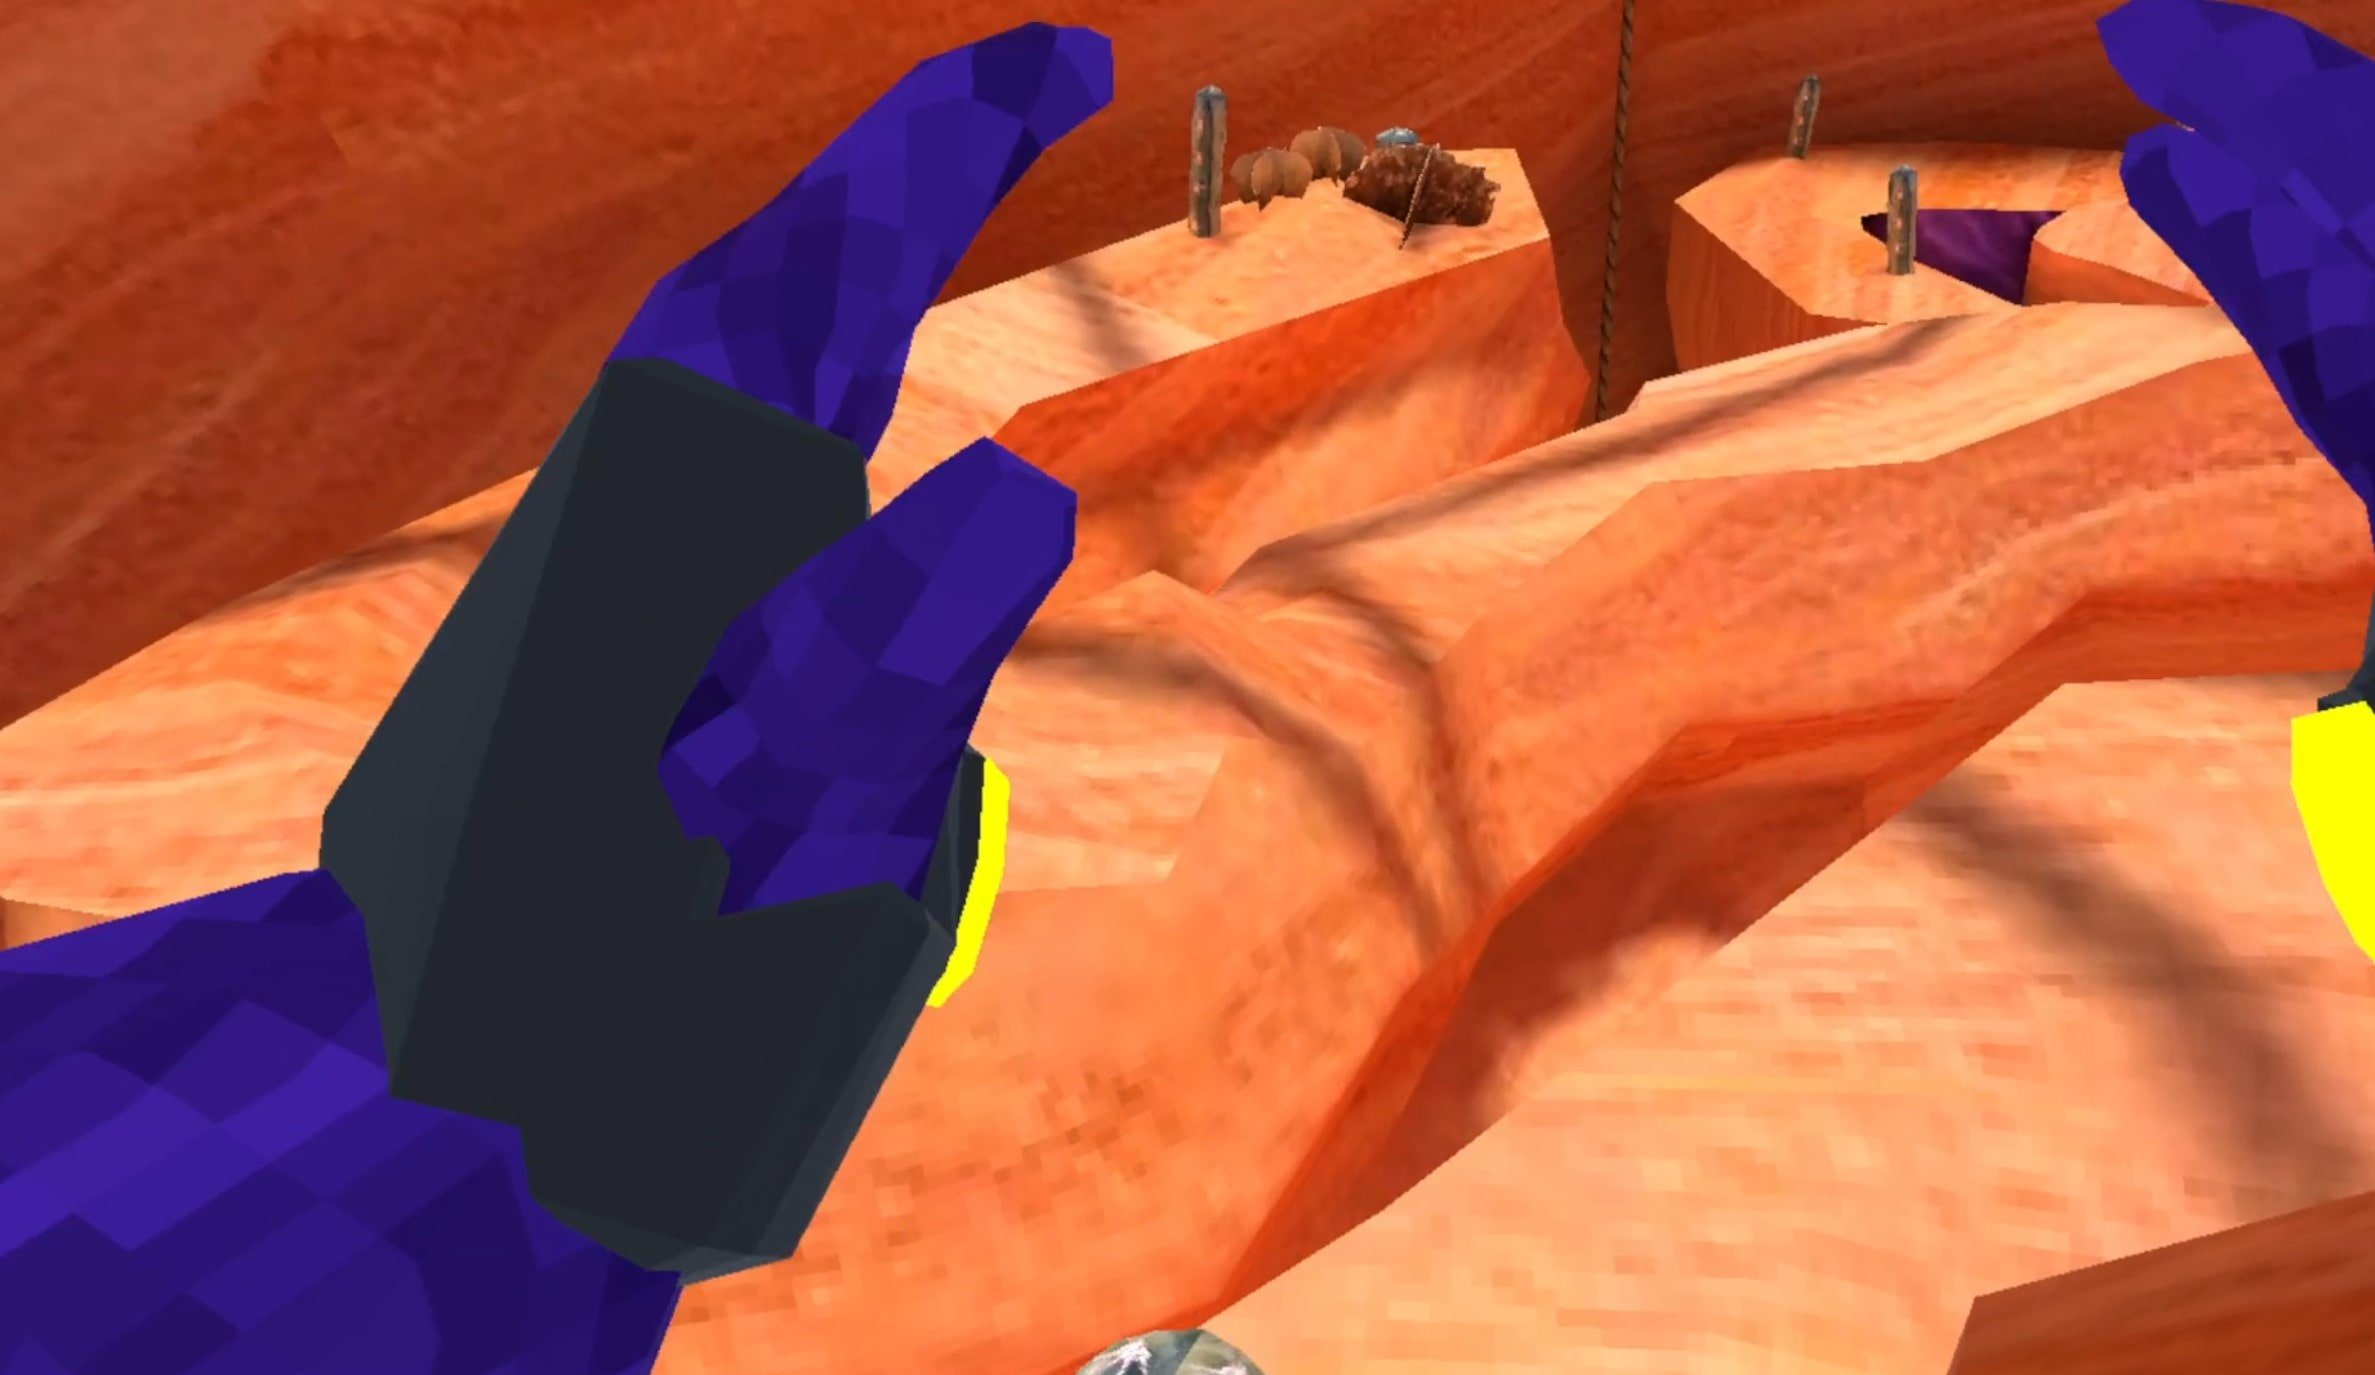
Flying with Gorilla Tag mods
To actually use your new mods you’ll either have to find a custom room that somebody else made, and join it by entering the room ID in the “Room” menu on the Monke Computer in your treehouse, or go over to the “Game Modes” menu in your tree house. When you’re there hit the arrow button on the right and you’ll see that you can select a ton of Modded game modes to find public lobbies that are modded. Select one and then enter a lobby by exiting your treehouse as usual.

Stick to the modded game modes when using Gorilla Tag mods
When you enter the Modded lobby you’ll notice that there’s a yellow button on the inside of your left Monke paw. Press it with your other hand.

Press this button on your palm to open the Gorilla Tag mod menu
Now your Gorilla Tag Mod Menu will appear out of the back of your left hand! All of the mods you installed will be on the mod menu. You can scroll through all of your mods with the arrows on the bottom. To activate a mod press the mod name in the mod menu with your right hand and the button will turn red. That means that the mod is activated.
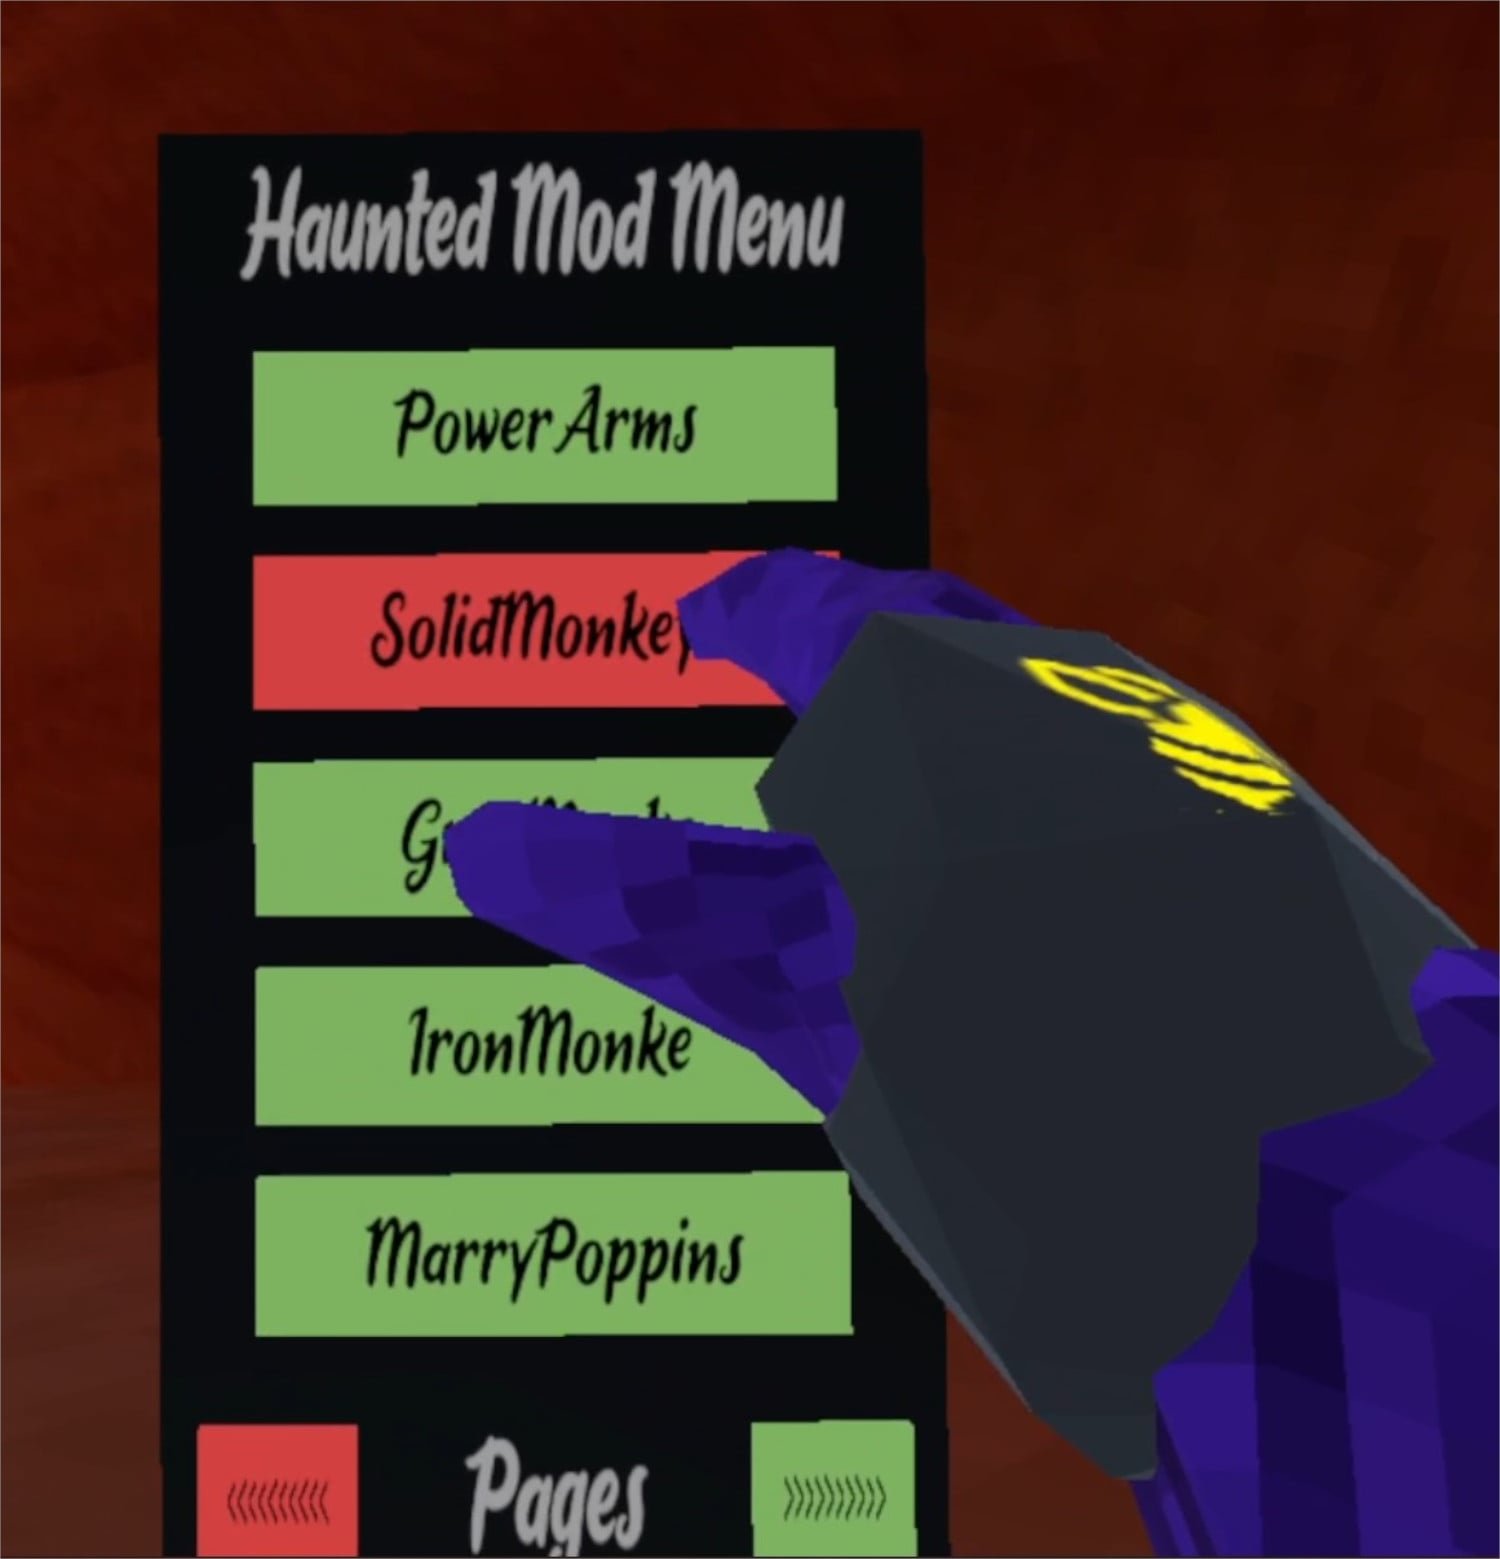
Activating a mod using the mod menu
Now you can easily enjoy all of your Gorilla Tag mods with your new Gorilla Tag mod menu! Activate and Deactivate your mods at will. Enjoy!
Easily Get and Install Into the Radius Mods
Welcome to this step by step guide on how to download and install Into the Radius Mods! Into the Radius is an extremely fun VR game. Even after you’ve played it through a bunch of times, or haven’t even finished it and want a different experience, mods can make this VR Survival Game even better. So keep reading to find out how to install Into the Radius mods as easily as possible.
Welcome to this step by step guide on how to download and install Into the Radius Mods! Into the Radius is an extremely fun VR game. Even after you’ve played it through a bunch of times, or haven’t even finished it and want a different experience, mods can make this VR Survival Game even better. So keep reading to find out how to install Into the Radius mods as easily as possible.
Into the Radius Mods on the Oculus Quest 2
You might be here to find out how to install Into the Radius mods on the Oculus Quest 2, or if you can install mods on the Quest 2. Well I’m afraid to tell you that currently Into the Radius mods are not supported on the Meta Quest 2. Hopefully at some point in the future they will be, but for now there’s no way to install Into the Radius mods on your Quest 2. To play modded Into the Radius you’ll need to play it via PCVR via Steam or the Oculus App on your PC.
If you have a Quest 2 and want to play Into the Radius on PCVR then you could set up and use Oculus Airlink. The thing about Airlink is that it can drop a ton of frames and be very choppy and look horrible if your internet setup to your PC isn’t very good. If you want to use Oculus Airlink, then make sure your PC is connected to your Router or Modem with an ethernet cable.
If you can’t or don’t want to use Airlink then you’ll need to be able to connect your headset to your PC directly. This is possible with an Oculus Quest 2 using an Oculus Link Cable or comparable USB 3 cable. If you don’t have one there are plenty online that are not as expensive as the official Link Cable, but are possibly not as good.
How to Get Into the Radius Mods
To mod Into the Radius on PCVR let’s start with getting the mods that you’ll want to install. In this example we will be downloading the Scavenger Mod. This mod is a great new way to play the game. Make sure you start a new save file after installing this mod, and always be wary of cross compatibility issues when you have multiple mods installed.
To get the scavenger mod get on your PC and go to nexusmods.com and search by game for “Into the Radius” or follow this link to take you straight to the Into the Radius mod page.
Once you’re here feel free to browse the mods listed on the front page and search through some categories. There’s a bunch of great cosmetic mods that replace objects in the game with different models. There are even other gameplay mods like the STALKER mod that you can install. To find the Scavenger mod search for “Scavenger Mod” in the search bar at the top of the screen, or go to any mod page that you want. When you’re there click on the “Files” tab.

Oh, and make sure that you’re logged into a Nexus Mods account, otherwise you won’t be able to download anything. Don’t worry, you can easily sign up for a free Nexus Mods account. Also you’ll notice that some mods, like the Scavenger Mod, can be installed using Nexus Mod’s Vortex mod manager.
Since not all mods are supported by Vortex, here we’ll be going over how to install these mods manually. Don’t worry, it’s not very hard and takes about just as long as using Vortex anyway.
Now click the “Manual Download” button underneath the latest mod file and you’ll be taken to a downloads page. Select the “Slow Download” button if you’re using a free Nexus Mods account and the file will download to your Downloads folder (or whatever folder you’ve designated files to download to, but Downloads is the default).

Congratulations on your shiny new mod! Time to install it.
How To Install Into the Radius Mods
Head to your PC’s Downloads folder. You can find it in the “Quick Access” panel of the file explorer, or go to C:\Users\<Your PC Username>\Downloads. If the downloaded mod file is a .zip file right click on it and select “Extract All” to get the unzipped contents.
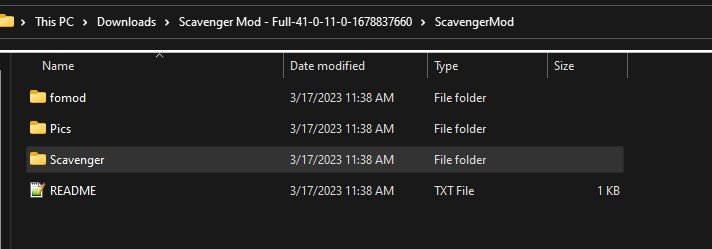
Whichever mod you’ve downloaded should come with one or multiple .pak files. Those .pak files contain the actual mod information and all you need to do is move them to the right folder to install the mod. The Scavenger mod comes with a lot of .pak files in the ScavengerMod/Scavenger/ folder. For this example we’ll be installing the .pak file in the “Abundant” folder for as much loot as possible, and also disabling the shop with the .pak in “Optionnal_files”.
Now that we know what .pak files we want to move, let’s open another File Explorer window to where we want to move them. If you run Into the Radius VR through Steam, then go to where you installed Steam and then \steamapps\common\IntoTheRadius\IntoTheRadius\Content\Paks. The default Steam installation path is: C:\Program FIles\Steam\steamapps\common\IntoTheRadius\IntoTheRadius\Content\Paks.
Oculus App users can find the Into the Radius folder in C:\Program Files\Oculus\Software\Software by default. Then go to \IntoTheRadius\Content\Paks.
This “Paks” folder is where you need to move all of the installed .pak files. Just drag the .paks for the mods you want to install into the “Paks” folder and that’s it! You’ve installed Into the Radius mods. When you start the game next they’ll be installed and ready to go.

Well that’s how you install mods in Into the Radius VR. Make sure to be careful that the mods you install don’t overlap and conflict. Be sure to read the README if one comes with a mod you want to install, or at least read the mod’s page to check if the mod developer shows any conflicts. Most should be obvious, for instance don’t install two mods that reskin the same weapon. It’s also best to start a new game after installing mods, as the mods might mess with a differently modded or vanilla game. Especially overhaul mods like the Scavenger or STALKER mods.,
Oh, and make sure to leave pakchunk0-WindowsNoEditor.pak in the “Paks” folder. This .pak is needed to run Into the Radius properly and is part of a vanilla installation of the game. Moving or deleting it will probably break your game.
Have fun out there in a whole new Zone!