Into The Radius Walkthrough And Guide - The Sixth Mission - The Intrusion
Stuck in Into The Radius? Wondering where to go and how to get there for your next mission?
Well don’t worry we’ve got you covered with this walkthrough and guide for Into the Radius VR.
Here we’ll be talking about the sixth Top Priority mission that you get in Into The Radius, The Intrusion, which brings you back to Pobeda Factory to collect a bomb, fight your way through a factory, blow up a door, and steal a case of documents.
Stuck in Into The Radius? Wondering where to go and how to get there for your next mission?
Maybe you would just like to see what is in store for you before you get there, or you’d like to know if you’re properly prepared for your next mission in the Pechorsk Zone.
Well don’t worry we’ve got you covered with this walkthrough and guide for Into the Radius VR.
In this Into the Radius walkthrough we’ll detail how to progress through the main story “Top Priority” missions, with a couple of guiding tips thrown in here and there to make your adventure smoother.
The focus of these walkthrough articles will be the story missions, but we’ll throw in some general gameplay tips and other useful loot locations near your objectives.
These articles will also assume you’re playing the game on the Normal difficulty mode with Tutorials turned on, which is highly recommended for your first playthrough. This walkthrough will still be useful if you’re playing on Realistic difficulty, but some details like vendor prices or enemy placement and numbers will be different.
Here is every article in our complete Into the Radius VR Walkthrough:
Into The Radius Walkthrough And Guide - The First Mission - Equipment Retrieval
Into The Radius Walkthrough And Guide - The Second Mission - Total Recall
Into The Radius Walkthrough And Guide - The Third Mission - Fixing A Leak
Into The Radius Walkthrough And Guide - The Fourth Mission - Flash In The Dark
Into The Radius Walkthrough And Guide - The Fifth Mission - A Probing Move
Into The Radius Walkthrough And Guide - The Sixth Mission - The Intrusion
Into The Radius Walkthrough And Guide - The Seventh Mission - A Farewell Feast
Into The Radius Walkthrough And Guide - The Eighth Mission - Kids Playground
Into The Radius Walkthrough And Guide - The Final Mission - Ouroboros
Here we’ll be talking about the sixth Top Priority mission that you get in Into The Radius, The Intrusion, which brings you back to Pobeda Factory to collect a bomb, fight your way through a factory, blow up a door, and steal a case of documents.
The Sixth Mission - The Intrusion - Loadout
Now that you’ve got Security Level 3 your loadout options have expanded a lot.
By now you’ve likely got some favorites among the weapons that you’ve tried, and so if your loadout looks different than what I’ve got here don’t worry about it.
Just make sure you’re ready for some fighting out in the open at medium ranges, but also fighting inside of buildings in close quarters and small rooms. You will have to fight a lot of enemies at close range in this mission.
Whatever works best for you is up to you, though if you’re unsure, having trouble completing the mission, or want to have a tried and true loadout to use then here’s a sample one.
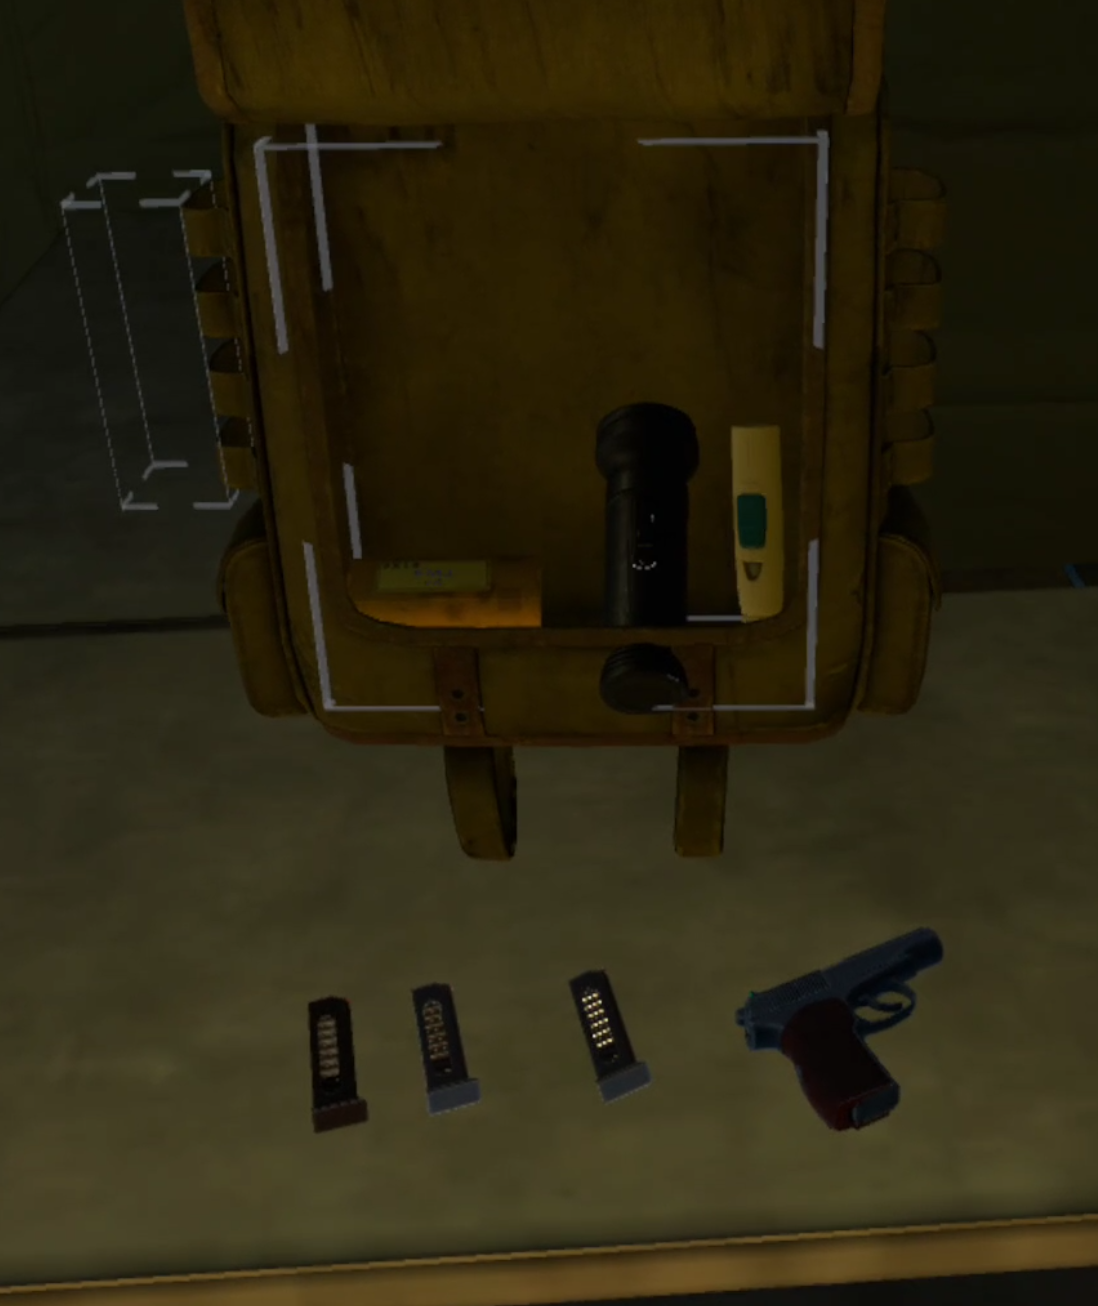
A sample loadout for the The Intrusion mission
As you can see here our loadouts have come a very long way in this game, from a Makarov and a dream to something a soldier wouldn’t feel ashamed to carry on to a battlefield.
First of all let’s talk about the armor you can see on the left. Wearing both the SSH-40 Helmet and Army Bulletproof Vest is highly recommended and not super expensive. The extra protection from bullets will undoubtedly save your life many times in the Zone. Oh, and of course you should have a Head Lamp as well.
Speaking of armor you might notice that our Gas Mask is missing. Since we’ll be carrying a lot of stuff and avoiding anomaly fields then it’s pretty unnecessary and will just add weight to a heavy loadout. The route we’ll be taking does pass a few anomaly fields though, and at least one contains a bunch of gas clouds. So if you want to take some artifact hunting detours feel free to take one.
Now for the weapons. Once you hit Security Level 3 I highly recommend that you invest into an Assault Rifle of some kind whether that be an AK-74 variant, AKM, AUG, or M4A1.
If you’re unfamiliar with the various weapons in Into The Radius these assault rifles are highly effective at short and medium ranges, can fit a variety of attachments, and do good damage to both armored and unarmored opponents. They are fantastic all around weapons.
You’ll also notice that the M4A1 in this picture has a silencer. While not strictly necessary, bringing a silencer for your rifle is not only pretty cheap, but also very helpful in the initial infiltration into Pobeda Factory during this mission.
This mission will take you a while, and while you will probably find some food on your way, it doesn’t hurt to bring a can to be safe.
Lastly as the Mission Briefing says, there are a ton of the Zone’s hostile inhabitants between you and your objective.
The description of The Intrusion mission
So bring a TON of ammunition and healing items. You’ll be using a lot of ammo, and possibly a lot of heals. Grenades can be useful since a lot of fighting will be in close quarters, but they are just as dangerous to yourself as to your enemies and aren’t necessary.
As for the type of ammunition to bring, FMJ for rifles should work out just fine. Though you can spend some extra for AP rounds, which deal less damage but penetrate through armor much more effectively.
That’s up to personal preference. FMJ is perfectly capable of taking down an armored enemy as long as you hit them rapidly. Though you may want to upgrade the ammunition you use for your sidearm to +P rounds in case you need to use it against an armored opponent. +P rounds not only penetrate armor better, but also deal more damage. They’re well worth the cost.
The Intrusion - Getting To Pobeda Factory
So after checking your loadout and accepting the mission head out to the Bolotky Village exit from Vanno.
This walkthrough also assumes that the Tide has just come in and it is daytime. I’d recommend leaving at around 7 or 8 AM to give yourself enough daylight to make it if you want to do this during the day.
While going at night does make navigating an unfamiliar area a lot harder, it does give you a huge advantage in stealth as long as you don’t use any lights. I’d recommend going during the day the first time you complete this mission unless you’ve been doing more sneaking than fighting up to this point. Regardless there’s no way around fighting your way through the factory, so you better be ready for one.
Let’s take a look at the map and plot our route through Bolotky Village.
The route we will take through Bolotky Village
As with our previous walkthrough on the A Probing Move mission, we’ll be avoiding the hotspots of Bolotky Village like the village itself and the construction site across the swamp.
You’ll run into the most enemies near the ruined tanker by the lakes next to the Kolkhoz Zarya exit. The rest of the way you’ll undoubtedly run into a few more, but they shouldn’t be much of a problem at this point in the game.
Bolotky Village is the easy part of this mission, and if you forgot something or want to reequip before heading to Pobeda Factory you can easily just go back the way you came to Vanno.
So just like last time immediately cut north through the forest taking down the few enemies that will be there, and when you see the exit to Kolkhoz Zarya next to the ruined tanker cut to the east and go across the narrow strip of land in between the red lakes.
The path between the lakes by the ruined oil tanker
You’ll run into a few enemies here, mostly those that attack you in melee range like Fragments, Spawn, and Seekers, though there will be at least one firearm equipped enemy in the forest you’re headed towards.
Go through the strip of forest past the lakes, while watching out for Web Anomalies.
Once you’re on the other side of the trees you’ll be next to the tower safehouse marked with a blue house on your map.
The safehouse tower
Instead of taking the exit to Pobeda Factory near this tower like last time, keep going past it to the northeast and you’ll run across a small road past more trees and a patch of swamp water.
The path near the top of Bolotky Village
Follow this road, you can also see it on your map.
It will lead you directly to the exit to Pobeda Factory. There are quite a few anomaly fields next to it, and you’ll probably run into a few enemies, but nothing you can’t handle.
Before taking the exit to Pobeda Factory make sure to ready yourself, eat if you’re hungry, and load your magazines.
The rope line to Pobeda Factory
The Intrusion - Getting The Bomb
Once you’re in Pobeda Factory take a look at your map.
Here is the route we’ll be taking. There are a few ways to get to the bomb, and all of them risk combat, so you might as well take the shortest route.
The route we will be taking through Pobeda Factory
Pobeda Factory does have quite a few enemies in it from Mimic Policemen, Mimic Commandos, and even some of the more lightly armed Mimic Soldiers.
Don’t worry though, you’ve got quite a bit of experience in Into The Radius by now and you can handle this.
If you brought a silencer now is the right time to make sure you’ve got it on your weapon. Being quiet as you push across the factory complex to the bomb will make the whole experience a lot easier.
When you’re ready walk up to the main gate. You’ll notice an anomaly field in the parking lot on your left, and your friend standing in front of the entrance.
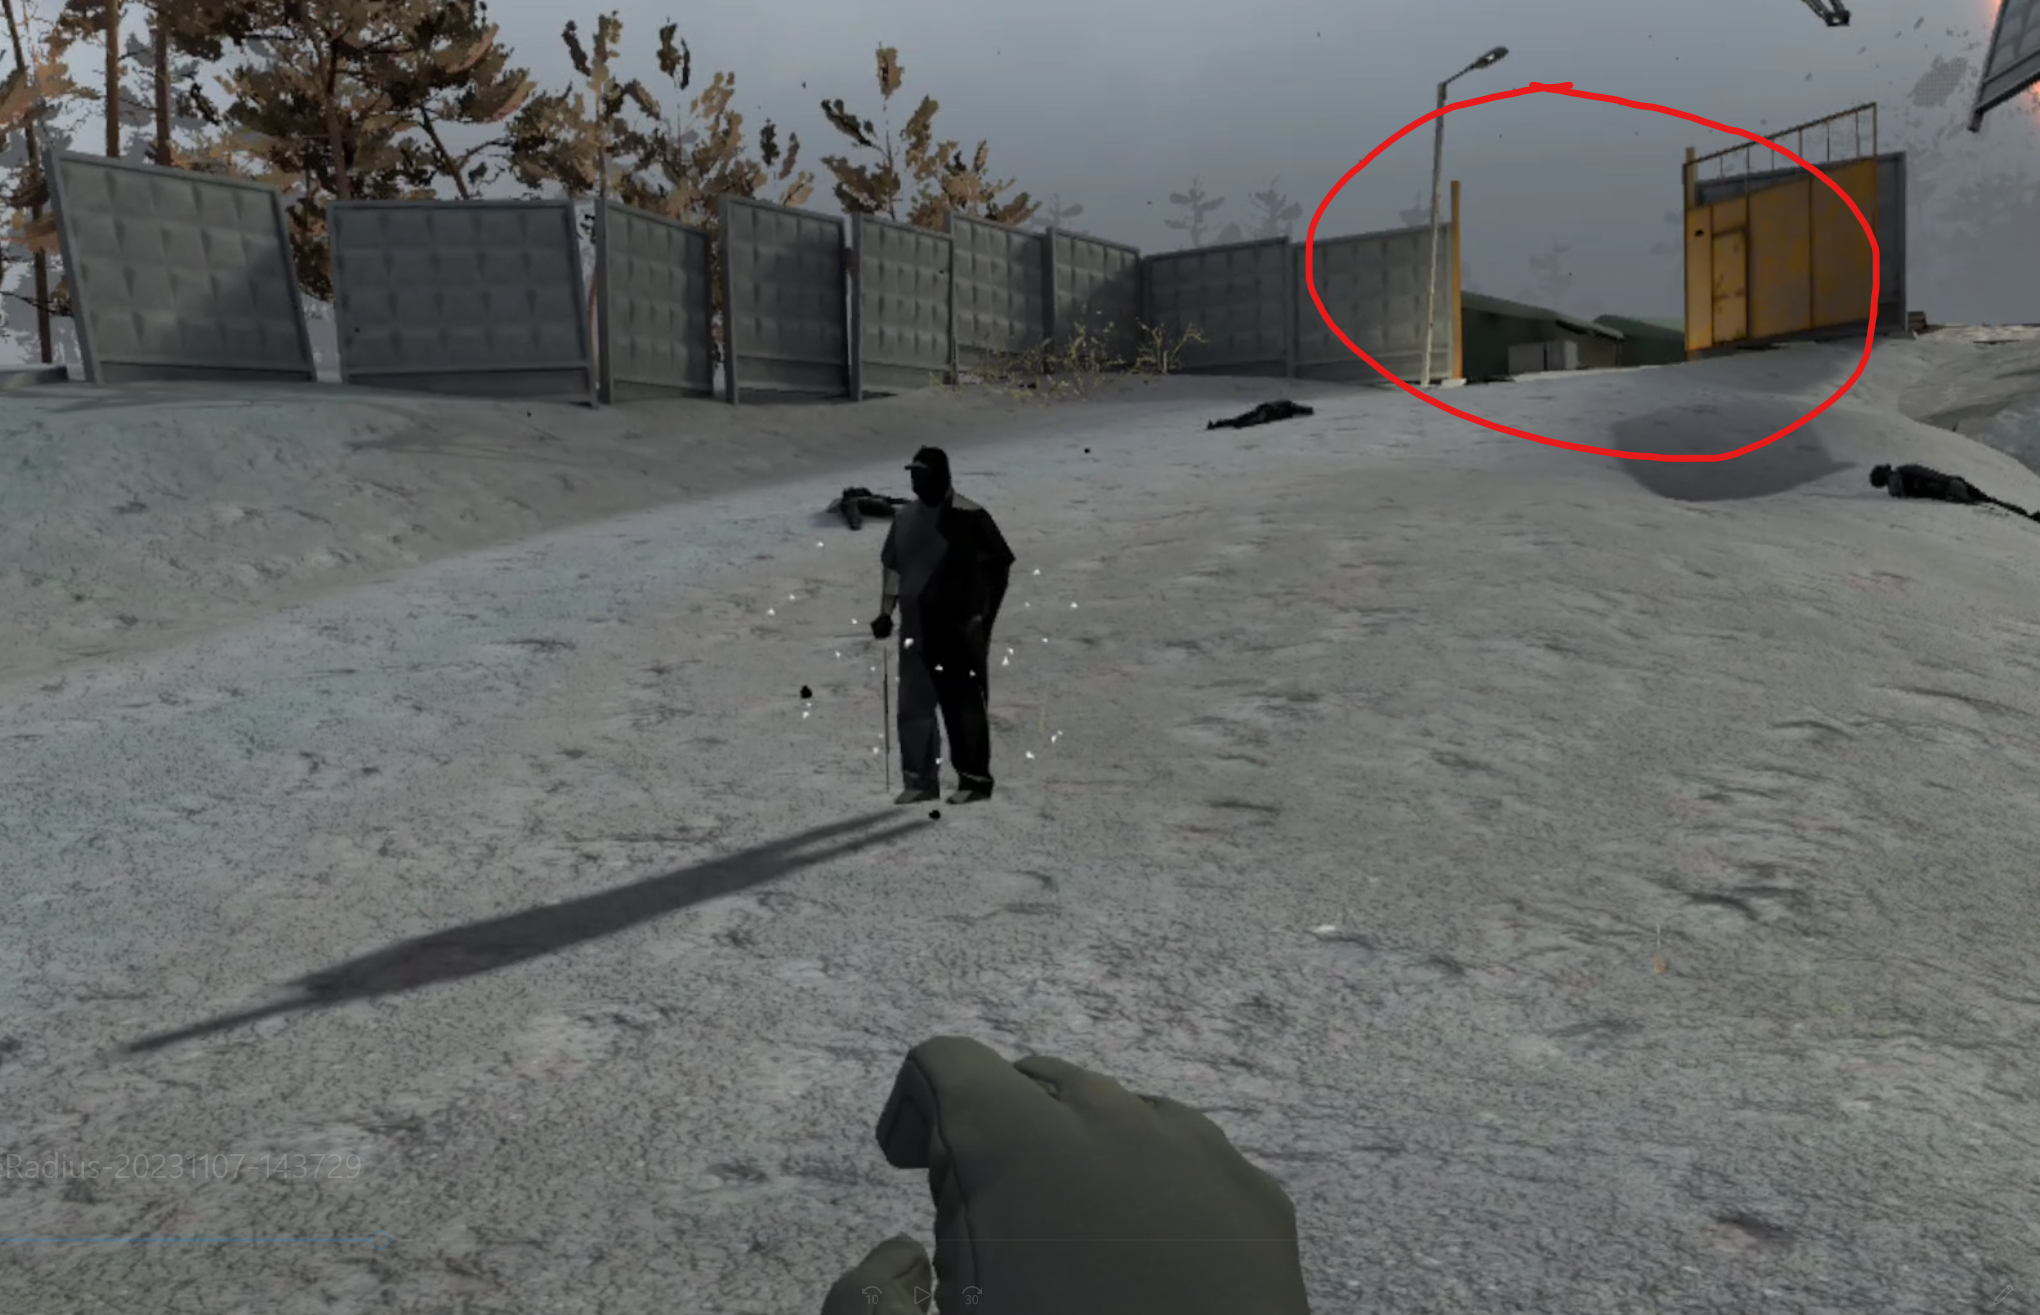
Our friend at the entrance of the factory. The outer gate is just past her
Touch her for some extra dialog and keep moving. Right through the gate you’ll be in a sort of small courtyard with buildings on either side of you. Don’t bother going left or right, there will be enemies patrolling near those buildings.
Just go straight through the inner gate.
The inner gate on the main road of Pobeda Factory
There will be another anomaly field on your left with more enemies patrolling around it.
At some point an enemy will probably spot you. If they do then take them down with your silenced weapon quickly and keep moving.
If you don’t have a silenced weapon then any gunshot of yours will attract a crowd of enemies. If you aren’t taking the stealthy approach you may want to consider holding your position and letting your enemies come to you, as unsilenced shots will draw enemies from all directions.
Either way there won’t be too many, but there will be more equipped with firearms than you’ll be used to from Bolotky Village. Hopefully you’re also wearing your armor.
Whether you can sneak past or have to fight the enemies near the entrance, keep following the road through the center of the factory complex past the second gate.
When the walls around the buildings on either side of the road give way you’ll see a ruined building with a floating anomaly field in front of you and on your right.
The anomaly field in the ruined building near the bomb
That anomaly field is just to the west of the bomb’s location. You don’t have to go through it, so instead head to the east a little bit and pass by the field.
Get through this area quickly. The area to the west of that anomaly field is full of enemies among those buildings, and there might be more wandering around the hills and ruins. You can play it safe, dig in and fight them all, or run through and take down any that see you with a silenced rifle.
As always distance helps with avoiding being spotted, so the sooner you get over to the bomb the less likely they are to spot you, though there might be a stray enemy or two near the bomb they won’t be hard to deal with.
You can see the location of the bomb on your map. It’s inside a crate in a pit.
The crate containing the bomb
Grab it and put it in your backpack. There will be a lot more combat before you need it.
The Intrusion - Close Quarters Combat
The bomb pit should be relatively safe, so reload your magazines and keep an ear out for enemies sneaking up on you.
When you’re ready get out of the pit and take a look at the big building just to the south.
The entrance is just to the left of that truck
As you can see on the route plotted on our map there’s an entrance to the factory interior on the eastern end of this large building.
The route we’re taking through Pobeda Factory, again
The doorway is next to a high wall and hidden behind some piles of concrete pads. If you follow the northern wall of the building to the east you’ll run into it eventually.
Once you get next to the entrance you’ll probably hear a lot of footsteps. If you’re using a silencer then you can take it off now.
Time to go loud.
The entrance to the interior of the Pobeda Factory
There’s really no reason to try and stay quiet anymore.
From here on out there will be enemies directly between you and where you need to go, with no way to maneuver around them or avoid them.
In the factory interior there are no clever routes, no secret back entrances, just a straight up running firefight between you and a small army of radius entities.
Immediately find cover as you enter the warehouse. Watch out for the Web Anomalies and Gas Anomalies floating around the place.
There will be about five or so Mimic Soldiers between you and where you need to go, which is a stairway that leads up above the warehouse floor that you’re on. Just keep heading east. Stay in cover and listen for footsteps.
Play it smart and you can get the drop on the enemies in your way. If you take some hits don’t worry, that’s what the armor and healing items you brought are for.
Fighting through the Mimic Soldiers
Once you’re on the other side of the warehouse look for the stairway leading up.
There may also be a Mimic on top of them firing down at you. It’s just to the right of the red sheet metal room jutting out of the wall.
The stairway leading further into the factory
Head up the stairs, there will likely be a Rift Anomaly in the locker room that the catwalk leads into.
Destroy it so that it doesn’t respawn any enemies, and continue forwards into the small office adjoining the locker room.
There will likely be more enemies around, so make sure you take care of them, and also make sure you loot the place. Some great loot spawns in that room, and there’s even a crate on one of the tables that can spawn a weapon inside.
Oh, and if you’re worried about the condition of your weapons there’s even a brush and cleaning spray on one of the window sills.
Some free cleaning supplies
Once you’re done looting continue forwards. There’s some black grass in the next hallway.
You’ll run into the Black Grass anomaly multiple times in this building. Even if you’ve got just a Head Lamp it’s easy enough to get past by simply looking at it for a few moments, and then quickly walking over it while looking down at your feet.
Once you’re past the black grass take a right and you’ll see a long hallway.
The long hallway, be careful down there
This hallway is the skybridge that joins the large warehouse/factory you’ve been in to the building on the other side of the road.
Be very careful crossing it. There is very little cover. The easiest way to clear this area is to draw enemies towards you so that you can shoot them as they advance across the open ground, instead of advancing towards them and getting shot up in the open.
If you brought some grenades and have a good throwing arm you can also toss a couple down the hallway to clear out the next room as well.
However you make it across, keep your ammunition count in mind and make sure all of your magazines don’t run dry.
Take a left down another hallway in the next room. There will be more Black Grass at the end of it, and probably another enemy or two. There will be enemies spread throughout this building.
There’s a lot of Black Grass in the factory
Go down the stairs where there will probably be, you guessed it, even more enemies.
There’s a lot of stairways too
You might be able to see why I recommended bringing so many healing items and so much ammunition.
There will be yet another hallway full of black grass and a stairwell leading downwards. Don’t worry, you’re getting close to the end by now.
If you’re not in a hurry though there is a great opportunity to grab some extra loot by taking a left into another hallway before going down the stairs.
Make sure to go down this side hallway to get more loot
Down this hallway is another crate of loot which might contain a weapon, and some other things scattered around.
There should be yet another loot crate if you walk out on the fire escape and go up the stairs. Though be careful that you don’t get shot at by any stray enemies while you’re up there.
The view from the fire escape, don’t fall down!
When you’re done looting head back to the stairway and down the stairs.
There will probably another enemy or two lurking around, and you might hear a lot of footsteps around you if you haven’t cleared the whole outside area when you were on your way in.
Don’t worry, enemies outside the walls are basically harmless until you leave, and you’ll be leaving very shortly. Next to another ruined staircase that has a ramp leading up to yet another crate, you’ll find the door.
The door to the final room and the black statue in front of it
There’s also a black statue that you can touch to get a hint, basically that you need to blow the door down and then escape out of the window, which is just what you’re going to do.
Get the bomb out of your backpack and then place it into the small highlighted area on the door.
Be ready for when you do though, the bomb will immediately arm. Run as soon as you place it. The bomb will blow in a few seconds.
Once the door is gone head into the office beyond it.
There will be an absolute ton of loot in there. Various pieces will be scattered around including some items that will certainly sell for lots of cash, a Pecho plushie, and another of the white crates that may spawn a firearm.
On the floor behind the desk is your target, the case of documents.
The case of documents to bring back
The thing about this case is that unlike previous mission items you can’t put it into your backpack. Instead you need to carry it in one of your hands, which makes leaving a little tricker than usual.
Of course you can always drop it to regain the use of both of your hands, but this can still make moving while being ready for a fight difficult since you won’t be able to hold your rifle while walking with the case.
Also the case is very heavy and will slow you down. Regardless the hard part is behind you now. Time to get out.
Load your mags and get ready for the trip home before climbing out of the window with your case in hand, a little wooden ramp is leading up to it.
The window you can jump out of to leave
Keep a watch out for enemies, and take a left once you’re out of the building. Go to the road that leads through the center of the factory.
On the road turn right (south) and follow it back out through the main gate the way you came in.
If you chose to take the stealthy approach to getting into the factory complex you might have an enemy or two between you and the exit. You could also choose to wait for nightfall by sleeping in the safehouse nearby marked by the blue house symbol on your map.
Just take your time and you’ll be fine. You’ll probably be so overloaded with loot that you’ll be forced to take your time anyway.
Whenever you make it back to Vanno turn the case in and you’ll get a stack of cash and Security Level 4!
Security Level 4
Congratulations! You’re now the master of Pobeda Factory, and you’re one away from the highest Security Level in Into The Radius.
The Intrusion is definitely a hard mission, but by being properly prepared and planning ahead you can make it through no problem, and with a pack full of loot to boot.
Next time we’ll be talking about the seventh Top Priority mission in Into The Radius in Part Eight of our Into The Radius VR Walkthrough.
Into The Radius Walkthrough And Guide - The Fifth Mission - A Probing Move
Stuck in Into The Radius? Wondering where to go and how to get there for your next mission?
Well don’t worry we’ve got you covered with this walkthrough and guide for Into the Radius VR.
Here we’ll be talking about the fifth Top Priority mission that you get in Into The Radius, A Probing Move, which includes your first trip to the third map of the game, Pobeda Factory. All you’ve got to do is get in, grab a little tape recorder, and get out.
Stuck in Into The Radius? Wondering where to go and how to get there for your next mission?
Maybe you would just like to see what is in store for you before you get there, or you’d like to know if you’re properly prepared for your next mission in the Pechorsk Zone.
Well don’t worry we’ve got you covered with this walkthrough and guide for Into the Radius VR.
In this Into the Radius walkthrough we’ll detail how to progress through the main story “Top Priority” missions, with a couple of guiding tips thrown in here and there to make your adventure smoother.
The focus of these walkthrough articles will be the story missions, but we’ll throw in some general gameplay tips and other useful loot locations near your objectives.
These articles will also assume you’re playing the game on the Normal difficulty mode with Tutorials turned on, which is highly recommended for your first playthrough. This walkthrough will still be useful if you’re playing on Realistic difficulty, but some details like vendor prices or enemy placement and numbers will be different.
Here is every article in our complete Into the Radius VR Walkthrough:
Into The Radius Walkthrough And Guide - The First Mission - Equipment Retrieval
Into The Radius Walkthrough And Guide - The Second Mission - Total Recall
Into The Radius Walkthrough And Guide - The Third Mission - Fixing A Leak
Into The Radius Walkthrough And Guide - The Fourth Mission - Flash In The Dark
Into The Radius Walkthrough And Guide - The Fifth Mission - A Probing Move
Into The Radius Walkthrough And Guide - The Sixth Mission - The Intrusion
Into The Radius Walkthrough And Guide - The Seventh Mission - A Farewell Feast
Into The Radius Walkthrough And Guide - The Eighth Mission - Kids Playground
Into The Radius Walkthrough And Guide - The Final Mission - Ouroboros
Here we’ll be talking about the fifth Top Priority mission that you get in Into The Radius, A Probing Move, which includes your first trip to the third map of the game, Pobeda Factory. All you’ve got to do is get in, grab a tape recorder, and get out.
The Fifth Mission - A Probing Move - Loadout
After completing the Flash In The Dark mission you’ll have to do a repeatable mission before A Probing Move will appear on your terminal.
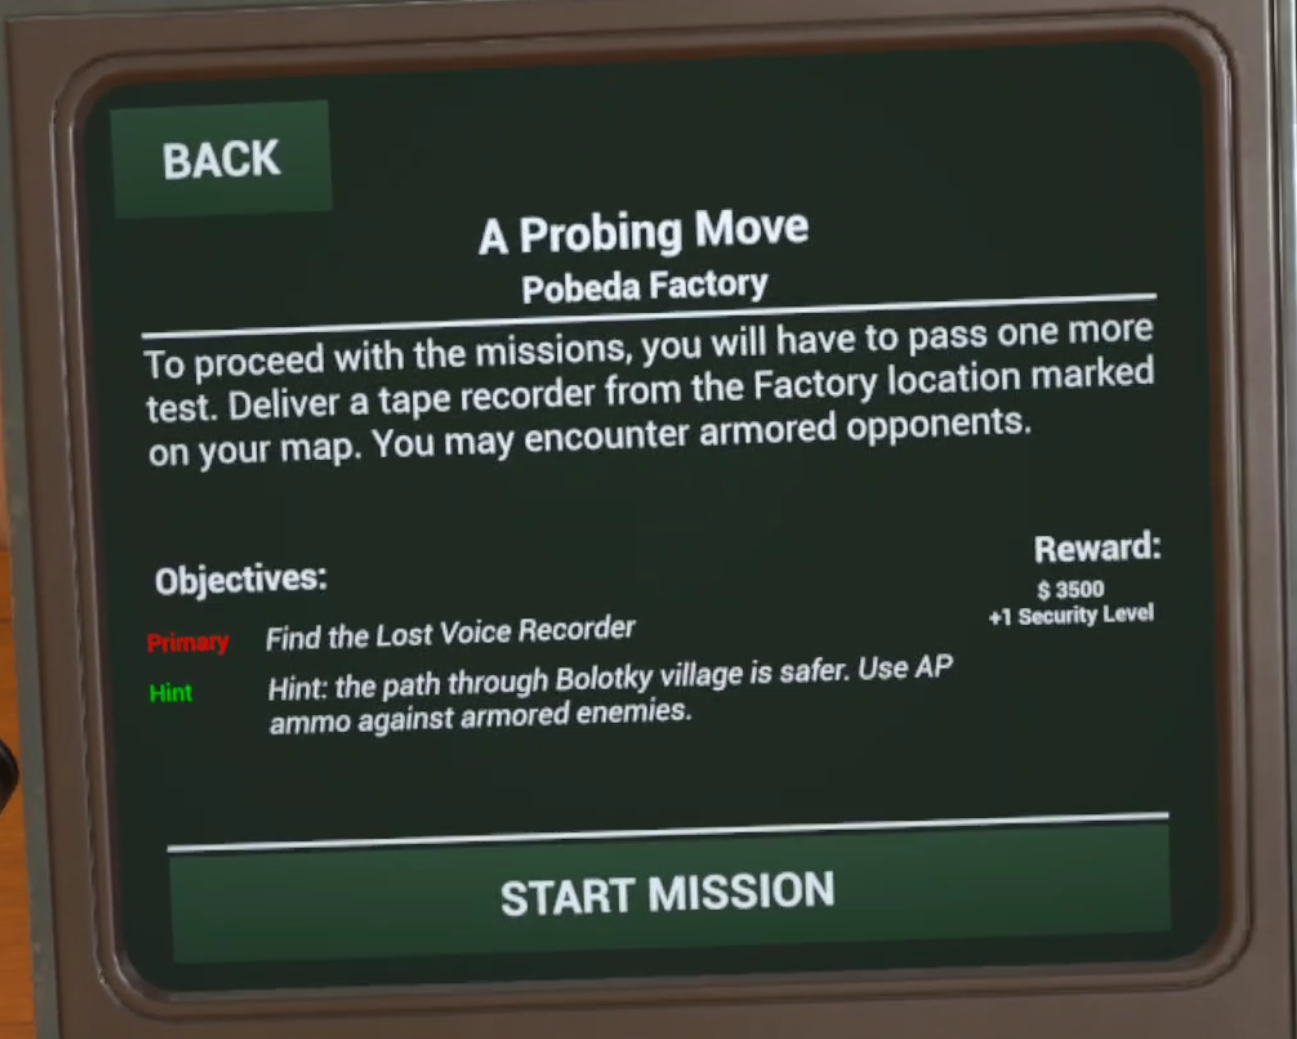
It’s not a bad idea to get some extra money before completing a Probing Move. As you’ll see from the mission description you’ll reach Security Level 3 after completing it, and at Security Level 3 a lot of new and very good weapons and armor become available.
The mission description of A Probing Move
The fighting will actually be even easier than clearing Bolotky Village for the Fixing A Leak mission so if you’ve made it this far you don’t strictly need to buy any upgrades.
That being said, Into The Radius is a game that you should have fun in. If you really want an upgrade go for it with the knowledge that you can always wait for the Tide to come by sleeping through a few days and then do repeatable missions and artifact hunt in Pervomay or Bolotky for more cash.
The sample loadout for this mission isn’t the most extravagant, but isn’t strictly necessary either. You can pull this off with just a pistol if you’re careful.
A sample loadout for this Into the Radius mission
Still, it doesn’t hurt to bring a little extra firepower and the SKS sure was a lot of fun during and after this mission. You should at the very least have a decent pistol by now like the GSH-18 or Glock 17.
Not shown in this Loadout are the usual knife, detector, head lamp, and probes that you should always have on you.
You’ll need to use a bit of ammo, so a spare mag or two and a box or two extra will be fine. The huge box of SKS ammunition you see in the picture above was definitely overkill, and so were the amount of healing items and the gas mask. The gas mask also isn’t strictly necessary.
The reason I brought so much when doing this mission was that I planned to go the extra mile and grab a couple of stashes, which we will also show here. If this is your first time doing the A Probing Move mission then I recommend you just focus on finishing the mission and getting some Security Level 3 equipment before moving on to the stashes that are shown in this article.
Though if you want to try to grab whatever you can in one run then go ahead and go for it, but if you do a decent weapon and a decent amount of ammo is much more important, like in the loadout above.
A Probing Move - Travelling through Bolotky
This walkthrough assumes that the tide has just come in and all enemies are freshly spawned. Now for the first, and oddly the most difficult part of this Into the Radius mission.
Getting through Bolotky is actually the most combat heavy part of completing this mission with the method shown in this walkthrough.
Take the rope line from your home base of Vanno back to Bolotky Village, and immediately make sure your surroundings are clear of enemies.
A Spawn charging through the woods
As always keep your distance from the train tracks and don’t attract the many enemies in the village. As we usually do we will be avoiding them. There’s no reason to get into an unnecessary firefight.
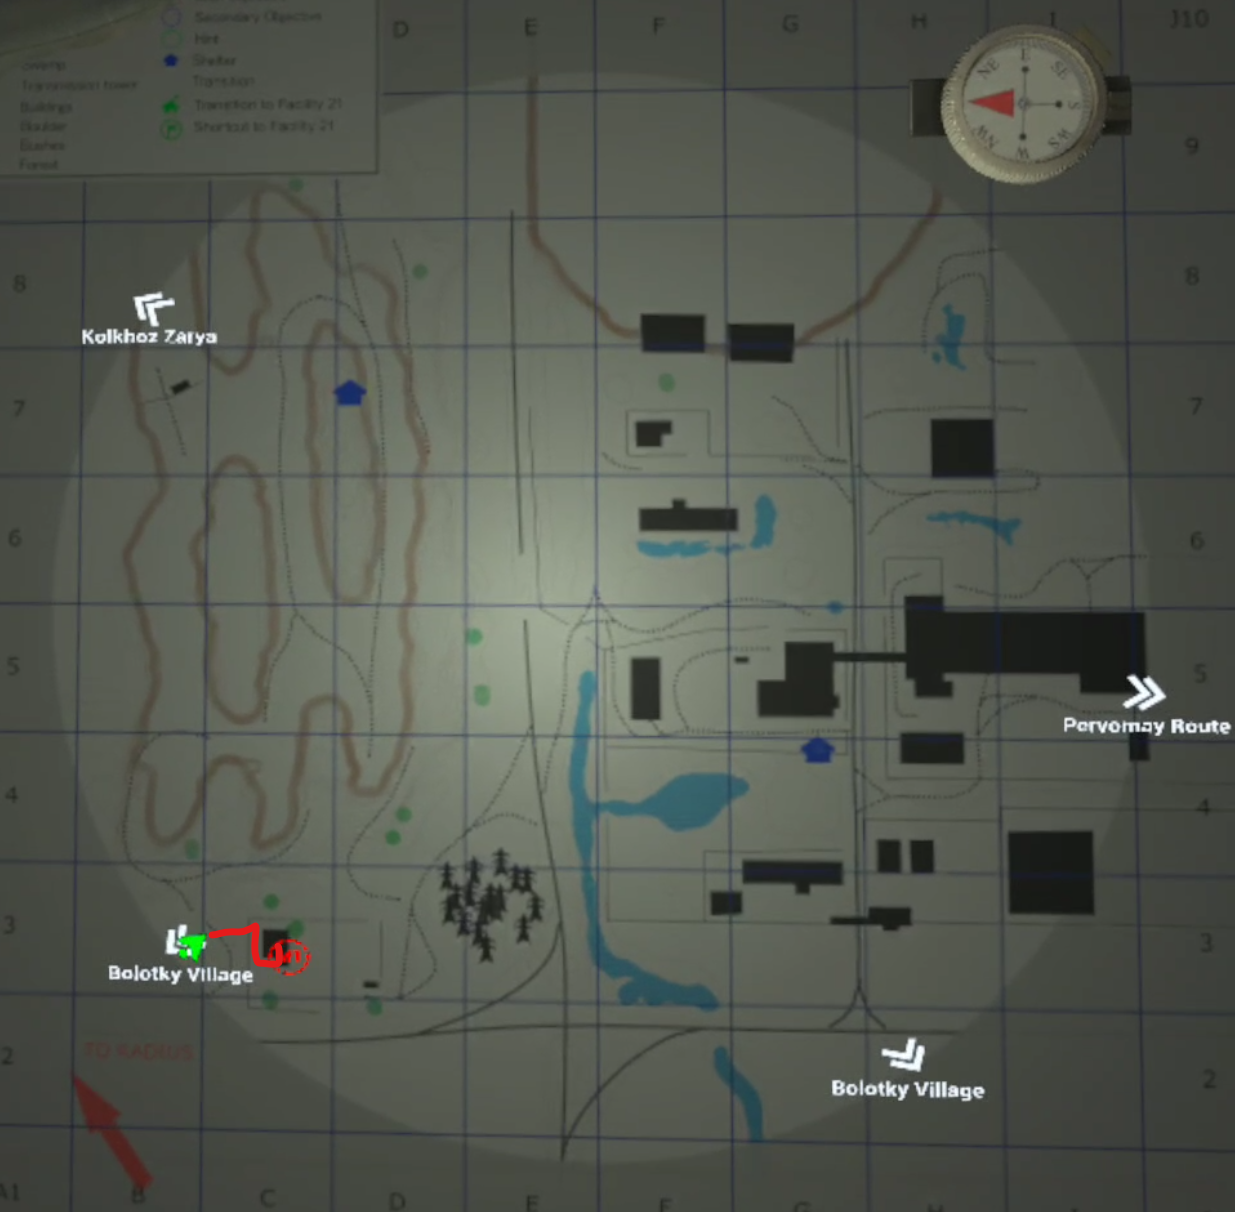
Once you’re sure nothing is coming after you take a look at your map. Here is the route that we’ll be taking for this mission.
The route to take to complete the A Probing Move mission easily
You’ll need to continue north through the woods you spawned in, sticking to the left side of the train tracks.
Once you can see the rope line at the end of the tracks which leads to Kolkhoz Zarya, note the ruined oil tank by the lakes.
The crashed oil tank and the path between the lakes to the forest on the other side
You’ll likely have run into an enemy or two by the time you see it, but they’ll be pretty manageable opponents like Fragments, Spawn, and Seekers.
That’s most of what you’ll be running into on this route. Go past the oil tanker and between the lakes to the forest on the other side, but be careful.
This is the area where combat will be the heaviest, as the noise of gunshots will attract more enemies from the swamps nearby and the forest that you’ll be heading towards.
Fighting a shotgun armed mimic and Spawn near the lakes
There is likely to be at least one firearm equipped enemy in the woods ahead, and they’re going to get drawn out by any unsuppressed gunshots. Holding your ground and letting them come to you will give you an advantage.
As with any big fight in this Into the Radius VR walkthrough always make sure you’ve got a path of retreat back across the train tracks. If the fight becomes too tough you can always run back into the woods you came from and get some time and distance.
Though if you’re a more stealth inclined player using a silenced weapon and coming at night is also a viable strategy.
However you get past the enemies make your way past the lakes and through the forest when they stop coming at you. Make sure to keep an eye out for Web Anomalies in the trees.
Once you’re on the other side of the woods you’ll see a big tower that is one of the safehouses marked by a blue house icon on your map.
The tower safehouse near the Pobeda Factory exit
You’re basically home free when you see this, though there might be a few scattered enemies nearby, depending on how much noise you made earlier and where you made it.
Check your map and from the tower make a beeline for the exit to Pobeda Factory.
The exit to Pobeda Factory
Bolotky Village - Kedr Stash
You can take a slight detour on your way to Pobeda Factory, or come later to get a stash that’s near the Pobeda Factory exit.
To the east of the exit, and on the northern end of the swamp that dominates the center of the Bolotky Village map is a red valve poking out of the water just south of a circle of rocks and trees filled with anomalies (and artifacts).
The red valve marking the PP-91 Kedr stash
You’ll likely run into a few enemies like Spawn, Seekers, or Fragments. It’s safest to approach this stash from the west from the direction of the tower safehouse we just talked about.
When you’re next to the Valve you’ll notice a little boat. Point your hand towards the water until you see a circle appear. Actually bending down to grab the items in the stash is extremely hard, so it’s better to just distance grab all of them.
Distance grabbing the contents of the stash
Keep in mind that you only have one slot on your back and another in your backpack to hold two handed weapons like the Kedr. This is a good stash to hit during this mission if you’ve got the ammunition and don’t plan on taking on the riskier stashes in Pobeda Factory once you’re there.
Of course you can always come back another time to get it. The stash contains a PP-91 Kedr, two magazines for it, a silencer compatible to it, and a box of 9x18 ammunition.
The location of the Kedr stash in Bolotky Village
All of these items won’t be in very good condition and will need to be repaired in the repair box at the train car in Vanno.
Pobeda Factory - Getting The Tape Recorder
Now for the last leg of the A Probing Move mission, and surprisingly the easiest part.
You might have noticed in the mission description that you were warned you would have to fight armored enemies, and there are armored enemies near the mission objective.
What you’ll know from reading this Into the Radius walkthrough though, is that you don’t have to fight them. It’s really easy to sneak in, take the tape recorder, and leave. Check out the route on the map.
The route to the objective for the A Probing Move mission in Into the Radius
Right after you spawn in by the rope line there will be a small hill ahead of you, walk up it and you’ll see the outer wall of the compound with the tape recorder. Oh, and make sure you watch out for Stomper Anomalies.
You will also see a gap in that wall. That is your way inside.
The hole in the wall you should sneak through
Sneak in through the gap. Don’t run, fire your weapons, or do anything that makes a lot of noise. Stealth is definitely the best option here.
Once you’re through the hole you’ll see and hear a Rift Anomaly around the back of the large building. Make sure there aren’t any enemies patrolling on the other side of it that might see you, and then destroy it with your knife for an easy Shard artifact.
The Rift Anomaly around the back of the building
Once you’re through with that, or decide to just ignore it, take the right just after the entrance and sneak around the side of the building.
You’ll see a dumpster, and right past it a blue sheet metal room attached to the huge brick building.
This blue room has the Tape Recorder inside
Watch out for enemies on the other side of the building. There will be a few patrolling around. While they’re not the toughest you’ll run into in Into the Radius they will have armor, and there’s really no reason to fight them.
Remember that enemies in Into the Radius are drawn to sound, and can see you if you’re in front of them. So if their side or back is turned to you and you’re crouch walking to make less noise they won’t notice you.
They’ll likely also be far away, and so it’s easy to walk up the concrete steps and into the blue room.
The Tape Recorder on top of a desk
The Tape Recorder you came here for is on one of the desks.
There’s also a black statue with some glowing white particles near it that you can touch for some dialog.
You can loot around if you want, just keep in mind that an enemy can spot you through the windows so it’s a better idea to keep a low profile. Still if you have the tape recorder you can always just run back to the rope line and leave instead of fight.
After you have the Tape Recorder, that’s it. Just go back to base the way you came.
Congratulations! After turning in this mission you will be Security Level 3, and a ton of options will be open to you. We’ll talk more about them in the next mission walkthrough (coming soon).
For now let’s get into a couple of great stashes that aren’t too far away from your objective in A Probing Move that you can pick up after you get the Tape Recorder, or on later forays into Pobeda Factory.
Pobeda Factory - The IZh-81 Shotgun Stash
The stash to get a free IZh-81 pump action shotgun along with some slug rounds for it is just north of the compound that contains the Tape Recorder.
The biggest obstacle to getting to it is a watchtower containing a Mimic Sniper. You’ll see it just after going a little north of the Tape Recorder compound and looking down into the entrance to the canyons below.
The watchtower overlooking the canyon
You could try throwing a grenade into the tower, but if you miss you’ve got a good chance of blowing yourself up. The easiest way to take them out is by climbing the ladder and shooting the mimic with a pistol in one hand while you hang on the ladder with the other.
There will also be some Spawn and Fragments roaming around the road leading into the quarry to the west of the watchtower. The anomaly field by the tower is also a good place to hit while you’re there, and can even contain Regen Artifacts.
Of course keep in mind that any gunshots can still draw enemies like armored Fragments and Mimic Policemen from the compound. So make sure you’ve got some firepower when attempting this.
Once you’re done with the tower take the road down into the canyon and go to the location marked on this map.
The location of the IZh-81 shotgun stash
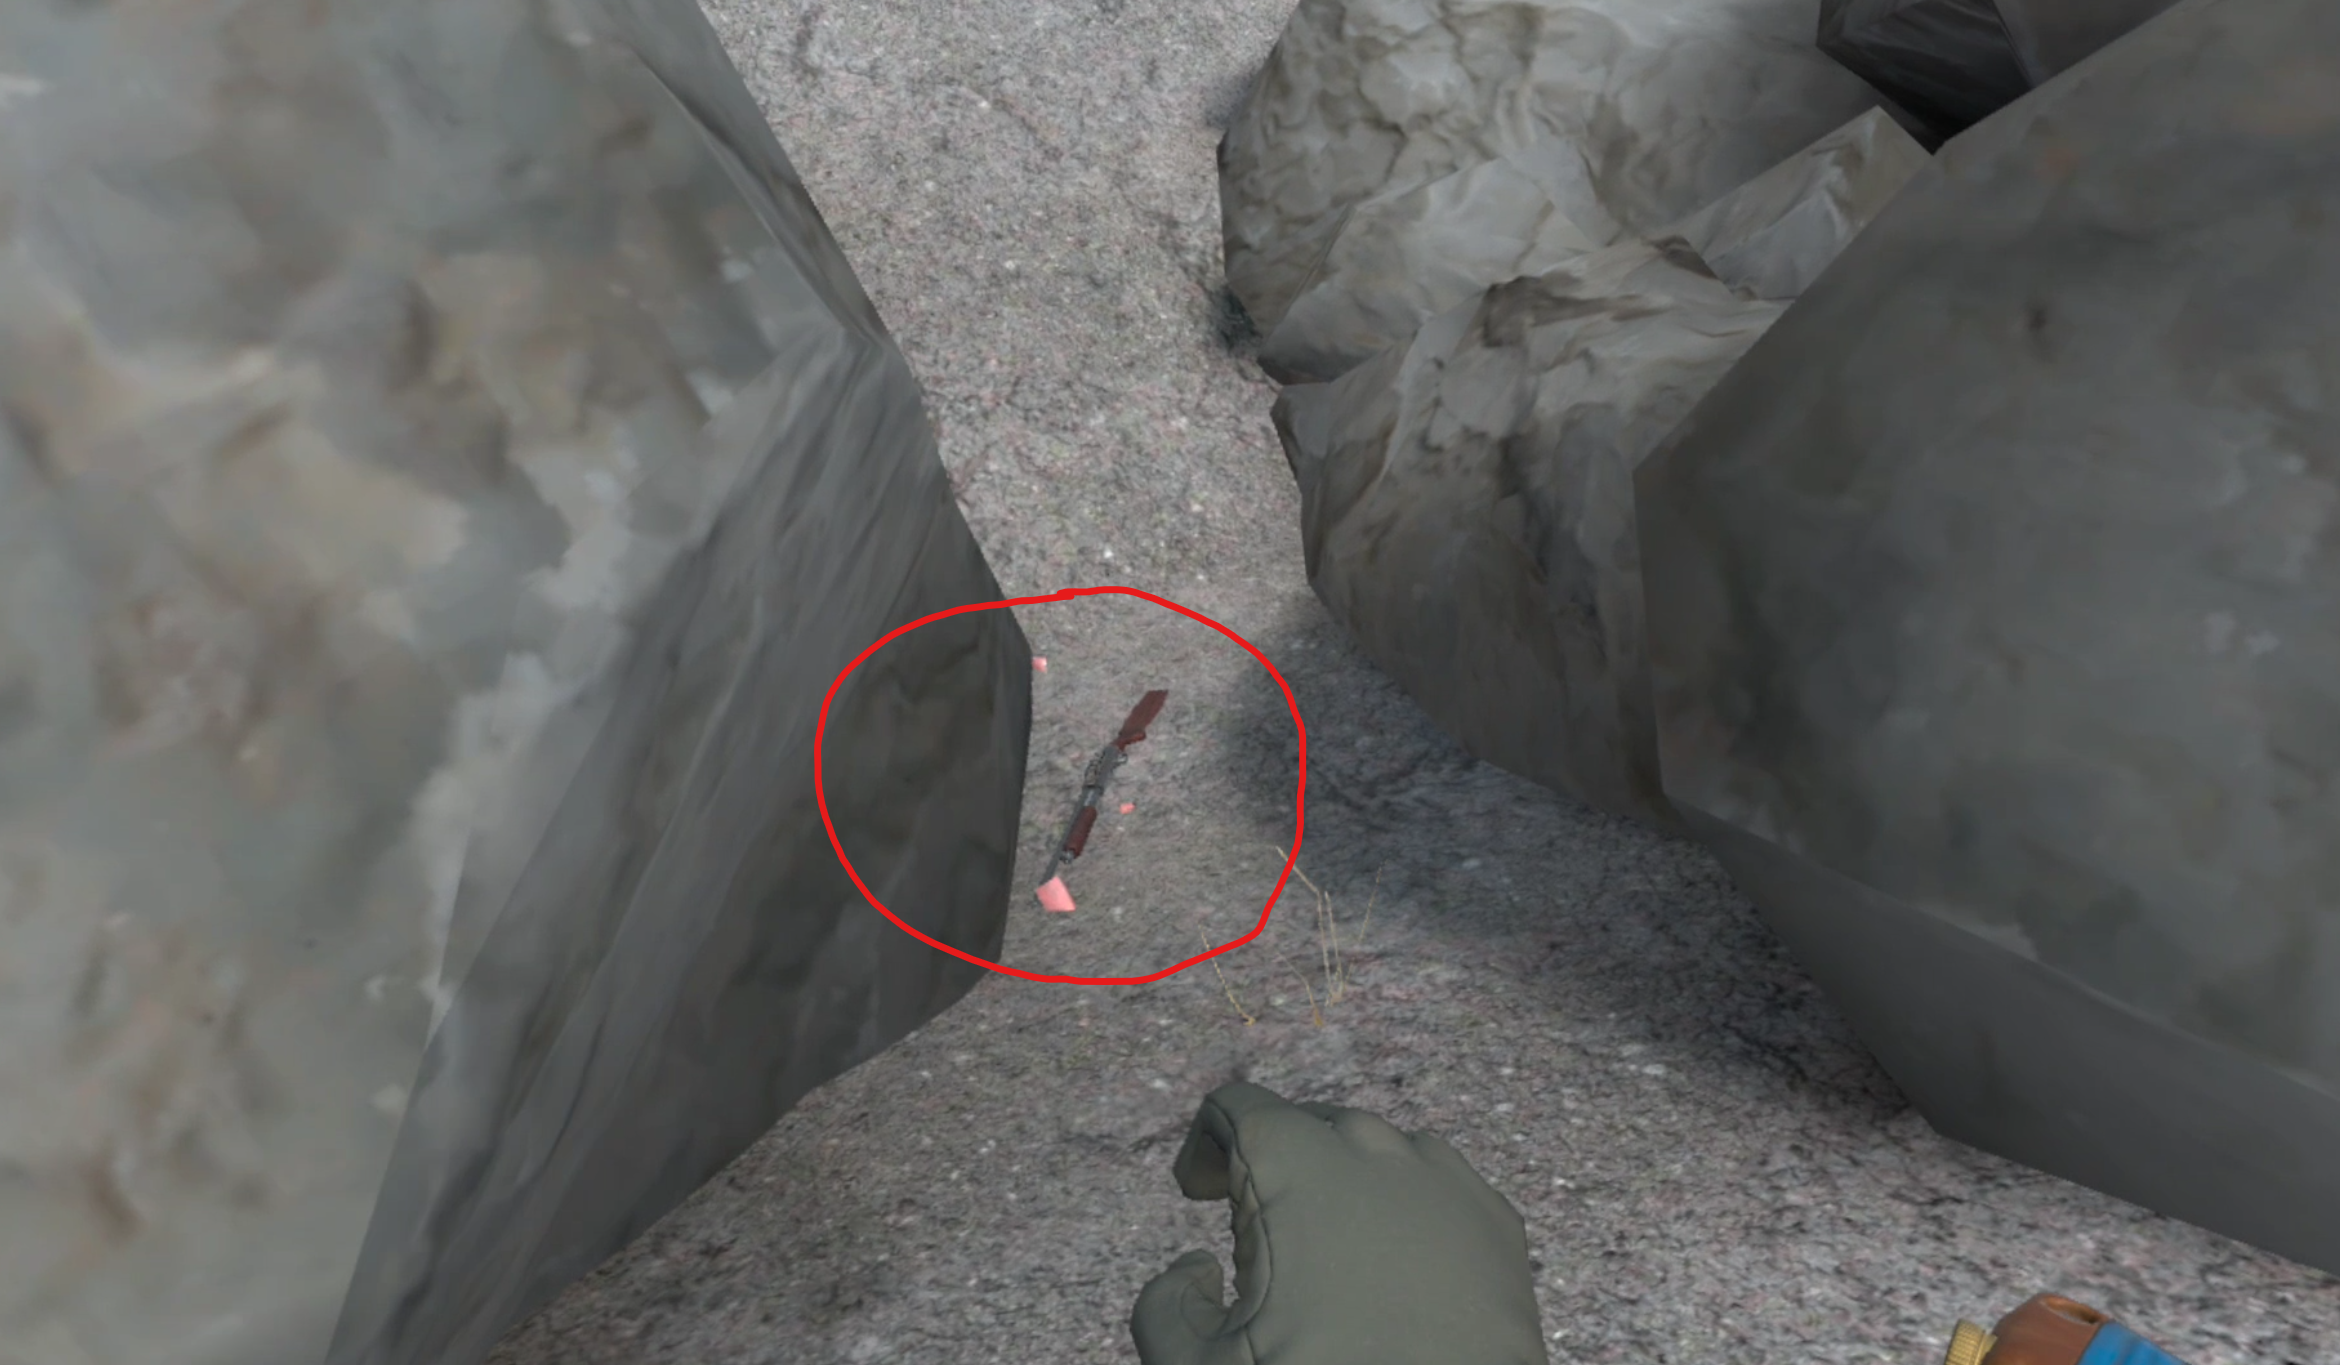
The stash is hidden behind some big boulders, so make sure you look behind them.
This stash contains the Izh-81 pump action shotgun in great condition along with several boxes of shells and a Combat Knife. The shotgun even already has a modification adding a Rail B system to the top of it, which can mount optics for easier aiming.
The shotgun stash
Pobeda Factory - The AUG Stash
If you feel a little riskier there’s another stash to the north, and this stash contains an AUG assault rifle.
It’s a little further away than the IZh-81 stash but you’ll only run into a few enemies on the walk up the far eastern canyon towards the stash.
The location of the AUG stash
Unless you take the western canyon up, which you definitely shouldn’t do. The entrance to Kolkhoz Zarya there is protected by a heavily armed group of Mimic Soldiers that you should avoid at all costs.
They’ve got multiple snipers and several armed with assault weapons. You don’t need to fight them and if you do it will be very hard to win.
So head up the eastern canyon that runs past the safehouse marked by the blue house symbol, and at the end of the road you’ll see another watchtower and a bunch of gas clouds around these strange stone spires.
The path going towards the AUG stash with the watchtower circled and the truck containing the stash circled
That watchtower has another mimic sniper inside. Though even during the daytime it’s possible to rush him. Run forward from rock to rock. If your health is full you can take a couple of shots and keep going.
If you’re fast and a little lucky the sniper won’t notice you at all. Depending on your equipment you could also try to shoot them from a distance, or use smoke grenades to mask your approach.
The same technique of shooting the mimic with a pistol while hanging on to the ladder with one hand works just as well here if you manage to get underneath the watchtower.
Make sure to watch out for Gas Anomalies though, there is one that wanders near the watchtower, though it is avoidable. Once the tower is clear go to the cliff next to it and you’ll see this truck on top of a pillar.
The AUG stash
You might not have noticed without reading this walkthrough, but an AUG, a magazine for it, and a couple of ammo boxes are on top of it, right behind the cab.
So run off of the cliff full speed and land on top of the truck. Of course once you collect the stash you better have a gas mask. Your only way out is to fall into the anomaly field below. As long as you keep your gas mask on and don’t fall into an anomaly you’ll be fine.
The AUG is in pretty bad shape though, and will need to be repaired at Vanno’s repair box.
Those are all of the stashes we’ve got for now. Congratulations on completing the fifth mission! Next time we’ll be talking about the sixth Top Priority mission in Into The Radius in Part Seven of our Into The Radius VR Walkthrough.
Into The Radius Walkthrough And Guide - The First Mission - Equipment Retrieval
Stuck in Into The Radius? Wondering where to go and how to get there for your next mission?
Well don’t worry we’ve got you covered with this walkthrough and guide for Into the Radius VR.
In this article we’ll be starting at the beginning of the game with your first mission, Equipment Retrieval, and cover some general tips for your first foray into the zone.
Stuck in Into The Radius? Wondering where to go and how to get there for your next mission?
Maybe you would just like to see what is in store for you before you get there, or you’d like to know if you’re properly prepared for your next mission in the Pechorsk Zone.
Well don’t worry we’ve got you covered with this walkthrough and guide for Into the Radius VR.
In this Into the Radius walkthrough we’ll detail how to progress through the main story “Top Priority” missions, with a couple of guiding tips thrown in here and there to make your adventure smoother.
The focus of these walkthroughs will be the story missions, but we’ll throw in some general gameplay tips and other useful loot locations near your objectives.
These articles will also assume you’re playing the game on the Normal difficulty mode with Tutorials turned on, which is highly recommended for your first playthrough. This walkthrough will still be useful if you’re playing on Realistic difficulty, but some details like vendor prices or enemy placement and numbers will be different.
Here is every article in our complete Into the Radius VR Walkthrough:
Into The Radius Walkthrough And Guide - The First Mission - Equipment Retrieval
Into The Radius Walkthrough And Guide - The Second Mission - Total Recall
Into The Radius Walkthrough And Guide - The Third Mission - Fixing A Leak
Into The Radius Walkthrough And Guide - The Fourth Mission - Flash In The Dark
Into The Radius Walkthrough And Guide - The Fifth Mission - A Probing Move
Into The Radius Walkthrough And Guide - The Sixth Mission - The Intrusion
Into The Radius Walkthrough And Guide - The Seventh Mission - A Farewell Feast
Into The Radius Walkthrough And Guide - The Eighth Mission - Kids Playground
Into The Radius Walkthrough And Guide - The Final Mission - Ouroboros
Here we’ll be starting at the beginning of the game with your first mission, Equipment Retrieval, and cover some general tips for your first foray into the zone.
Entering Vanno
We won’t be covering the Tutorial here, so our Into the Radius walkthrough will start where the game proper begins, with you as the Explorer standing before the gates of the UNPSC base of Vanno.
The entrance to the UNPSC base and your home - Vanno
Follow the footsteps and stop when directed to by the automated turret.
Raise your hands and do not move. If you fail to comply it really will shoot you.
In a moment you’ll be cleared for entry and the gate will open. Follow the footsteps towards your bedroom. Make sure to pick up the healing syringe on the barrel next to the door.
Make sure to get the healing syringe next to your bedroom
Healing Syringes are fairly expensive so having a free one to add to the one that you start the game with in your pack is a great find.
Hold your watch up to the door panel when prompted to open the door, and walk into your new home.
Follow the ghostly outline to the mission terminal and accept your first mission in the missions menu, Equipment Retrieval.
The briefing for Into The Radius’s first mission - Equipment Retrieval
As the briefing states you will need a firearm, in fact you’ll always need a firearm when entering the Pechorsk zone.
So before we get into tackling the first mission let’s talk about your loadout, and since this will be your first mission in the radius also cover some general loadout tips.
The First Mission - Loadout
You’ll start the game with some items in your pack and a Makarov pistol in the holster on your hip.
This pistol is in mint condition, but is also arguably the worst gun in the entire game. Don’t worry though, it will be more than adequate for now.
You’ll also have some food, some spare ammunition, a healing syringe, two spare magazines, a combat knife, and a flashlight in your backpack.
The gear that you start the game with. Not pictured is the Makarov in your hip holster
If this is your first foray in Into The Radius then you can find some useful information spread around Vanno in the form of notes that you can read, though the Tutorial will have covered all of the basics.
Looking around your room you’ll find a few items scattered around, most noteably on the green shelves in the corner. There’s a rusty Makarov there that you can sell later on, and some more ammunition and magazines for it.
Fill one of those magazines up with bullets and put it and the two in your backpack in the magazine pouches on your chest rig. While you’re at it also make sure to turn the safety off on your Makarov so that it’s ready to go when you need it.
The Makarov pistol with the safety switched off
It’s also advisable to take the combat knife out of your backpack and put it on one of your body slots. You have one on each of your arms and one on each of your shoulders.
Being able to quickly access your knife will be very useful against the enemies you will face in this mission. There will also be a packet of Advanced Probes on your left arm, you might as well keep them there. You won’t need them for the first mission, but you soon will.
You can leave the food behind as you won’t be out of your base for very long, but do make sure to bring your flashlight as you’ll want it to see clearly later on.
It’s advisable to always take spare ammunition to reload magazines in the field, though here you won’t need it. There are very few enemies in Into the Radius’s first mission, and it’s not very far away from your home.
Here is an example loadout for the first mission. If yours varies a little don’t worry about it. As long as you have your pistol, a few full magazines, your knife, a healing syringe, and a flashlight, you’ll be fine.
A sample loadout for your first mission. The box contains 25 rounds of 9x18mm bullets
Equipment Retrieval - Leaving Vanno For The First Time
Before you head out you can always explore the rest of Vanno. There are some other free items scattered about, and you can collect them whenever you like.
When you’re ready go back out of the gate you came in, following the ghostly footsteps, and walk into the rope line that heads into the fog.
The rope line leading out into the Pechorsk Zone
Welcome to the Zone. Have a look around. It’s pretty creepy, right? Well don’t worry, you can handle this.
Once you feel comfortable take a look at your map.
You’ll see your location at the bottom as a green arrow, and the location of your mission objective as a circle with “M1” inside of it.
The map of Pervomay Route showing the objective of the first mission
As you can see it’s very close.
First though, take a little detour. If you look off to your right you’ll see a little wooden watchtower amid the trees.
The wooden watchtower next to the path to Vanno
Climb up it and open the red container inside. You’ll get some more bullets for your Makarov and some other goodies.
If you don’t see the tower you don’t have to bother with it, but it’s good to get a little extra when you’re just starting out.
Anyway to start heading to the objective just walk down the paved road.
The road leading to the blockhouse
You’ll probably see some randomly generated corpses strewn about with loot next to them.
We’ll talk more about looting in a moment, because you’ll probably have a bigger problem to deal with as you near the end of the road.
See that path that goes up the hill? Well there’s going to be a strange dark figure at the bottom of it, and it will start walking towards you while making strange squelching sounds.
Don’t let it get close, while it’s only dangerous right in front of you, if you let it get within clawing range it will do a lot of damage to you.
Fighting the first enemy in Into The Radius
This is a fragment, the first type of enemy that you will encounter in Into The Radius VR.
Don’t panic, you’ll easily be able to deal with them by using your Makarov Pistol.
Before they get close aim carefully and shoot them a few times until they turn into a floating orb, then either shoot the orb or stab it with your combat knife. If you run out of bullets or panic you can turn around and run away. When sprinting you are faster than the Fragments, and that will give you time to reload and compose yourself.
Make sure to load in a fresh magazine afterwards, the Makarov doesn’t hold many bullets in each magazine.
If you want to know more about the fragment or other enemies in Into The Radius VR then check out our guide on all of the enemies in the game.
Anyway once that fragment is dealt with walk up the path leading into the little compound to your right, past the black statue of a man. You can touch the statue to get a little dialog.
All statues that you see which have little floating white particles around them can be touched to get some dialog.
The entrance to the blockhouse compound, and the man statue in front of it
Inside the walls of the little compound you’ll find another fragment.
Take them out just like you did the first one.
Taking down the second Fragment
The First Mission - Looting
The “compound” is really just two tents and the concrete blockhouse. Look around and scrounge what you can.
Structures in the radius will commonly hold useful items. Boxes of ammunition, more magazines, food, and other various bits and pieces.
Since you’re just starting out it’s wise to take a little food, especially the canned stuff, and if you find any more magazines it’s also a good idea to take them, even if you don’t have the gun that goes with them yet.
Ammunition for your Makarov (9x18mm) is very common, but it’s still a good idea to take whatever you can find, and also any shotgun shells you find. Really it’s not a bad idea to hoard any kind of ammunition you find in the early game.
If you’re unsure what something is then hold it in your hand and hold down the B button, a little text box will appear over the item telling you what it’s use is and how it works. If you’re unsure how an item is useful make sure to use this feature. It will answer a lot of your questions when first starting the game.
You’ll also find a note in each of the tents. These notes are rare glimpses into what exactly is going on in Pechorsk, and it’s recommended that you read them to enhance your appreciation for the mystery and story of Into The Radius.
A note found in one of the tents
Equipment Retrieval - Getting The Goods
Whenever you’re finished looting head into the concrete blockhouse.
Here’s where you will need your flashlight. While there’s some lighting inside it can be a little dark. Into The Radius can be a pretty scary game and you’ll always want to make sure you can properly see in poorly lit areas so you aren’t surprised by enemies or anomalies.
Immediately on your left you’ll see a crate on a table. Take whatever is inside.
There’s a crate in the blockhouse, make sure to loot it
Once you’re finished with that head the other way further into the blockhouse.
Right next to some sandbags you’ll see a watch in an open crate.
The objective of the first mission
That’s what you came here for! Pick it up and put it into your backpack. When you’re finished looking for whatever other valuables might be around, head back outside the way you came in.
You’ll get a visit from your friend. To hear what she has to say, touch her and her dialog will play.
Your friend will appear once you get the objective item
You’ve got the mission objective and hopefully some other good stuff too.
Head back the way you came, down the path leading up the hill and up the road. Just walk into the rope line heading into the fog and you’ll find yourself back at Vanno.
Completing Your First Mission in Into The Radius
Now that you’re back in Vanno the built in Tutorials will be your guide.
Follow the ghostly footsteps into the train car and over to the mission terminal.
Go here to deliver the watch
Some popups will tell you how to make the delivery. When the tray opens, throw the watch inside and complete the mission on the terminal.
You’ll also find a strange bright white note in your backpack. Weird huh?
Once the delivery is complete you are now security level 1. Congratulations!
The terminal will also tell you to go to the shooting range for more training. It’s an easy 300$ and you’ll learn some important stuff while you’re there. So you might as well go for it.
Go here to access the shooting range and training
Follow the ghostly footsteps over there and do the training.
The game will teach you about anomalies, the tide, artifacts, and how to get them. Though if you want a more in depth guide we’ve got one as well.
Once you are finished feel free to sell whatever you don’t need in the Train car, and use the shower to regain any health you might have lost to Fragments.
Congratulations on hitting Security Level 1! We’ll talk more about what you can do with your new security status, and how to tackle your next mission in Part 2 of our Into The Radius VR Walkthrough.
Other Guides You Might Find Helpful:
The Best Open World VR Games
So you want to experience a fantastic open world in VR. You want huge vistas, interesting landmarks to explore, and all sorts of fantastic things to find in a huge landscape brought to you in Virtual Reality.
Well good thing you found your way here, because you’re about to discover the best Open World VR games in existence. While these VR games have a variety of different mechanics and VR interactions, each is guaranteed to give you a massive place to explore and discover intriguing things.
These are the Best Open World VR Games.
Into The Radius
The Into The Radius Logo
If you’re looking for a truly weird place to explore then Into The Radius will certainly deliver. In all of the VR games I’ve played none gives as much of an experience of the surreal and scary quite like Into The Radius does.
In this game you’re an explorer doing your best to survive the Pechorsk Zone, which is a huge open world area comprised of 5 areas where the laws of the natural world no longer apply.
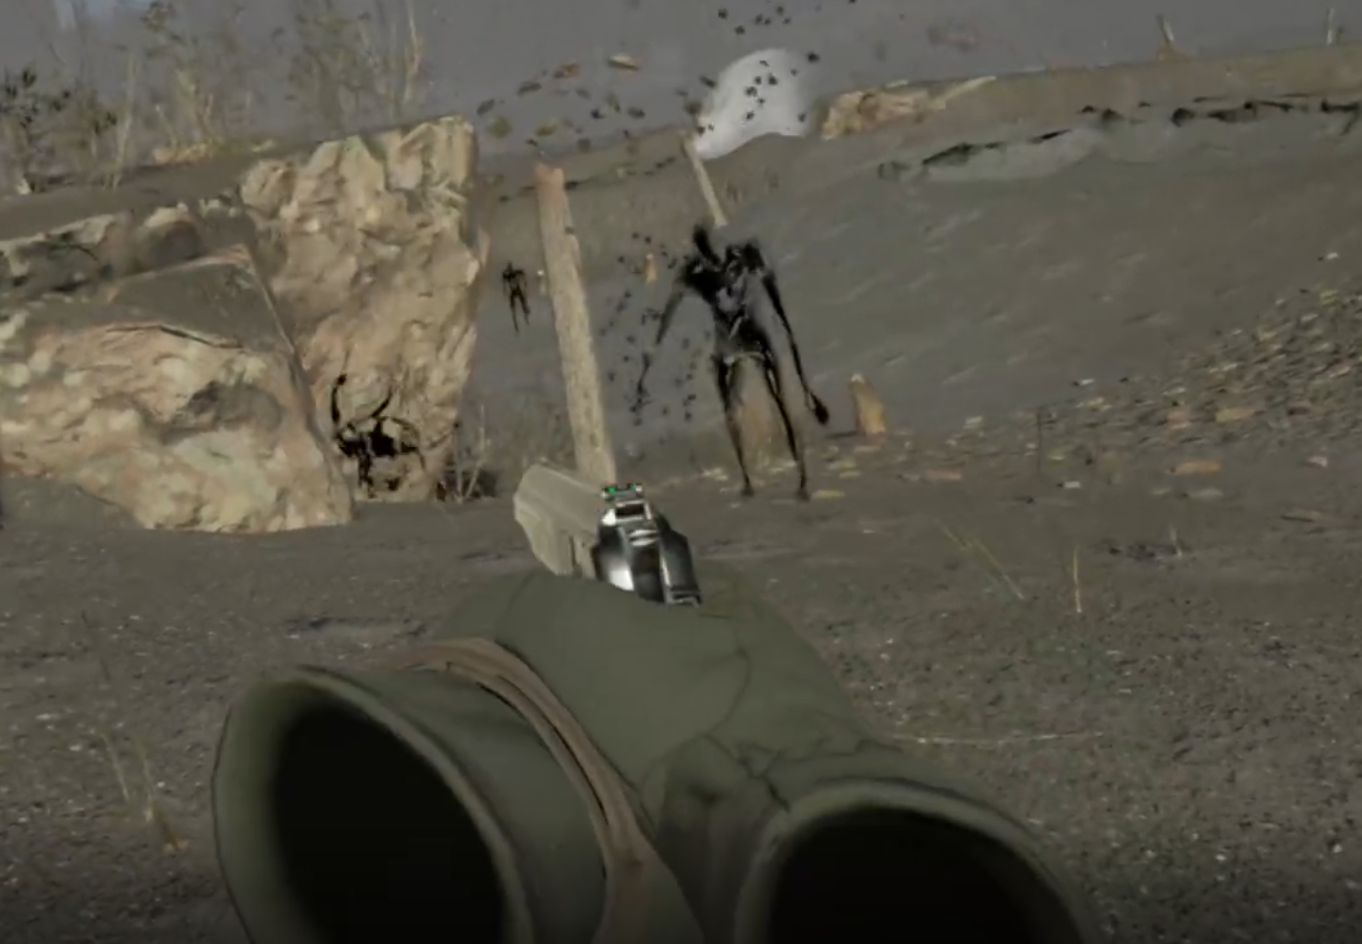
Fighting the dark figures in Into The Radius
As you hunt for artifacts, scavenge for supplies, and try to complete missions you’ll have to fight your way through the hostile dark figures that stalk the radius, and dodge the deadly anomalies that dot the landscape.
Into The Radius is a great open world game not only for its numerous combat and survival challenges, but for the imagination behind its world.
Pechorsk was once a normal place, but now there are all sorts of insane gravity defying ruins and odd structures scattered about. You really never know what you’ll see and discover next while exploring in this VR open world game.
A massive anomaly in Into The Radius
Into The Radius has made its way on a lot of our lists here at Reality Remake for good reasons. Not only is it a blast to play with tons of horror and action packed gameplay, but it also gives you a mysterious and strange world to explore.
That’s why Into The Radius is among the best open world VR games out there.
Elite Dangerous VR
The Elite Dangerous Logo with “VR” slapped on it
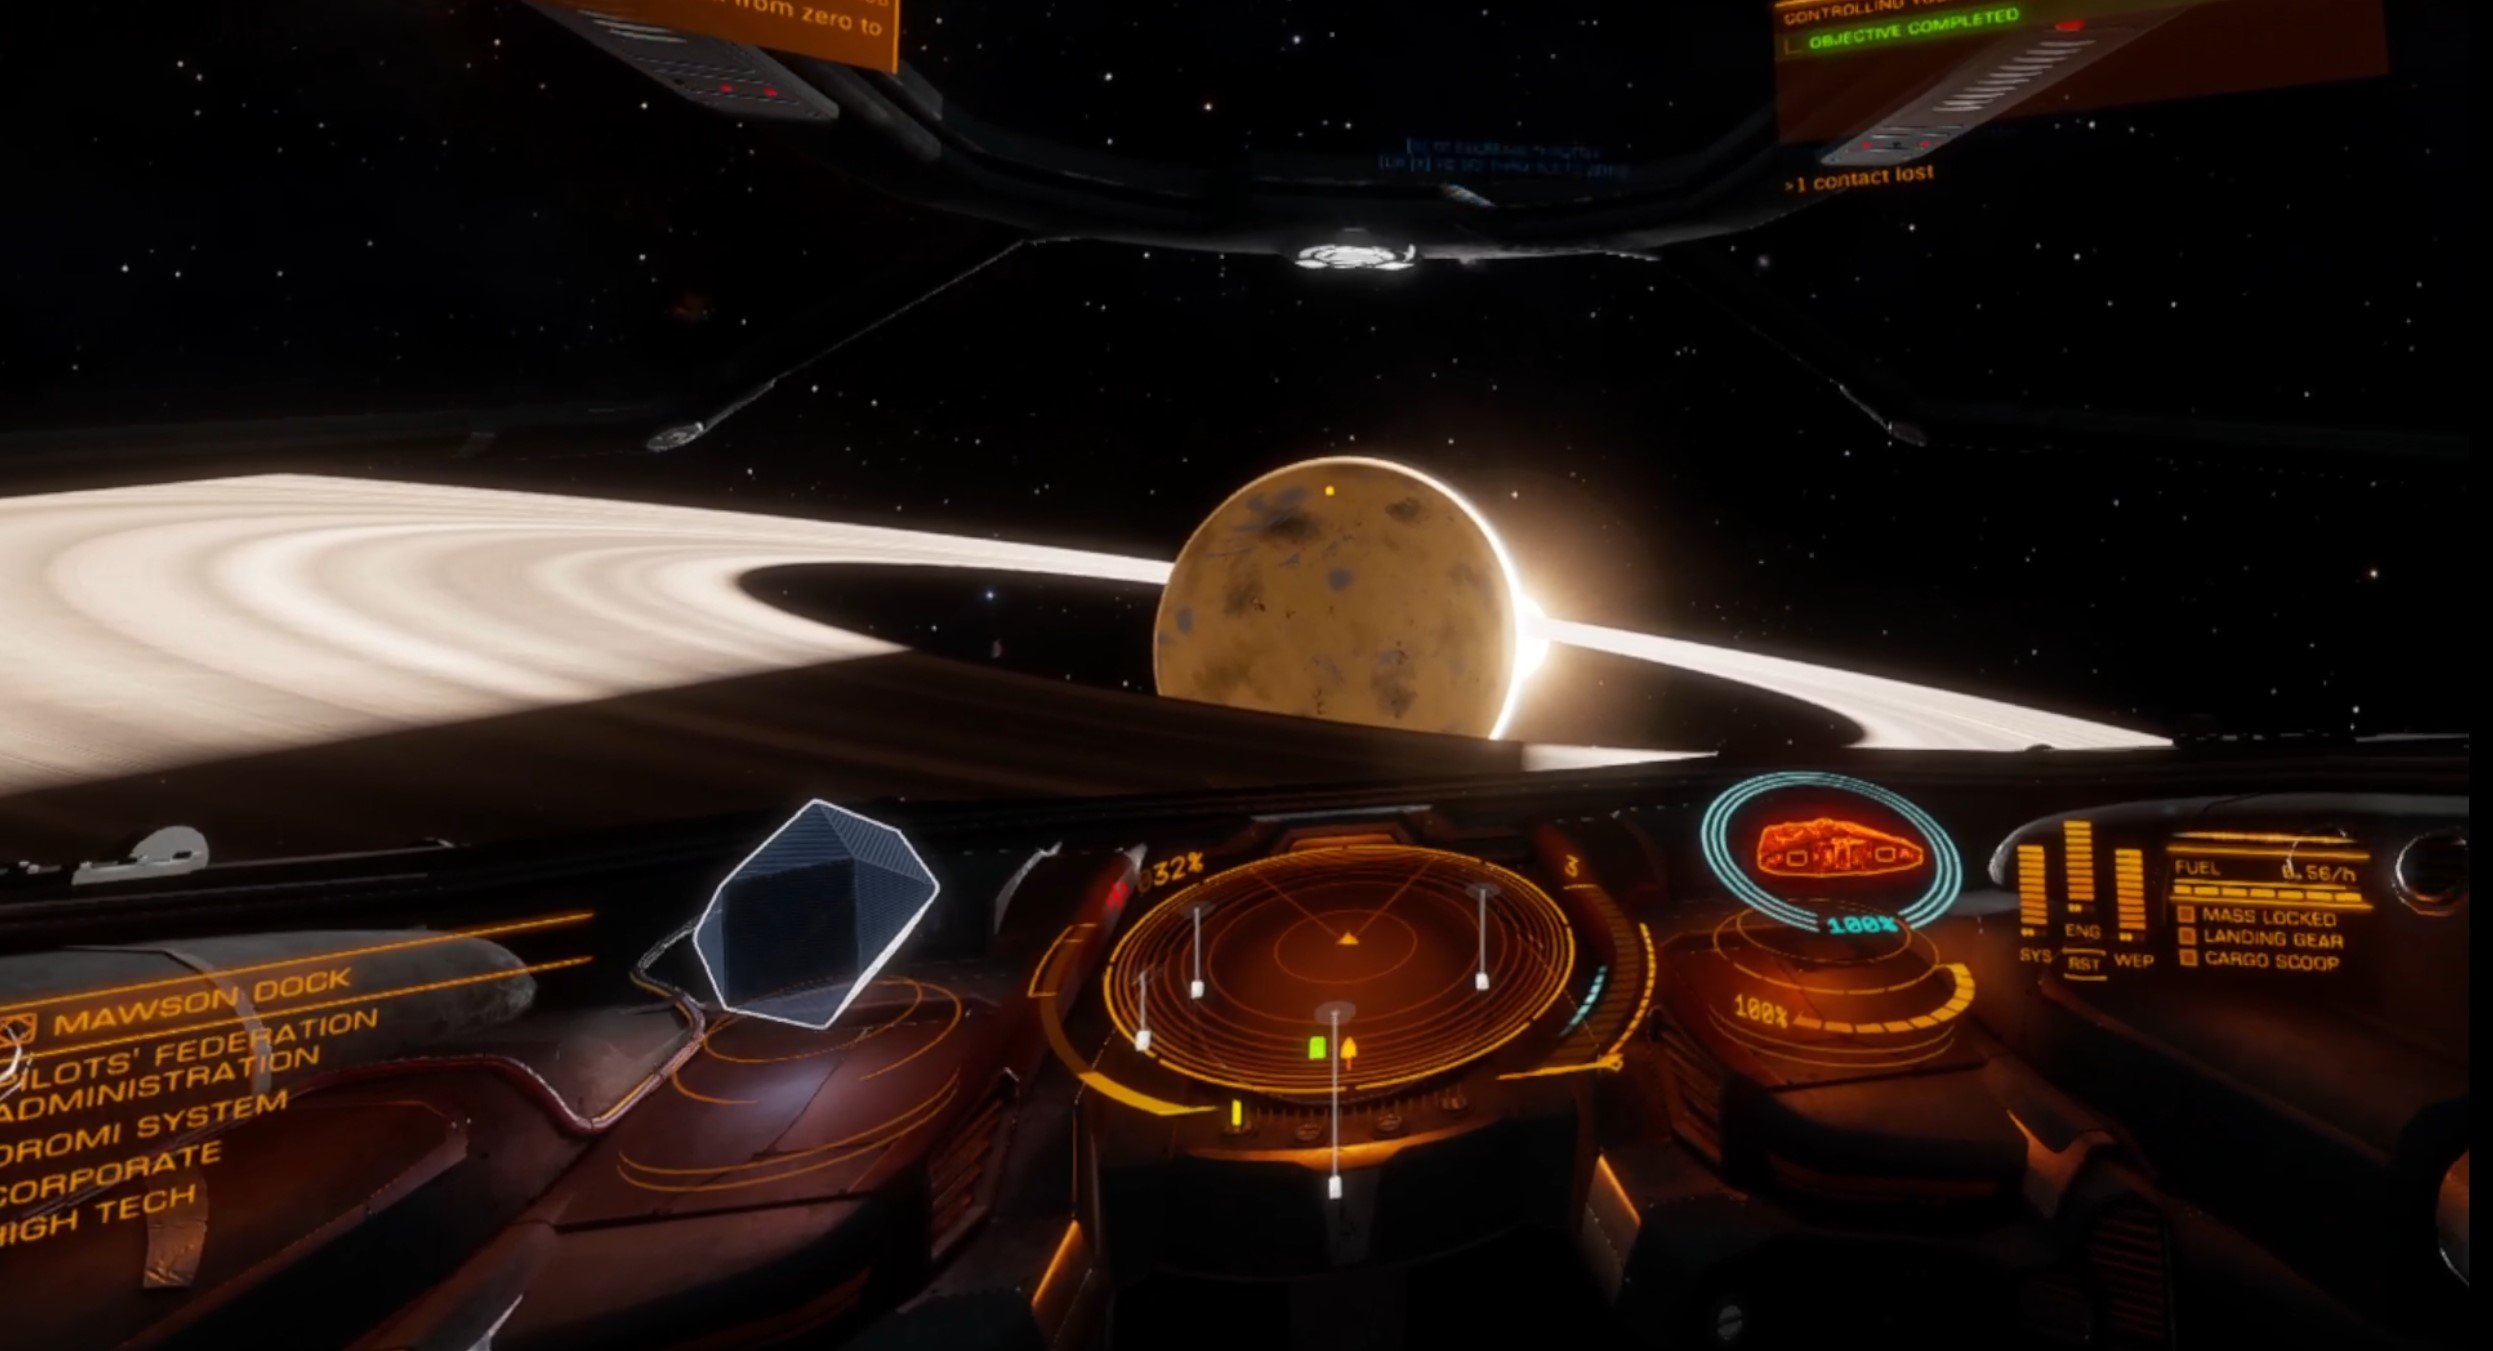
So you want an open world to explore in Virtual Reality, well what if we told you that more than one world was available? Well there are many worlds to explore in the depths of space, and that’s why Elite Dangerous VR is such a fantastic choice as an Open World VR game.
There is so much to explore in Elite Dangerous VR that nobody has seen all of it. Even all of the players of this game put together haven’t explored a small percentage of the worlds in store, because Elite Dangerous VR models our actual Universe.
If you want to not only see the incredible sights of space, but also have an effectively infinite number of worlds to discover, then Elite Dangerous VR will satisfy your craving for deep space exploration.
The views of space in Elite Dangerous VR are unmatched
There’s also more to do in this VR open world game. There’s combat, space trucking, space piracy, all sorts of things. No matter what you choose to do your chosen profession will take you all over this gorgeous game in the cockpit of your ship.
As far as open worlds go they don’t get much more open than the depths of space, so if you want to explore the cosmos Elite Dangerous VR is a great choice of open world VR game.
Want to know more? Check out our review and setup guide for Elite Dangerous VR.
No Man’s Sky VR
The No Man’s Sky Logo for their expansion “Beyond”
Since we’re talking about VR open world space games we’ve got to mention No Man’s Sky VR.
This game has a lot of the same open world strengths that Elite Dangerous VR has, but with very different gameplay mechanics.
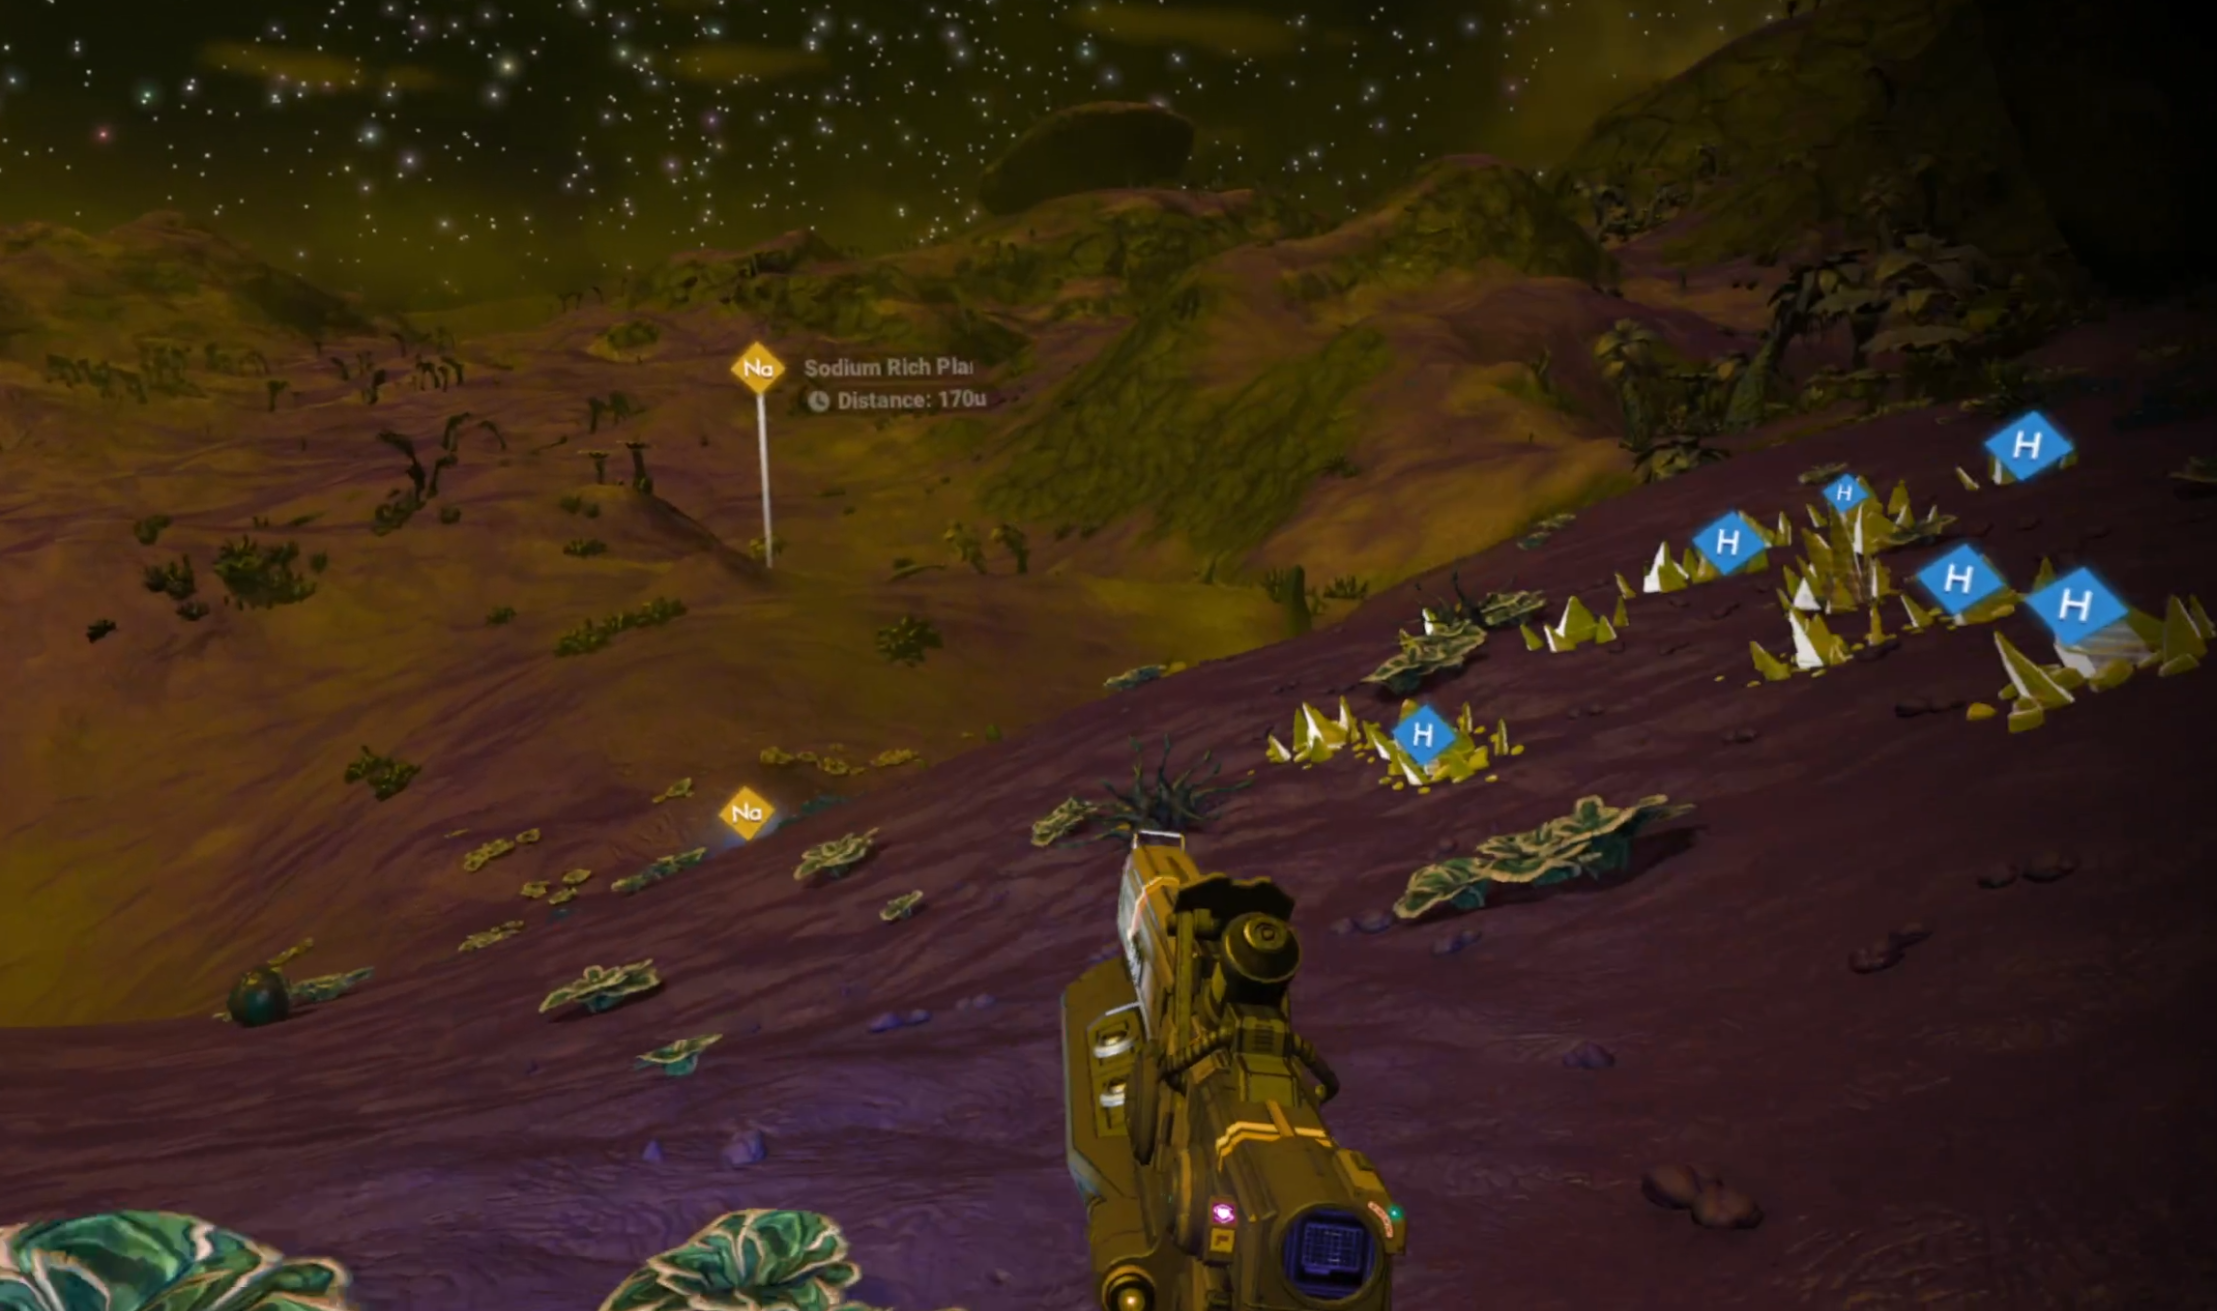
The universe is just as infinite in No Man’s Sky VR, but instead of always being confined to your ship you also have much more to do by walking around on the surfaces of planets like harvesting resources, fighting robots, and a ton more. All in immersive Virtual Reality.
Exploring a massive open world planet in No Man’s Sky VR
Learn alien languages, upgrade your ship, get a massive freighter, start a space colony, and so much more is available in No Man’s Sky VR. Of course, this game also has more worlds to explore than you can possibly imagine.
Despite getting a lot of bad press at its release, No Man’s Sky has delivered on so much since then, including this VR port, though on PCVR it leaves some to be desired. It’s easy to walk outside of your body, and the VR controls are a little janky at times.
So while not as smooth of a VR open world sci fi experience as Elite Dangerous VR, No Man’s Sky VR brings a ton of different gameplay options that Elite Dangerous’ purely spaceship and space rover based experience just can’t deliver on.
So while it’s not the best VR port around and can run pretty choppily, No Man’s Sky VR is still a fantastic open world VR game, especially on the PSVR2, where it runs much more smoothly.
The Walking Dead: Saints and Sinners
The Walking Dead: Saints and Sinners Logo
The Walking Dead: Saints and Sinners is another fantastic example of a VR open world game done well.
In this game you are the Tourist, an infamous survivor of the zombie apocalypse in the universe of The Walking Dead and you’ve recently arrived in the flooded city of New Orleans.
This game has an interesting story with compelling characters that centers around your quest to find The Reserve, a bunker which is rumored to contain tons of weapons and supplies that everyone in the city wants.
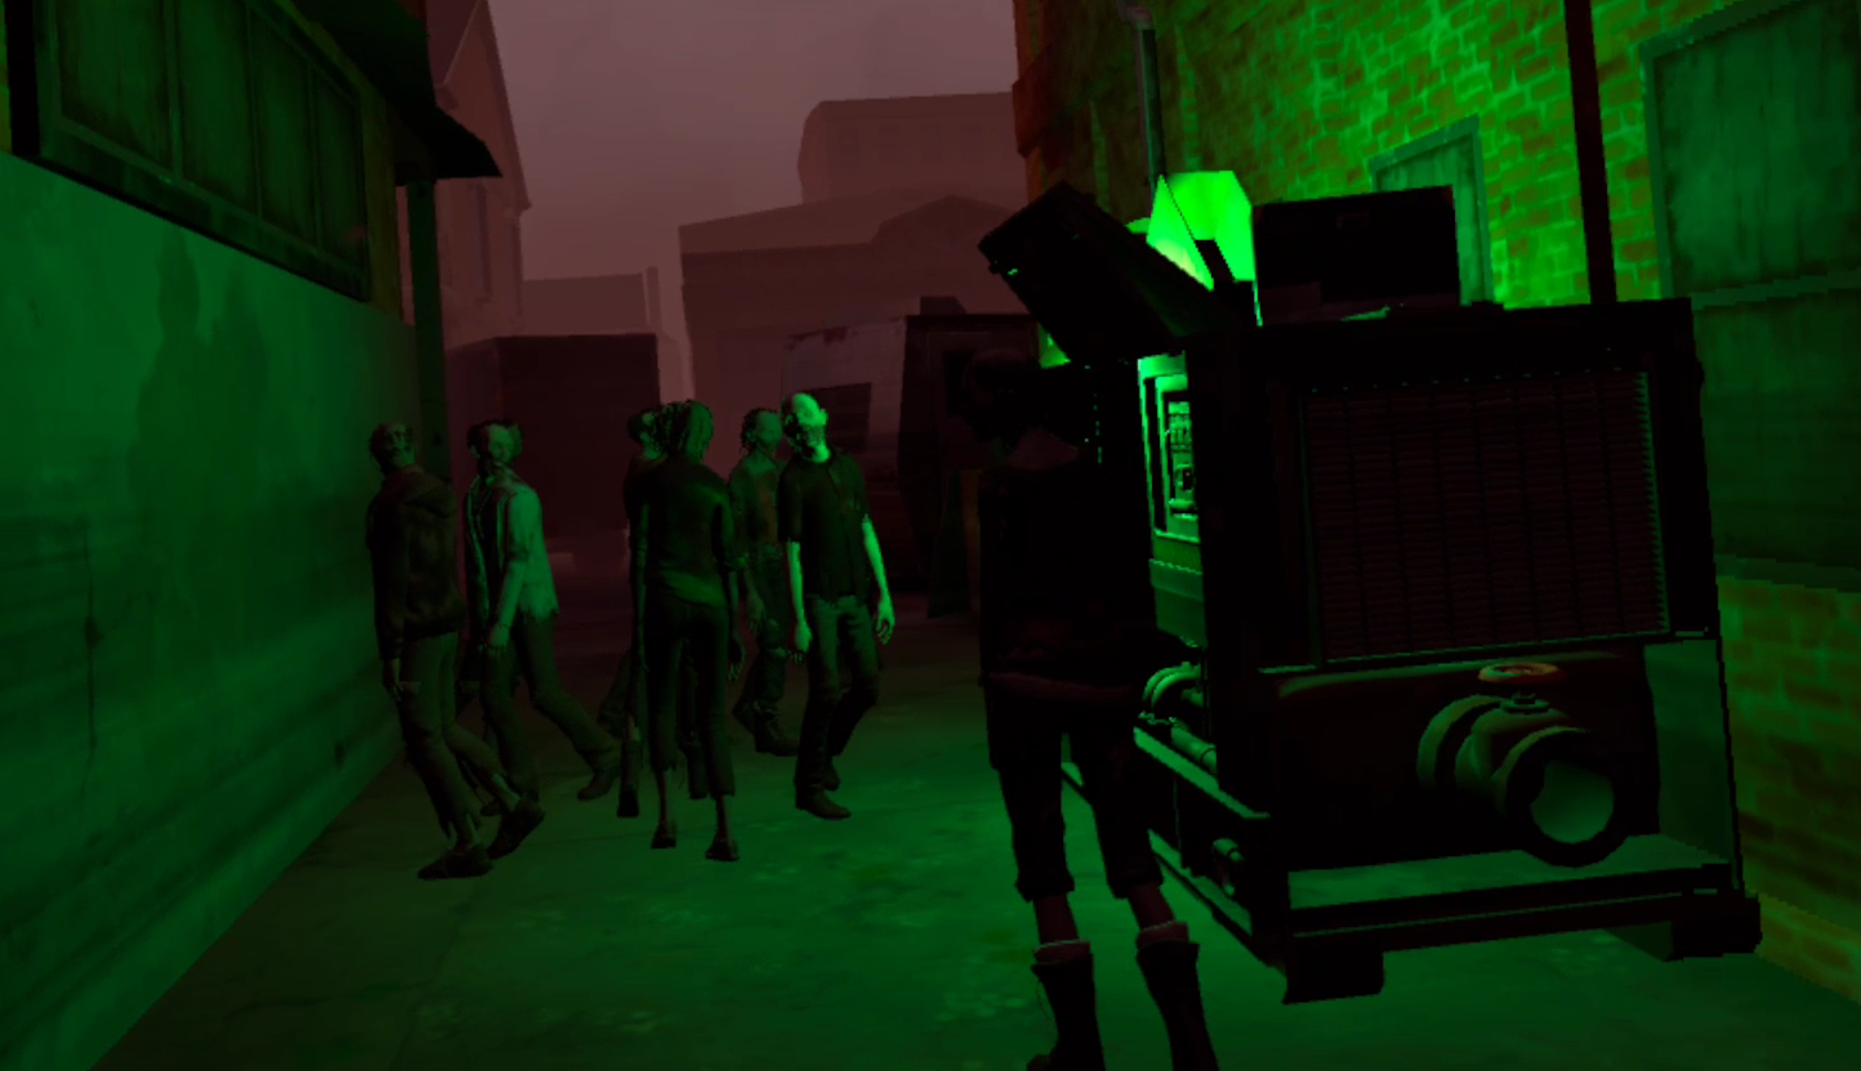
A small horde of zombies in The Walking Dead: Saints and Sinners
Your mission to find The Reserve will take you all over the ruined and zombie filled streets of The Walking Dead’s New Orleans. You’ll need to scavenge, craft, and fight through not only zombies but also the human factions that all want a piece of The Reserve, and you.
The Walking Dead: Saints and Sinners is a fantastic game not only for its story, missions, and events, but also the world that you enter every time you go out into the city.
There are all sorts of ruins to explore and sights to see in the zombie filled streets of New Orleans. The world is massive, though it is cut up into separate maps with tons of nooks and crannies to explore and things to find.
If you want a zombie themed open world VR game then there is no better one to scratch that itch than The Walking Dead: Saints and Sinners. It’s also available on the Meta/Oculus Quest as well as PCVR.
Green Hell VR
The Green Hell VR Logo
Both on PCVR and the Meta Quest platforms Green Hell VR is a fantastic game that lets you explore the Amazon rainforest in all of its green and dangerous glory.
From hunting animals to discovering which plants will make you sick or nourish you, Green Hell VR combines an intricate crafting, survival, and building system with a huge rainforest to explore.
You’ll even discover that you’re not quite alone in the green hell, there are some local peoples that aren’t too fond of you interloping in their territory.
Being attacked by a Jaguar in Green Hell VR
Green Hell VR is a fantastic VR survival game that constantly forces you to deal with the very real perils of your environment from leeches in the water to pumas stalking you between the trees.
There are very few games that combine survival elements with the thrill of exploration and discovery in a natural space quite like Green Hell does, and even fewer that do so in Virtual Reality.
Green Hell VR is a great open world VR game, and also a great story for you to discover. Why are you trapped in the rainforest? Why can’t you leave?
Hanging out and cooking food in Green Hell VR
If you want to discover the rainforest in all its dangerous beauty and master it then there’s no better VR open world game than Green Hell VR.
The Forest VR
The Forest VR Logo
While we’re on the topic of VR open world games that give you a big natural environment to explore, then there’s no way we won’t mention The Forest VR.
A PCVR port of the hit game The Forest, The Forest VR is essentially the same game but with a VR view and controls. While it’s not the smoothest VR port in terms of performance, quality, or VR interactions, it is still a great open world VR game to enjoy.
In this game you are a passenger on a crashed plane that must survive in a dangerous forest inhabited with cannibal tribes that only grow more aggressive as time passes.
Meanwhile you’re looking for your kidnapped son, and try to discover what exactly is happening in the remote stretch of wilderness you find yourself in.
Walking through the titular Forest
I’m not going to sugar coat this though, The Forest VR has a lot of jankiness to it.
From the third person animations to the annoyances of trying to crouch without being teleported into the air, and the input lag that can give you a headache or just make the game frustrating to play.
Still, The Forest is such fun as a Virtual Reality open world game if you can get over those things. It gives you a huge world to explore filled with dangerous cannibals, vistas and caves to explore.
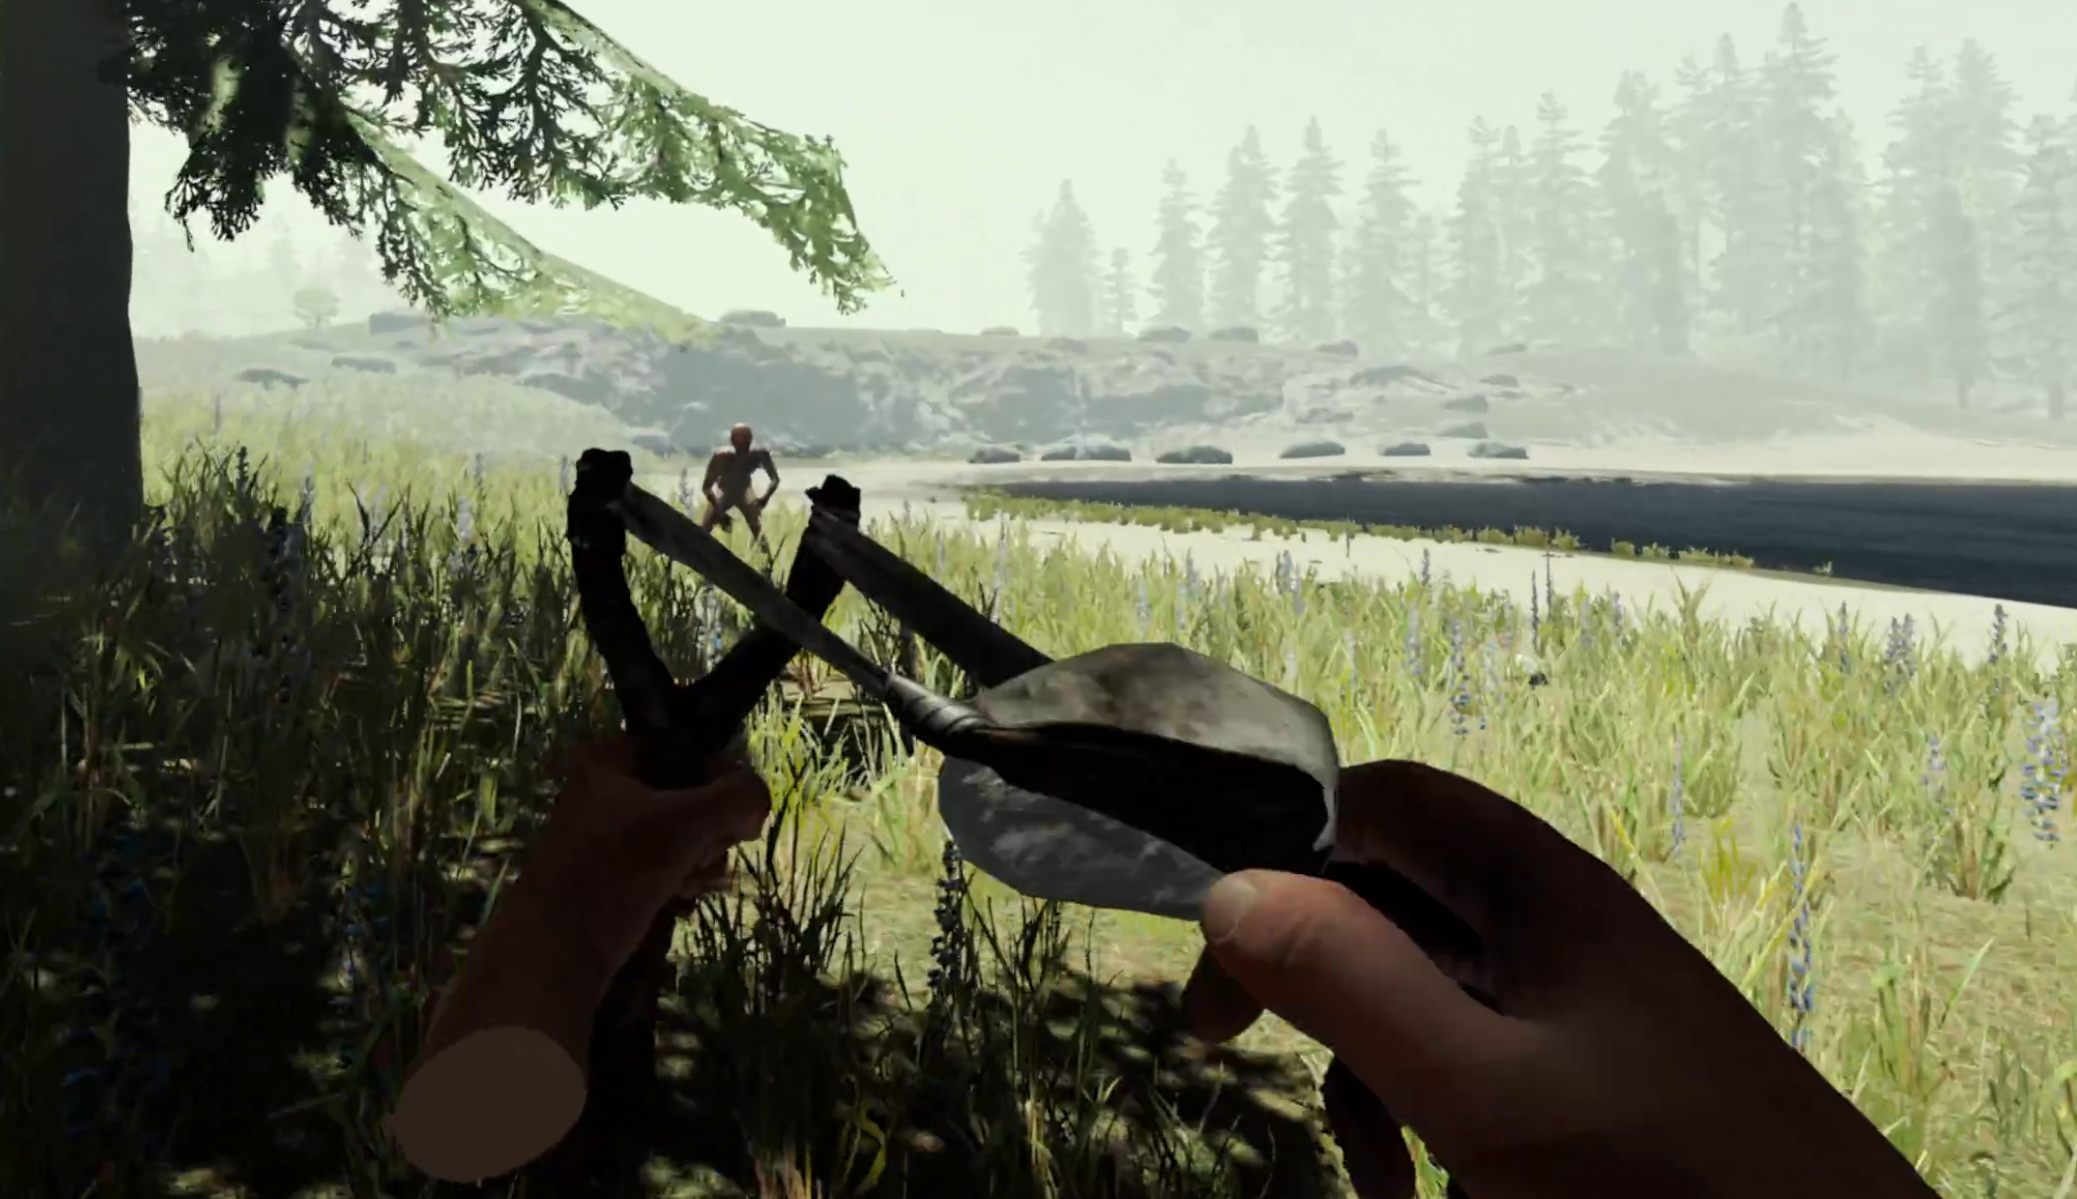
Slingshotting a cannibal
There is a lot of VR game for you to have fun with if you’re able to, and exploring the forest and its mysteries while you gather resources and uncover mysteries is too much fun to not include it on this list.
Gorilla Tag
The Gorilla Tag Logo
If you’re into VR games then you’ve probably heard of Gorilla Tag. So we won’t talk too much about it here, but you might not have realized that Gorilla Tag is basically an open world game as well.
Each area in Gorilla Tag is connected, and whether you’re playing it on PCVR or the Oculus Quest it is completely free. Your first time exploring each area with this game’s fantastic movement system is still a ton of fun, because each of the levels is connected.
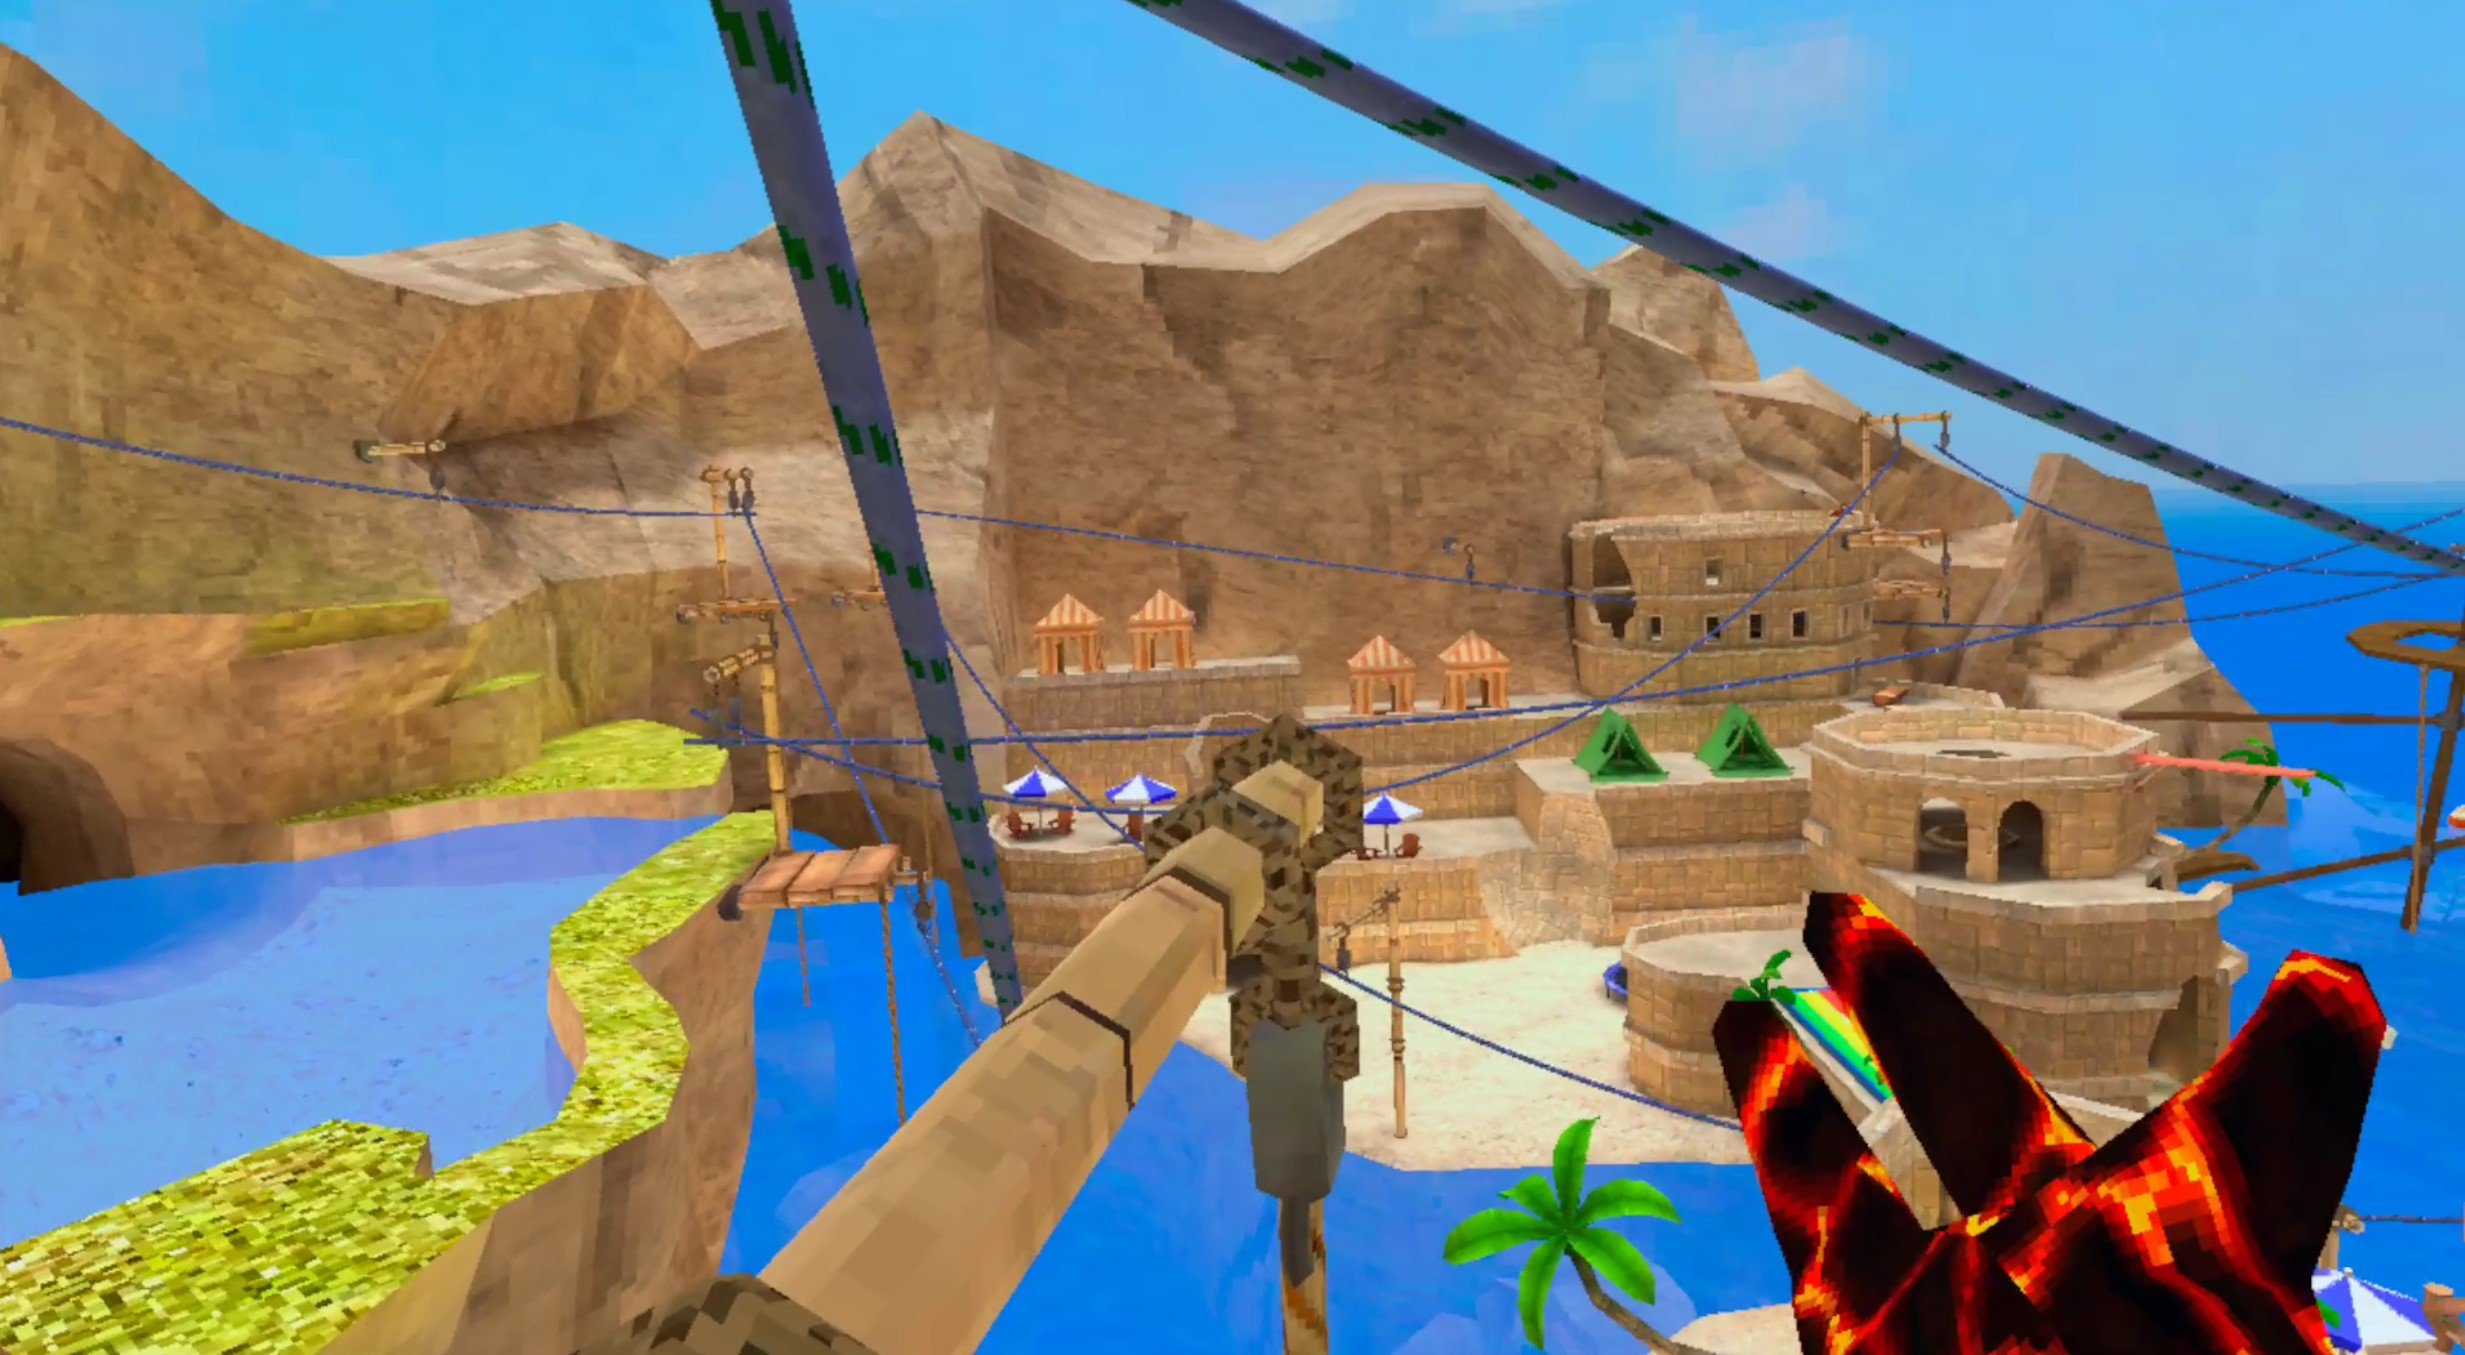
A fantastic piece of Gorilla Tag’s open world
There are a lot of nooks and crannies and things to discover and explore in Gorilla Tag, from a sunny beach to floating platforms high up in the sky.
So if you want to discover what is so special about Gorilla Tag’s VR oriented movement while also exploring an interesting world, then give it a shot. It’s free, and surprisingly satisfying as a VR open world to explore.
Ghosts of Tabor
The Ghosts Of Tabor Logo
If you want player vs player shooting action while you scavenge and explore a world ravaged island, then Ghosts of Tabor is a game that delivers just that. It is a fantastic VR shooting game and a fantastic VR open world game.
We’ve called it a VR Escape From Tarkov game before, and if you’ve heard of Tarkov then you know exactly what that means.
In Ghosts of Tabor you enter the world from your secret bunker by starting a raid, and in that raid you have a certain amount of time, at least 30 minutes, to find an extraction point and exit.
A massive building to explore in Ghosts Of Tabor
While you look for one you explore the map and try to find loot to take out with you and either sell for money to buy more equipment, or store in your bunker for later use.
Meanwhile other players might be your friend or foe out in Tabor, and the local FENIX rebels will certainly be unhappy to see you.
Oh, and just like in Escape From Tarkov if you die you lose everything you have on you. So staying alive is always your number one priority.
Fighting another player in Ghosts Of Tabor
So if you want an open world to explore while combined with fantastic player versus player shooting and the extraction shooter mechanics pioneered by Escape From Tarkov, then give Ghosts of Tabor a look.
For such an action focused game it also gives you a ton of explore and discover, making it a great open world VR game as well.
If you want to know more then check out our article on Ghosts of Tabor.
Stormland
The Stormland Logo
Stormland is a VR game so old that you might not have heard of it. This was an early Oculus title from the days when standalone VR headsets like the Meta Quest weren’t even available yet.
So Stormland is PCVR exclusive, but wow is it a hidden gem.
In this game you’re a robot with human consciousness on an alien world, and it takes a lot of inspiration from flatscreen open world games.
Flying in Stormland
You explore around finding camps of enemies and clearing them to make the world a little bit safer, and there’s a shooting combat system that by today’s standards is a little unsophisticated. Oh, and the game is awfully short at about five to six hours.
Though where Stormland really shines is when it lets you loose to explore its open world. I’ve never had such a good time flying around in a VR game than I did when coasting through the alien world of Stormland.
The towering columns packed with vegetation and science fiction structures scattered around the place make Stormland a very pleasing game to look at and a great VR open world game to explore.
Despite how short of an experience it is compared to more modern VR open world titles, and a somewhat lackluster combat system, Stormland is a ton of fun to explore at least once if you don’t mind paying the price for it.
Grimlord
The Grimlord Logo
Remember Dark Souls? Or maybe Elden Ring. You’ve probably heard of at least one of them and are familiar with the concept of a “souls-like”.
These games are very well known for their excellent melee combat systems as well as their harsh punishments for repeated failure. Well Grimlord takes both of those things, and puts them into a fantastic open world just like any of the flatscreen soulslike games.
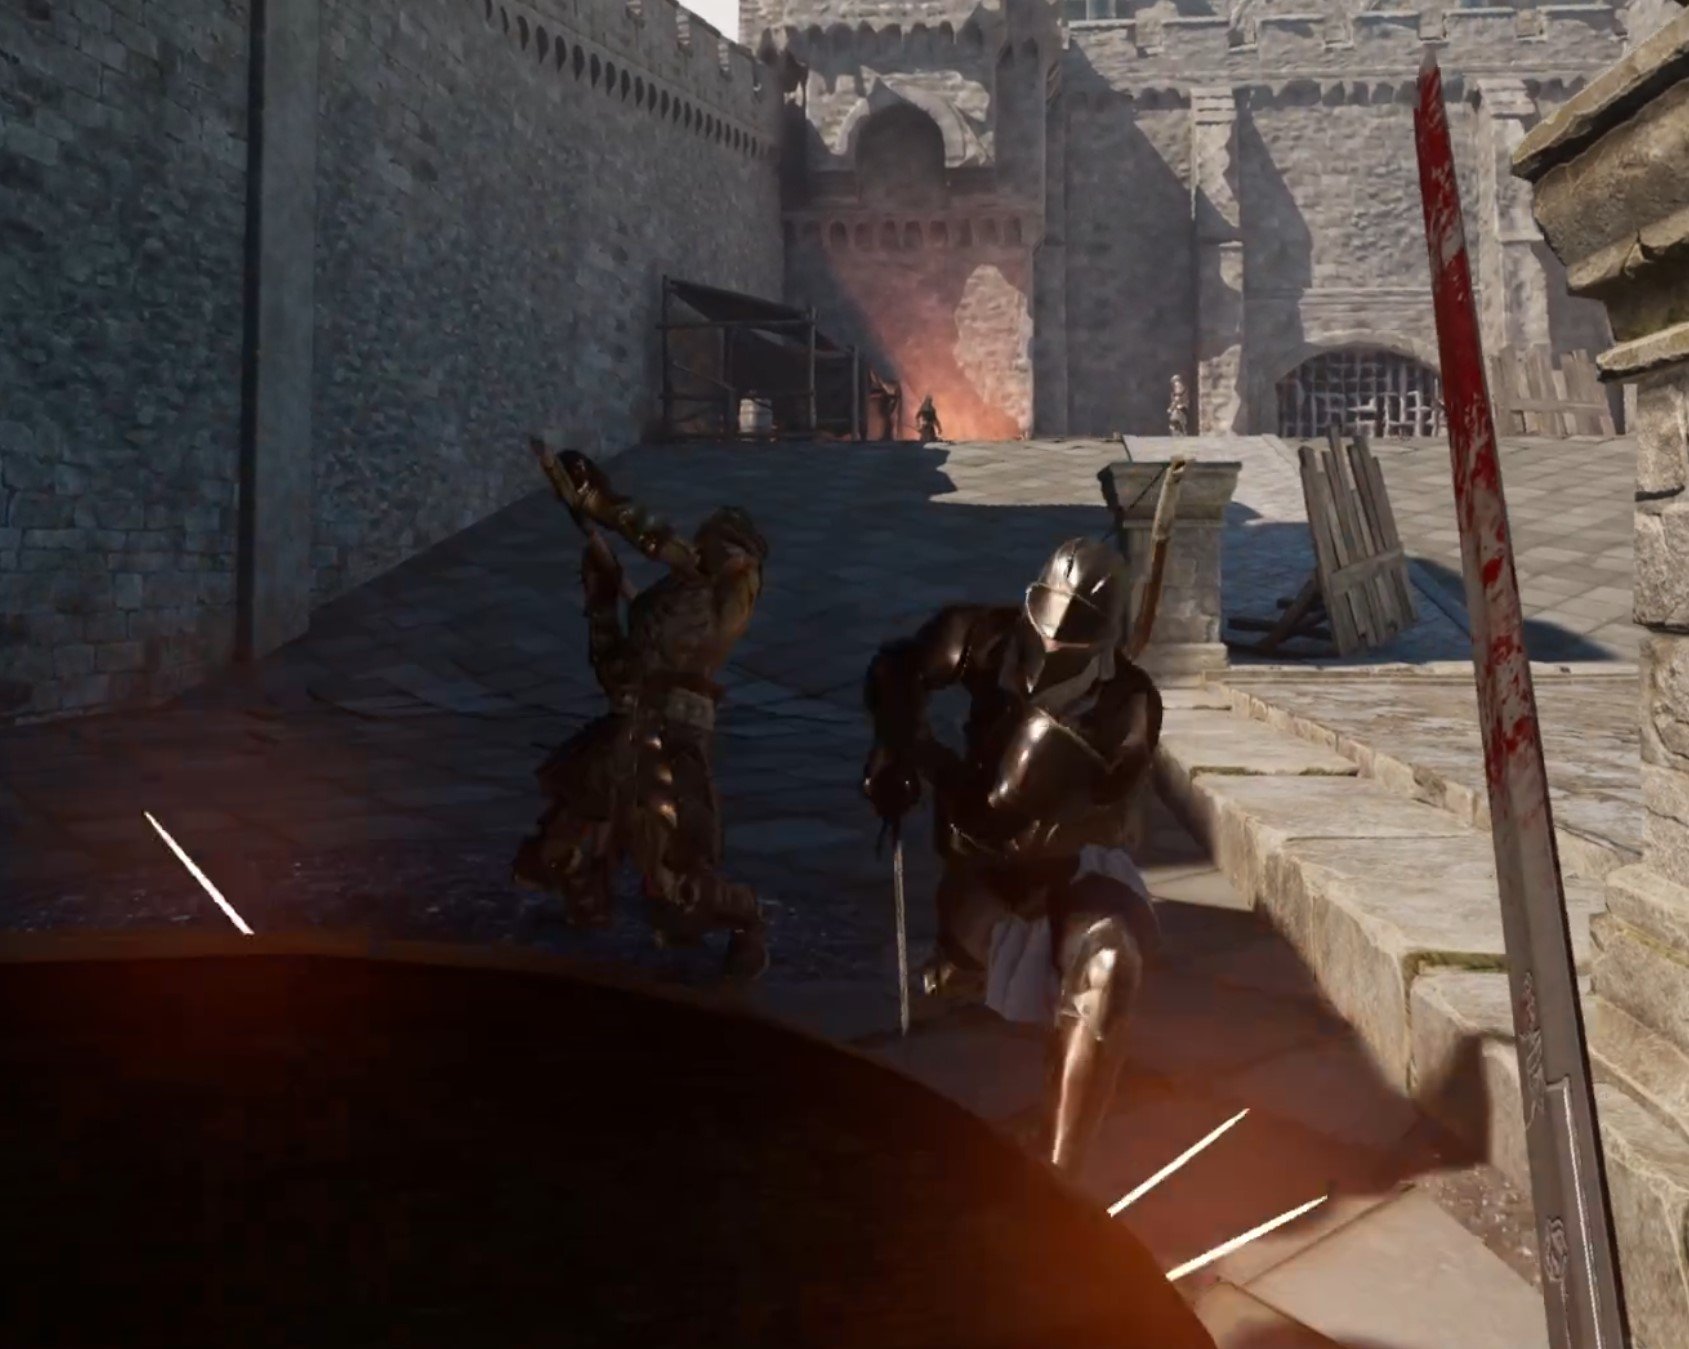
Fighting multiple enemies in Grimlord
The biggest difference is, of course, the addition of VR controls and a VR view.
Instead of hitting a button to attack in a set pattern, depending on your weapon, you’re now swinging your weapon any way that you want with your actual arm!
If a VR fighting game that includes a massive open world and soulslike progression sounds interesting in the slightest then you should really check out Grimlord, it’s a ton of fun.
Skyrim VR (With Mods)
The Skyrim VR Logo
It’s no secret that Skyrim VR was not a very good VR port. From the poor optimization to the lack of very basic VR interactions, it was considered a flop and a cash grab by its publisher, Bethesda Softworks.
Luckily as with all Bethesda games, Skyrim VR has had a lot of work put into it independently by the modding community.
If you want to do fairly basic VR things like grab stuff, have a physical body in the world, or enjoy melee combat that amounts to more than just flicking your wrist near an enemy, Skyrim VR with mods will give you all of that in the beautiful and immersive open world of Skyrim.
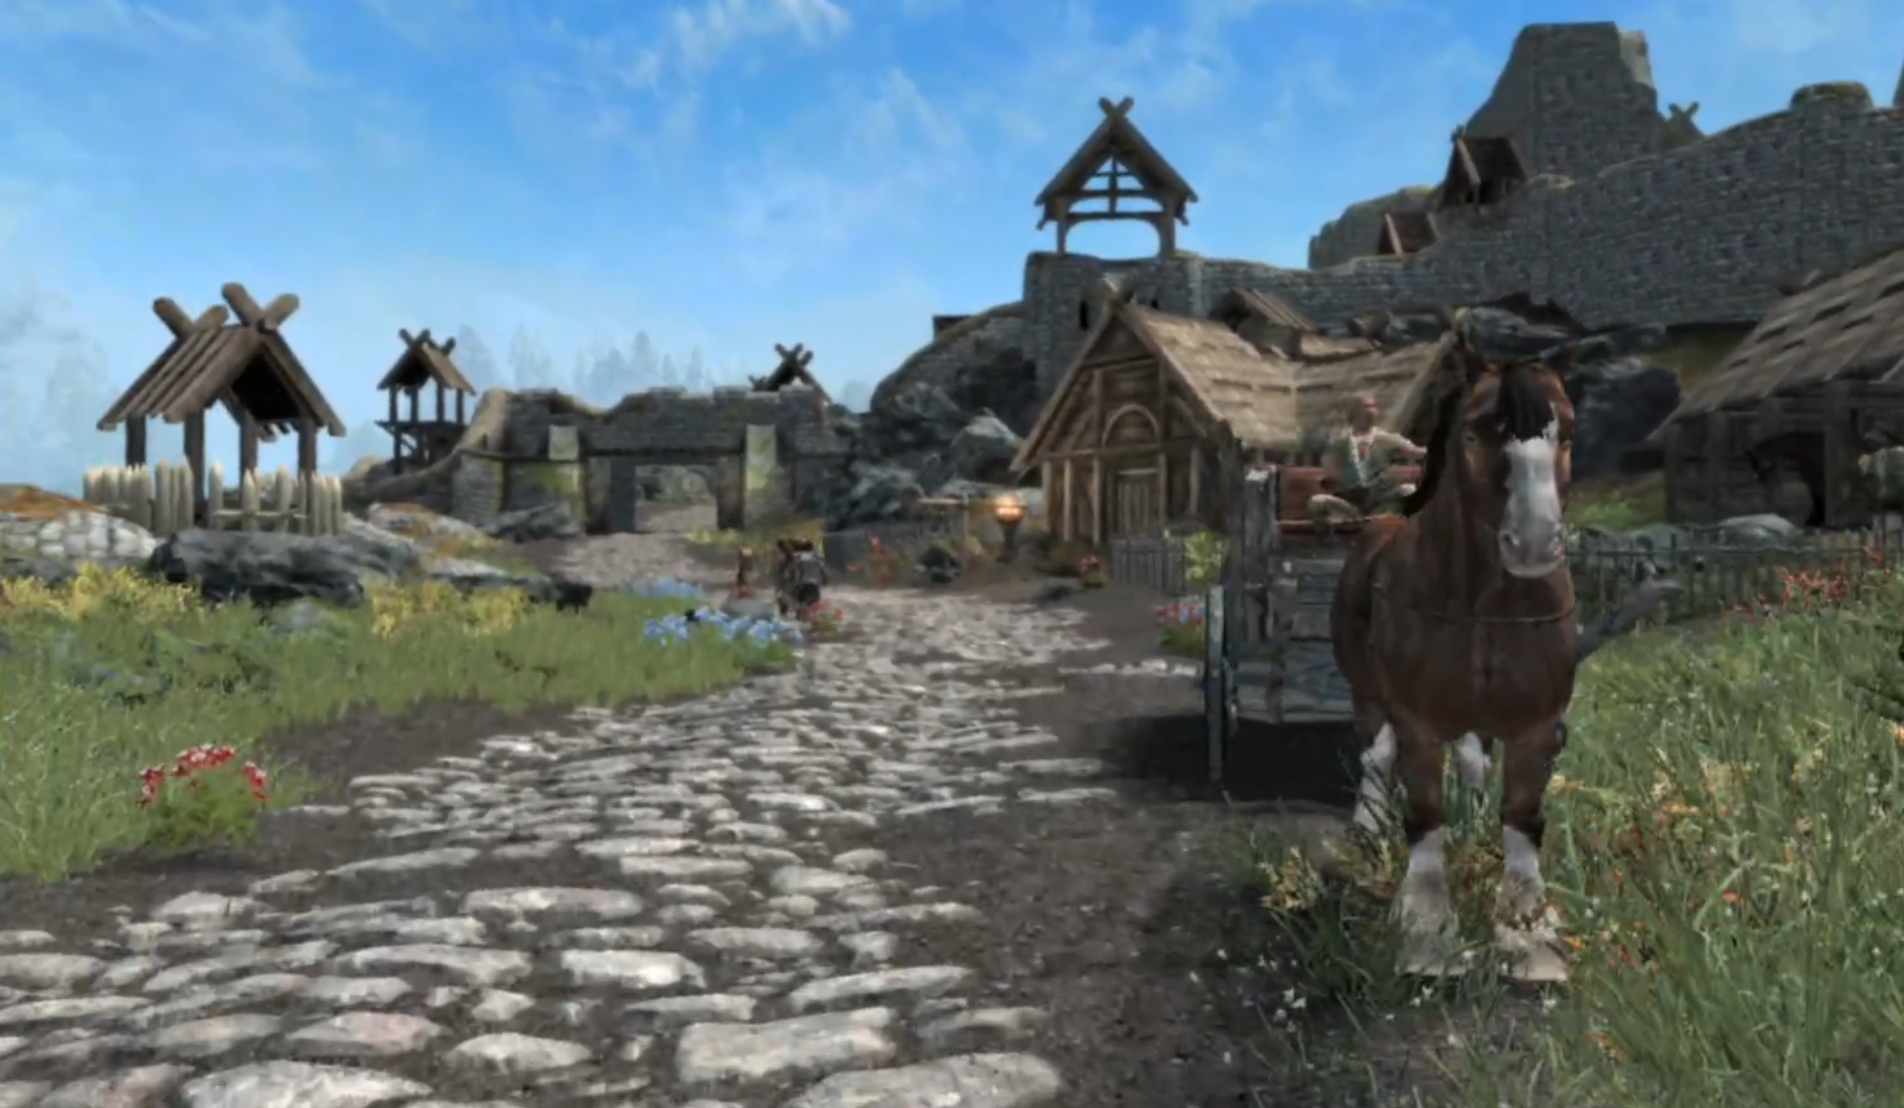
The entrance to Whiterun in Skyrim VR
Now you can experience Skyrim VR like you should have been able to from the start. While there are still some performance issues on certain graphics cards, Skyrim VR with mods really delivers on a VR Elder Scrolls experience.
Now you can explore Skyrim’s vast open world with truly immersive VR controls, and wow is it a ton of fun. If you’ve always wanted to explore Skyrim in VR, but the reputation of the VR port kept you away, it’s time to install mods and give it a go.
If you want the easiest way to install a large suite of Skyrim VR mods without having to worry about cross compatability issues, then check out our guide on the easiest way to install Skyrim VR mods so that you can enjoy this VR open world.
Minecraft VR
A Minecraft Logo
To cap off this list of the Best Open World VR Games, none needs as little introduction as Minecraft VR.
We don’t need to tell you anything about this game and what it entails, just that it’s possible to enjoy it in Virtual Reality and experience the most open of open worlds.
The satisfaction of creating a fantastic building is better than ever in Virtual Reality, and if you want a limitless open world to explore in VR then Minecraft VR will always deliver.
Well that’s it for our list of the best VR Open World games. If you want a big world to explore then you’ll certainly have found something on this list that you’ll enjoy. I’ve personally played every single one and found something to enjoy in exploring each of them, and you certainly will too. Have fun!

