How To Record Massively Improved Oculus Quest 2 Gameplay Videos With High Quality
Tried recording video gameplay on your Quest 2 and found that the default resolution and recording quality aren’t very good? Well you’ve come to the right place, because here you’ll find two ways to Record High Quality Videos with your Oculus Quest 2. Whether you want 1080p resolution recordings or better, you’ll find what you need here with these two methods for improving gameplay recording quality on your Oculus Quest 2 or Oculus Quest Pro.
Tried recording video gameplay on your Quest 2 and found that the default resolution and recording quality aren’t very good? Well you’ve come to the right place, because here you’ll find two ways to Record High Quality Videos with your Oculus Quest 2. Whether you want 1080p resolution recordings or better, you’ll find what you need here with these two methods for improving gameplay recording quality on your Oculus Quest 2 or Oculus Quest Pro.
There are also some older methods that you might find helpful here.
Method 1: Quest Recording Settings
While it won’t get you the best possible recording quality (more on that in the second method) the easiest way to record video gameplay in 1080p and with higher quality is with the experimental recording settings on your Quest 2 or Quest Pro Headset. First, to access these settings you will need to go to your settings menu, and the “Experimental” settings submenu.
When you’re there find the toggle for “Advanced Camera Settings” and select it so that it turns blue. Once you’ve done that you’ve unlocked a ton of new recording settings for the Quest 2. To use them go back to the main settings menu and then to the “Recording” settings section
You can change a lot more settings here now, most importantly the recording resolution, Aspect Ratio, Compression Quality, and Frame Rate. Image Stabilization is also great for games that involve a lot of fast head movements. For the highest possible recording quality using these settings, try a 1920 by 1080 pixel Aspect Ratio, aka 1080p, a 36 fps Frame Rate, and a 20 mbps Video Compression Quality.
Keep in mind that recording over a game that is already processor intensive for the Oculus Quest with these settings may cause stutters and visual lag. Though if you can afford a Quest Pro you’ll have an easier time with it’s enhanced processor.
Method 2: Quest Games Optimizer
While the Quest 2 now offers some decent recording features, if you want the finest looking footage possible it can be kind of a letdown. If you want to record with higher resolutions and bitrates then there is no better way than the Quest Games Optimizer App.
You can install the Quest Games Optimizer App on to your headset directly through an .apk and an app like SideQuest and then find in the “Unknown Sources” menu. After you have Quest Games Optimizer installed you can make your recordings look better at the flick of a switch.
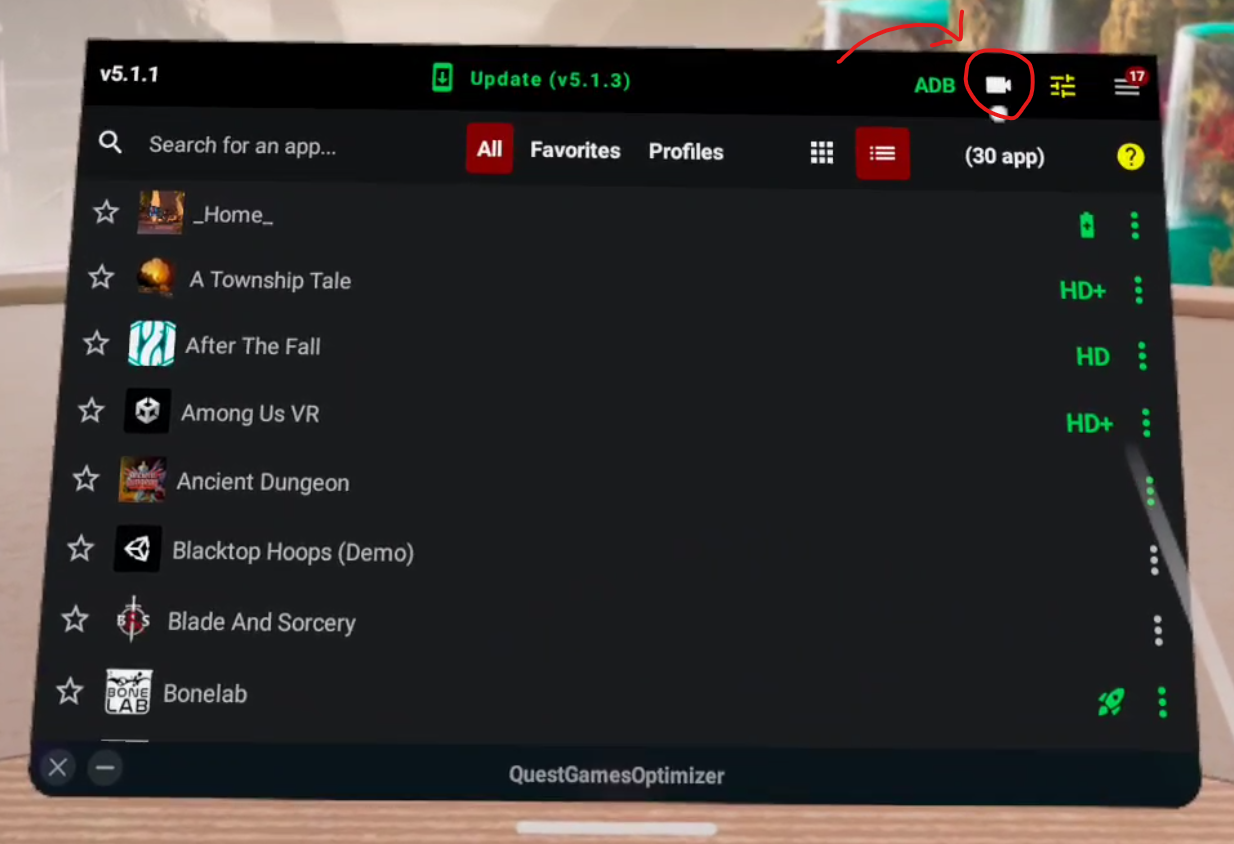
When you open it, Quest Games Optimizer (a.k.a. QGO) will show you every game you have on your Meta Quest 2 that has a profile which can be applied to it to make its graphics look beautiful. More importantly here there is also a recording button in the top right hand corner that you can press to get access to a slew of recording settings.
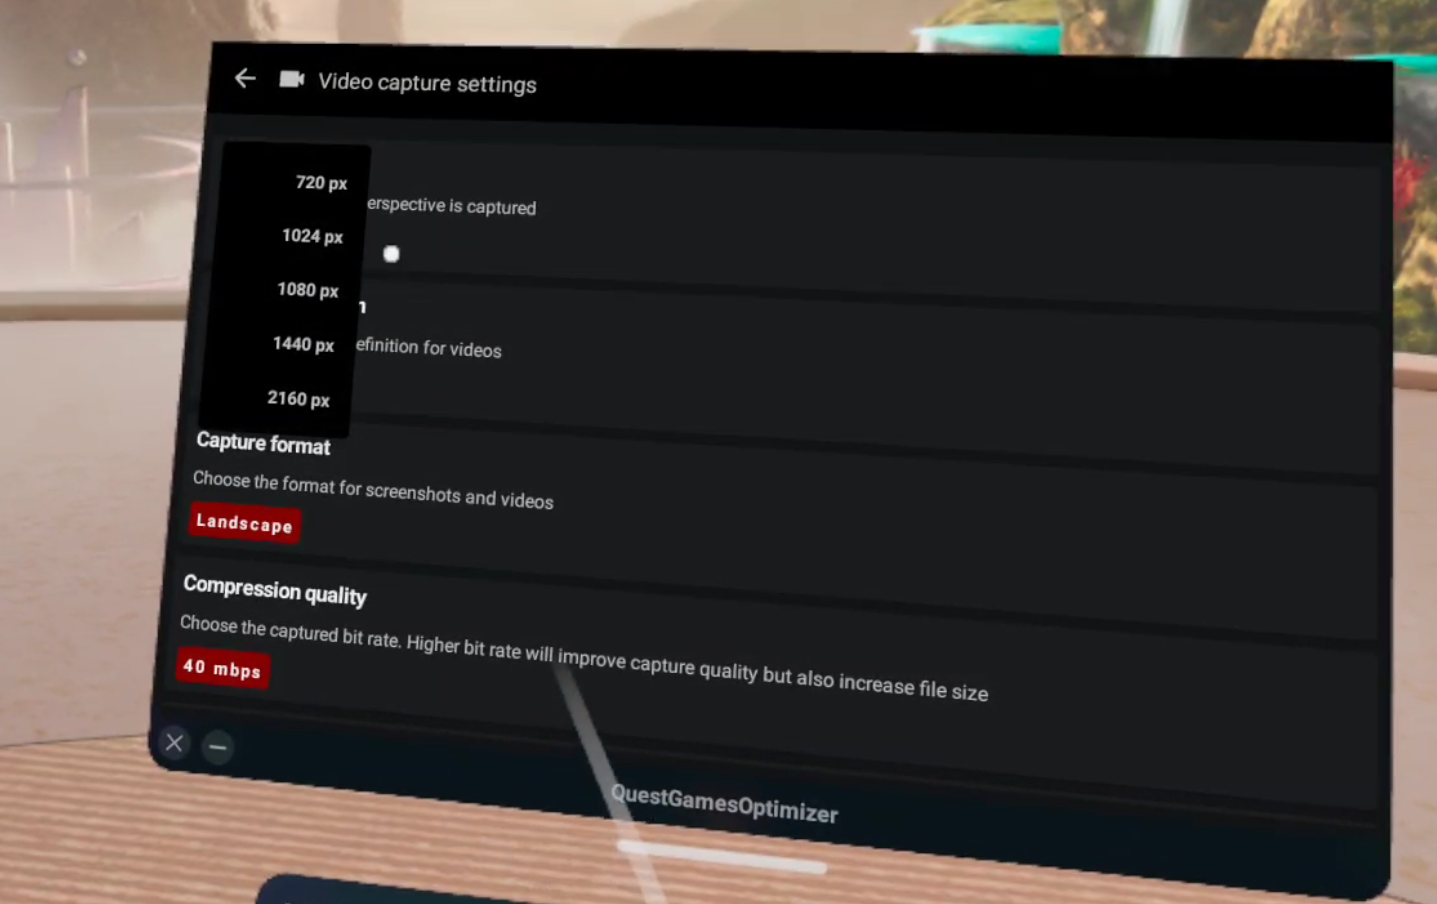
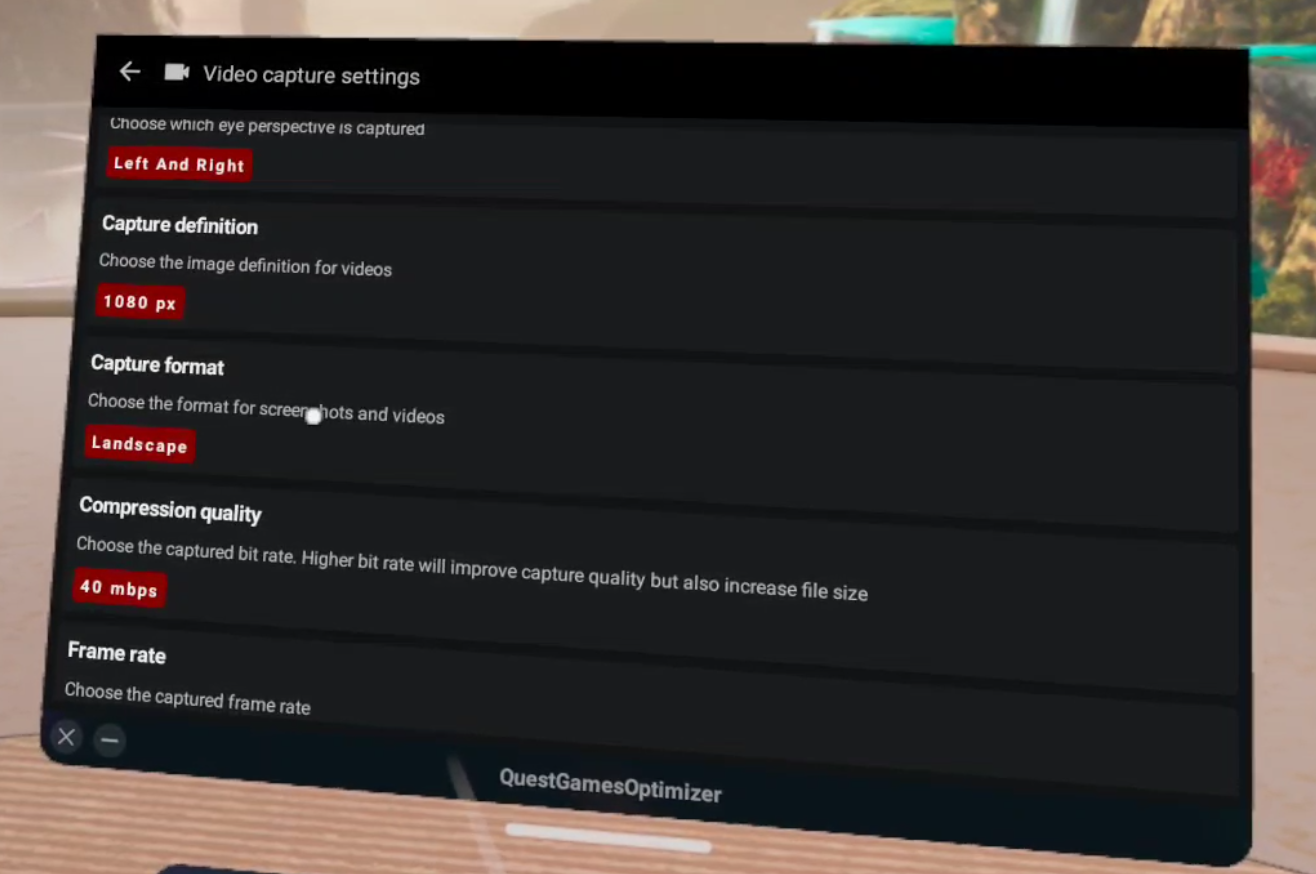
You’ll also notice that each of these settings can go higher than the Oculus Quest 2’s experimental recording settings allow. Meaning that the Quest Games Optimizer allows you to easily set even better recording settings than the Quest 2 does by default. It also allows you to record with not just your left and right eyes, but an amalgamation of both together with the “Left and Right” eyes option. The resolution can go as high as 4K.
Compression Quality and Framerate can also be set higher here as well. So if you want the best possible recordings, then QGO is your best option.
Just as with the Experimental Quest settings, the higher quality you make your recordings, the higher the chance of impact on your gameplay. Also make sure not to record for too long, because recording for too long (usually more than about twenty to thirty minutes) will suddenly corrupt the entire video file and recording will stop. You’ll have an easier time recording on a Quest Pro due to its enhanced processor, but the Quest 2 can handle very nice recordings on most games. Though some games that are more processor intensive might give you trouble.
Unfortunately the one downside of the Quest Games Optimizer is that it requires more setup than the Quest settings, which will be outlined here. Still, if you’re determined to have high quality videos it is more than worth it.
Setup
Getting QGO running in the first place can be a lot if you’re newer to the Quest and haven’t used Airlink or Quest Link before. As you can see in the “Prerequisites” section of the itch store page here. You need to:
Have your headset and Facebook/Meta account in developer mode so that you can use applications in “Unknown Sources.”
Do no disturb needs to be disactivated so that you can get notifications when a profile is applied or your recording settings are changed.
You need to enable an ADB wireless connection for QGO to work at all.
This can be a lot for some people if they’re not a certified VR lover who has already done all of this to install custom applications or connect their Headset to their PC. Luckily there are plenty of guides out there that explain the setup steps. For this you will need a PC to connect your headset to as well as a cable that can connect your headset to that PC. If you need one here is a link to one on amazon.
Even if you have already done all of this, you will need to reconnect your Headset to your PC once to enable ADB, which Quest Games Optimizer needs to do anything, though this can be done wirelessly. Luckily after you enable ADB debugging wirelessly you won’t need to do it again until you restart the headset.
After you enable ADB you can keep using Quest Games Optimizer without having to worry about connecting it to a PC, just stay on the same wireless network. After the initial hookup it’s still very easy. The easiest way around this limitation is to just avoid restarting your headset, and it’s pretty hassle free after you’ve done it once, so it’s really not that big of a problem. If you do restart your headset you will have to enable the ADB connection by connecting your headset to a computer again.
For more guidance on how to enable an ADB wireless connection the developer of Quest Games Optimizer has a post on their itch page about it here. When it comes to setup their itch page actually has a lot of great advice, and you can find out even more about Quest Games Optimizer on it.
Quest Games Optimizer is currently 4.99$ on itch io. It is worth it if you want to easily make your recordings look better than they can via the Quest 2’s settings alone.


